Create a Multicloud Defense connector
This topic discusses how to create a connector for Cisco Multicloud Defense. The connector sends dynamic application address objects to the configured Cloud-Delivered Firewall Management Center.
For more information, see the Address Objects chapter in the Cisco Multicloud Defense User Guide and address object API documentation.
The following figure shows how the Cisco Multicloud Defense connector works.
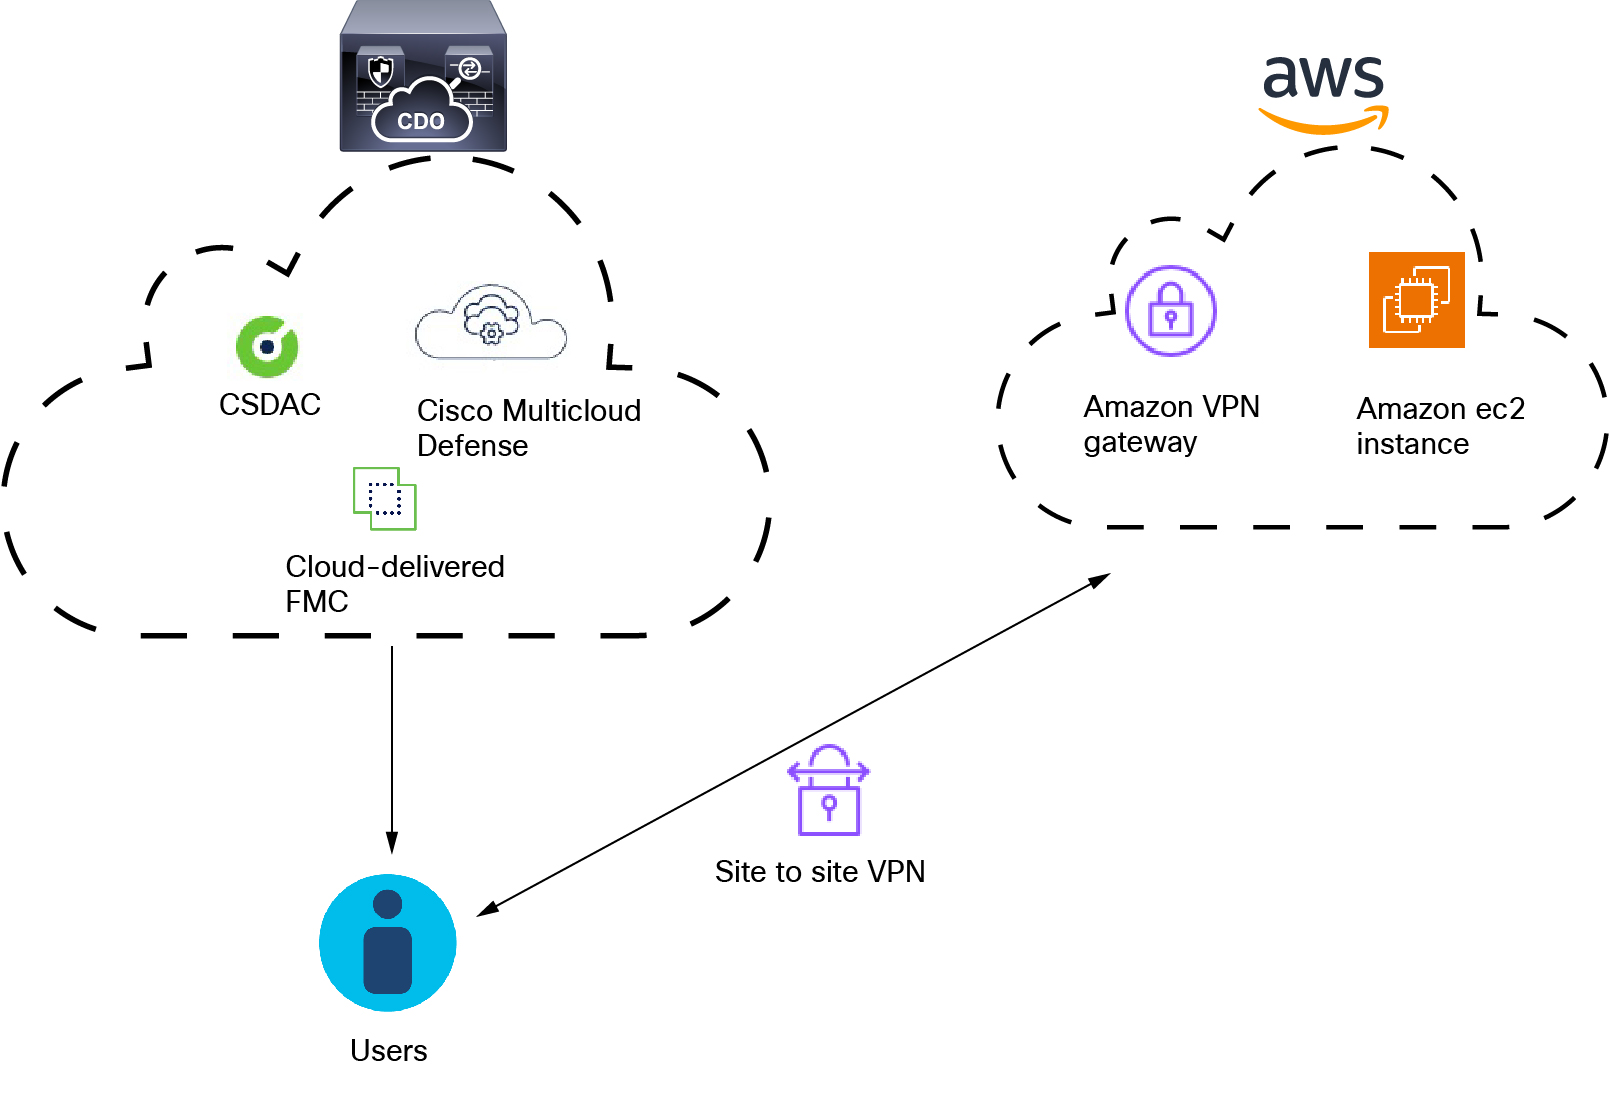
As the figure shows:
-
Users logging in and out of AWS create activity monitored by Multicloud Defense.
-
The dynamic attributes connector and Multicloud Defense, both included in Security Cloud Control, send IP addresses from that activity to the Cloud-Delivered Firewall Management Center.
-
These IP addresses can then be used in access control rules by the Cloud-Delivered Firewall Management Center.
Procedure
Step 1 | Log in to Security Cloud Control. |
Step 2 | Click Firewall. |
Step 3 | Click . |
Step 4 | Do any of the following:
|
Step 5 | Enter a Name and optional Description to identify the connector. |
Step 6 | Enter a Pull Interval. (Default 30 seconds.) Interval at which objects are retrieved from the Multicloud Defense Connector. |
Step 7 | Click Test and make sure the test succeeds before you save the connector. |
Step 8 | Click Save. |
Step 9 | Make sure Ok is displayed in the Status column. You must create a Cloud-Delivered Firewall Management Center adapter as discussed in Create an adapter. |
 )
) )
)