Procedure to Onboad an FDM-Managed Device Running Software Version 6.6+ Using a Registration Key
To onboard an FDM-managed device using a registration key, follow this procedure:
Procedure
Step 1 | Log in to Security Cloud Control. | ||
Step 2 | In the left pane, click . | ||
Step 3 | Click the blue plus button | ||
Step 4 | Click FTD.
| ||
Step 5 | On the Onboard FTD Device screen, click Use Registration Key. | ||
Step 6 | Enter the device name in the Device Name field. This could be the hostname of the device or any other name you choose. | ||
Step 7 | In the Database Updates area, the Immediately perform security updates, and enable recurring updates is enabled by default. This option immediately triggers a security update as well as automatically schedules the device to check for additional updates every Monday at 2AM. See Update FTD Security Databases and Schedule a Security Database Update for more information.
| ||
Step 8 | In the Create Registration Key step, Security Cloud Control generates a registration key.
| ||
Step 9 | Click the Copy icon
In the Security Devices page, you will see that the device is now in the connectivity state, "Unprovisioned". Copy the registration key appearing under Unprovisionedto Firewall device manager to complete the onboarding process. | ||
Step 10 | Log into the Secure Firewall Device Manager of the device you are onboarding. | ||
Step 11 | Under System Settings, click Cloud Services. | ||
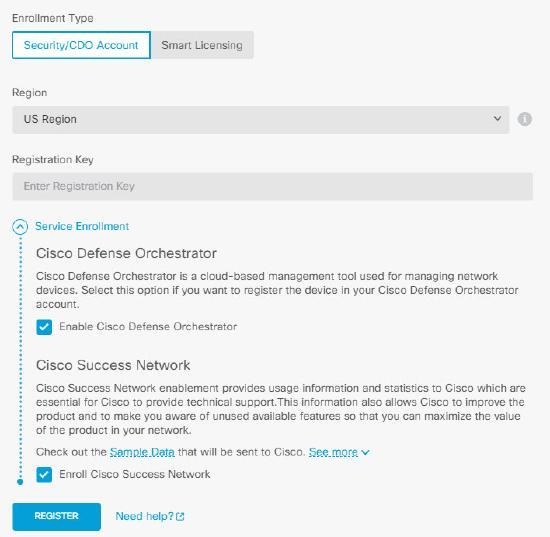
Step 12 | In the Region field, select the Cisco cloud region that your tenant is assigned to. | ||
Step 13 | In the Enrollment Type area, click Security Account .
| ||
Step 14 | In the Registration Key field, paste the registration key that you generated in Security Cloud Control. | ||
Step 15 | For devices running version 6.7 or later in the Service Enrollment area, check Enable Firewall in Security Cloud Control. | ||
Step 16 | Review the information about the Cisco Success Network Enrollment. If you do not want to participate, uncheck the Enroll Cisco Success Network checkbox. | ||
Step 17 | Click Register and then Accept the Cisco Disclosure. Secure Firewall Device Manager sends the registration request to Security Cloud Control. | ||
Step 18 | Return to Security Cloud Control, in the Create Registration Key area, click Next. | ||
Step 19 | Select all licenses you want to apply to the device. Click Next. | ||
Step 20 | Return to Security Cloud Control, open the Security Devices page and see that the device status progresses from "Unprovisioned" to "Locating" to "Syncing" to "Synced." |
 to Onboard a device.
 to copy the registration key.