Exempt Remote Access VPN Traffic from NAT
Configure NAT Exempt to exempt traffic to and from the remote access VPN endpoints from NAT translation. If you do not exempt VPN traffic from NAT, ensure that the existing NAT rules for the outside and inside interfaces do not apply to the remote access VPN pool of addresses. NAT exempt rules are manual static identity NAT rules for a given source/destination interface and network combination, but they are not reflected in the NAT policy, they are hidden. If you enable NAT Exempt, you must also configure the following.
-
Inside Interfaces: Select the interfaces for the internal networks remote users will be accessing. NAT rules are created for these interfaces.
-
Inside Networks: Select the network objects that represent internal networks remote users will be accessing. The networks list must contain the same IP types as the address pools you are supporting.
Before you begin
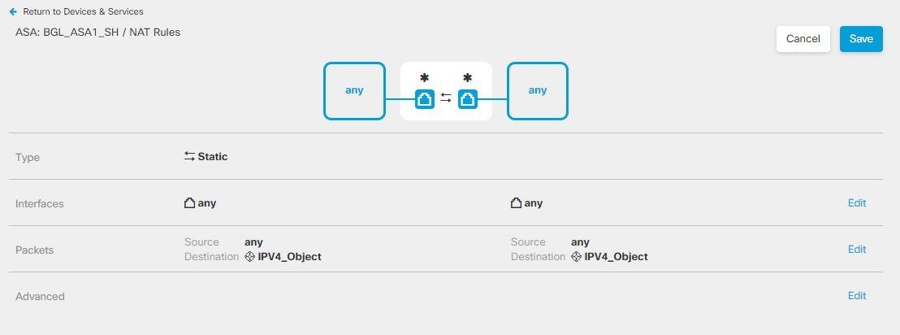
Create ASA network objects that match the configuration of the local IP address pools used in the connection profile and group policy of that device. These network objects must be assigned as the destination address and translated address when configuring the NAT rule.
Procedure
Step 1 | In the left pane, click . |
Step 2 | Use the filter and search field to find the ASA device for which you want to create the NAT rule. |
Step 3 | In the Management area of the details panel, click NAT |
Step 4 | Click
|
Step 5 |
 .
. >
>