Conditions for distinguished name rules in decryption policies
Learn to use distinguished name conditions in a decryption rule. If you're not sure, you can find a certificate's Subject Alternative Name (SAN) and Common Name using a web browser. You can then you can add those values to a decryption rule as distinguished name conditions.
For detailed information about SANs, see RFC 5280, section 4.2.1.6.
Overview
Distinguished name (DN) conditions allow you to specify certificate field values in decryption rules. This helps control which encrypted traffic is decrypted or excluded from decryption based on the certificate’s Common Name (CN) and Subject Alternative Name (SAN)
Identifying Certificate Values
Use these steps to find a certificate's Common Name. These steps also work to find the Common Name and SANs for a self-signed certificate.
These instructions use Firefox as an example, but other browsers work similarly. The following procedure uses amp.cisco.com as an example.
-
Browse to
amp.cisco.comin Firefox. -
In the browser's location bar, to the left of the URL, click
 .
. -
Click .
(For a non-secure or self-signed certificate, click .)
-
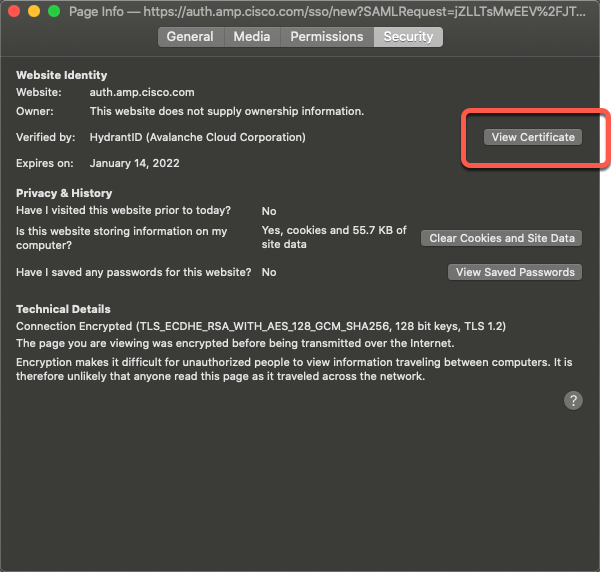
On the Page Info dialog box, click View Certificate.
-
The next page shows certificate details.
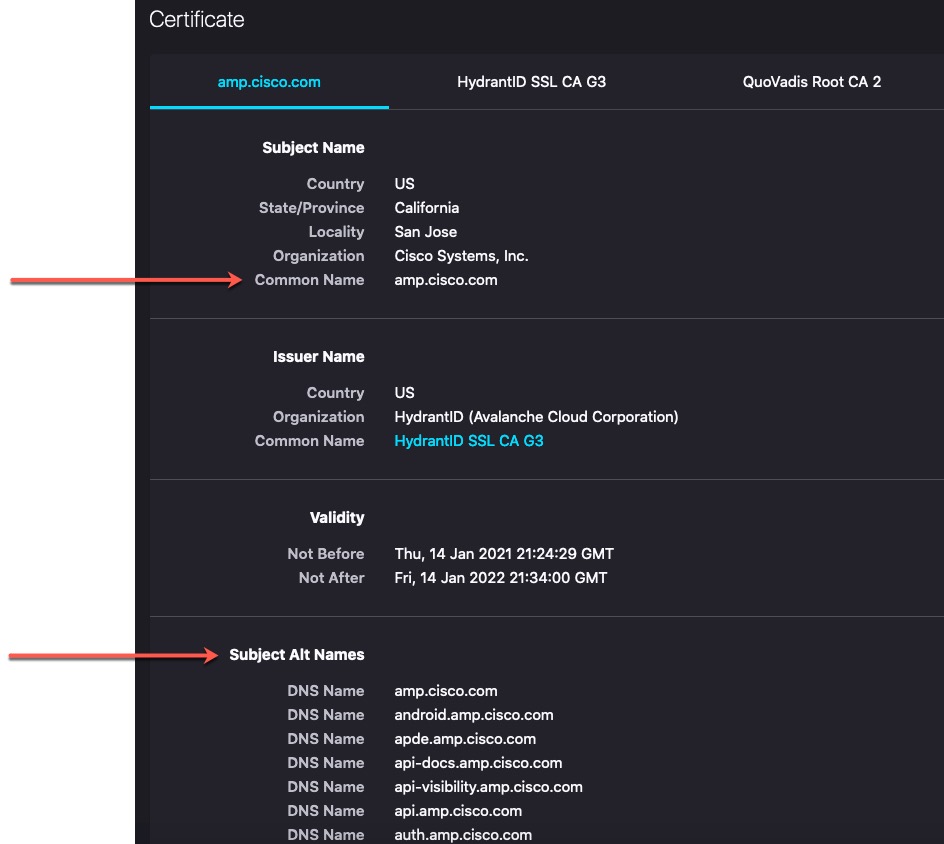
Note the following:
-
CN=auth.amp.cisco.com, if used as a DN rule condition, would match ONLY that host name (that is, SNI). The SNIamp.cisco.comwould NOT match. -
Wildcards can be used in DNs to match multiple domains.
For example, to match
auth.amp.cisco.com, useCN=*.amp.cisco.com. To matchauth.us.amp.cisco.com, useCN=*.*.amp.cisco.com.A DN like
CN=*.example.commatcheswww.example.combut NOTexample.com. To match both SNIs, use two DNs in the rule condition. -
Avoid overly broad wildcards like
CN=*.google.commatches a very large number of SANs. Instead ofCN=*.google.com, use a DN object likeCN=*.youtube.comas the DN object so it matches names likewww.youtube.com.You can also use variations of the SNI that match SANs like
CN=*.youtube.com,CN=youtu.be,CN=*.yt.be, and so on. -
A self-signed certificate should work the same way. You can confirm it's a self-signed certificate by the fact the issuer DN is the same as the subject DN.
Example: DN rule matching
Suppose you want to prevent decryption for traffic going to amp.cisco.com or YouTube. Configure DN rule conditions such as:
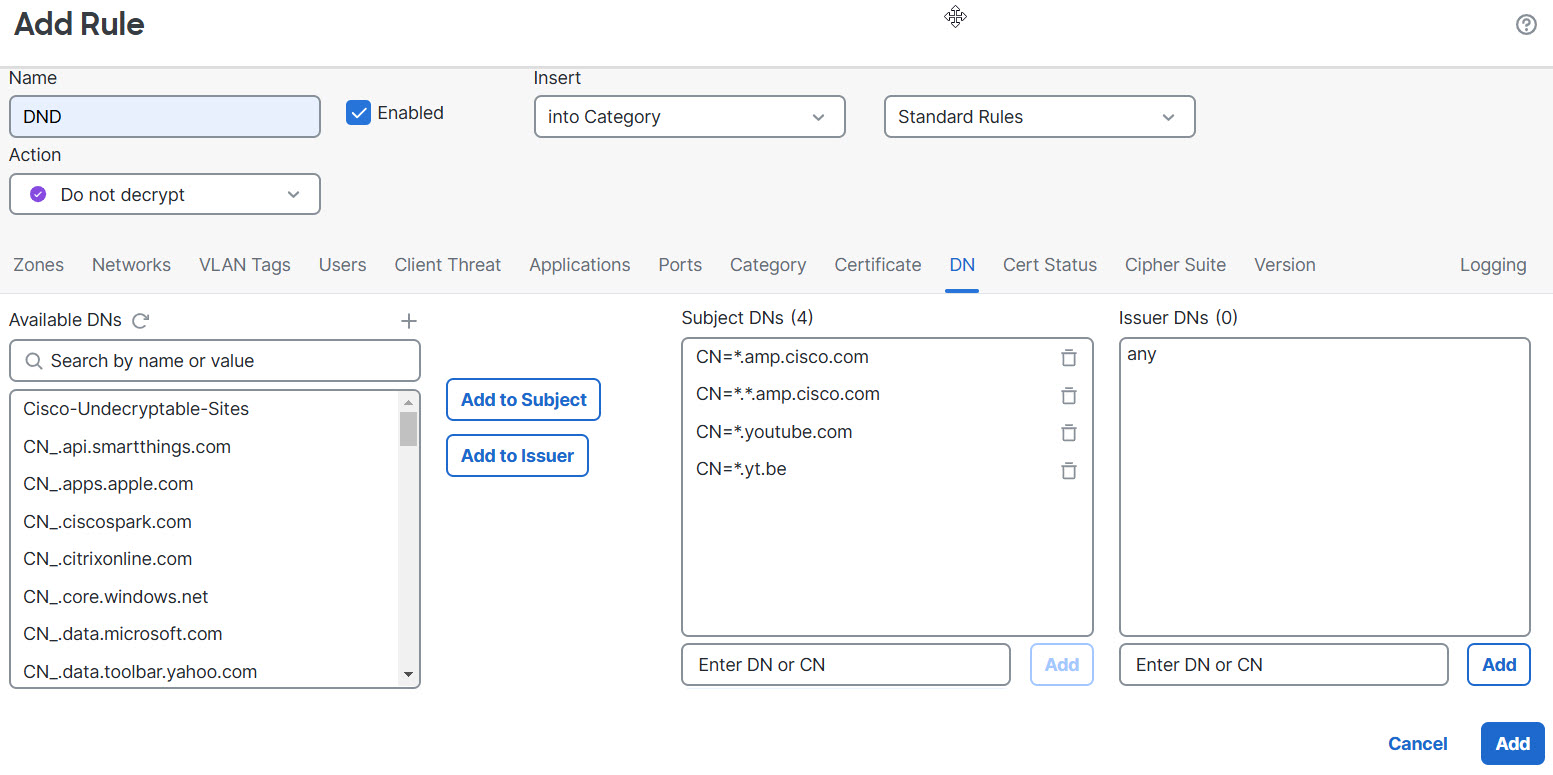
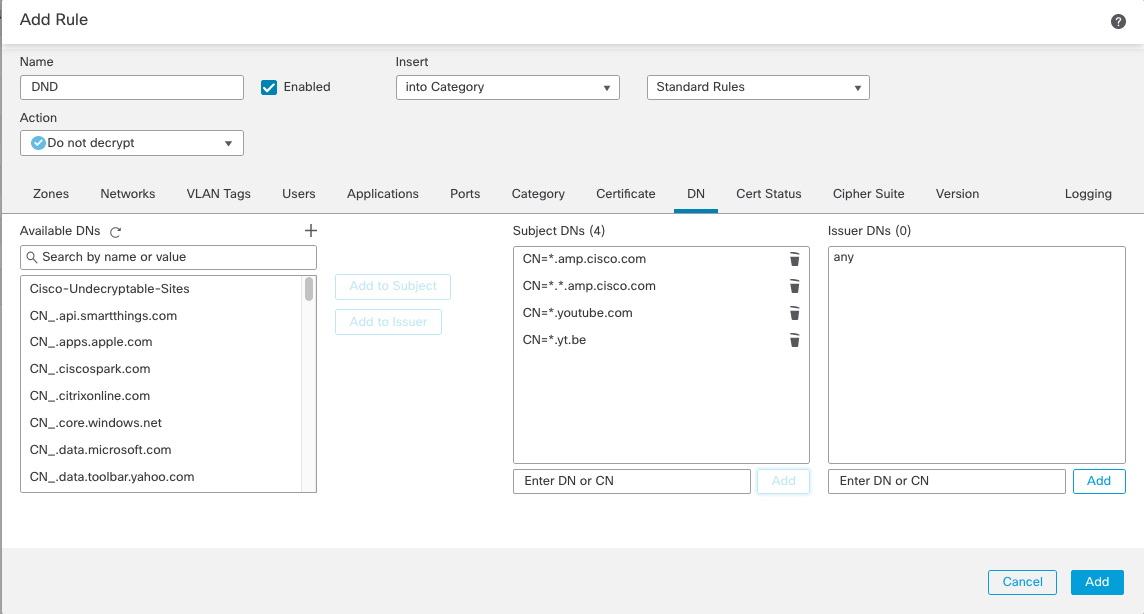
These DN conditions would match URLs like:
-
www.amp.cisco.com
-
auth.amp.cisco.com
-
auth.us.amp.cisco.com
-
www.youtube.com
-
kids.youtube.com
-
www.yt.be
These DN conditions would not match any of the URLs listed, so the traffic would not match the Do Not Decrypt rule. However, it might match another decryption rules in the same decryption policy .
-
amp.cisco.com
-
youtube.com
-
yt.be
To match any of the preceding host names, add more CNs to the rule (for example, adding CN=yt.be would match that URL.)
System behavior: SNI and SANs usage
The host name in the client request is called the Server Name Indication (SNI). During the TLS handshake, the client specifies which hostname they want to connect to (for example, auth.amp.cisco.com) using the SNI extension. The server then selects the corresponding private key and certificate chain that are required to establish the connection while hosting all certificates on a single IP address.
If the SNI matches the CN or a SAN in the certificate, the SNI is used for DN rule matching.
If there is no SNI, or the SNI does not match the certificate, the CN is used for DN rule matching.
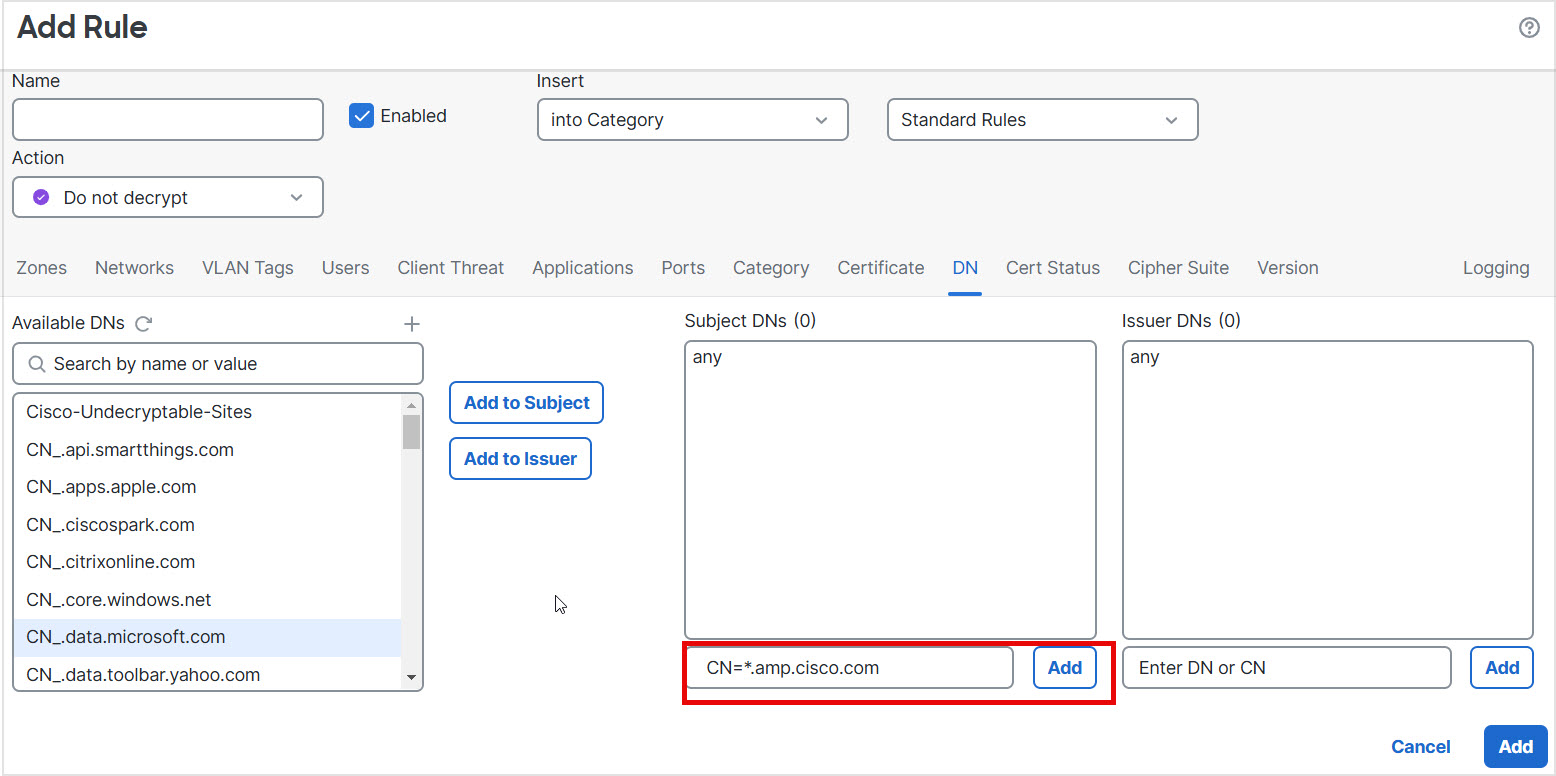
Add a DN rule condition
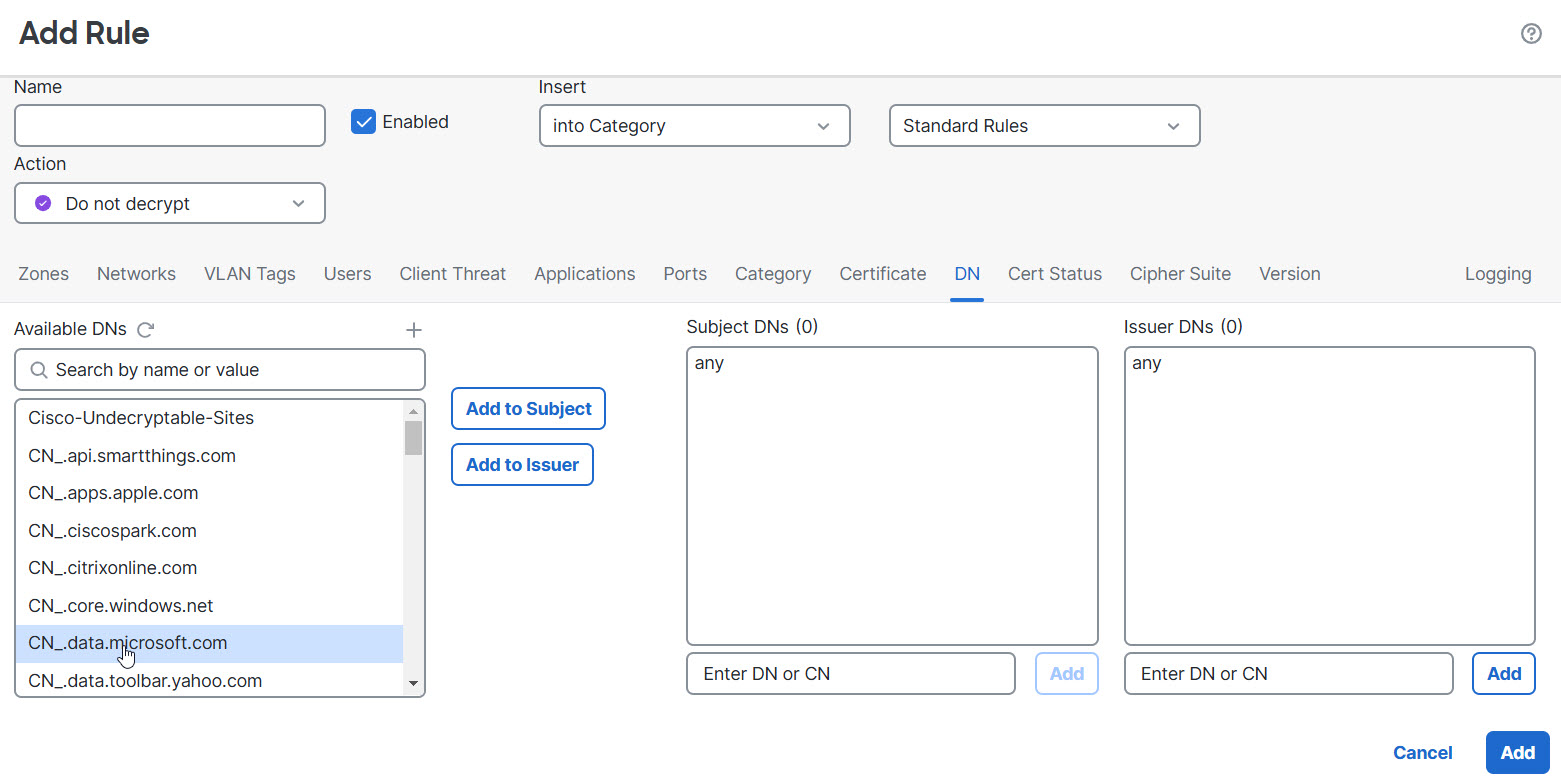
After you identify the CN you want to match,, edit the decryption rule by using an existing DN, creating a new DN object, or adding the DN directly.
-
Use an existing DN.
Click the name of a DN and then click either Add to Subject or Add to Issuer. (Add to Subject is much more common.) To view the value of a DN object, hover the mouse pointer over it.)
-
Create a new DN object.
Click Add (
 ) to the right of Available DNs. The DN object must consist of a name and a value.
 -
Add the DN directly.
Enter the DN in the field at the bottom of the Subject DNs field or the Issuer DNs field. (Subject DNs is more common.) After you enter the DN, click Add.