Configure IPv6 neighbor discovery
Before you begin
Supported in Routed mode only. For IPv6 neighbor settings supported in transparent mode, see Configure a global IPv6 address .
The IPv6 neighbor discovery process uses ICMPv6 messages and solicited-node multicast addresses to determine the link-layer address of a neighbor on the same network (local link), verify the readability of a neighbor, and keep track of neighboring routers.
Nodes (hosts) use neighbor discovery to determine the link-layer addresses for neighbors known to reside on attached links and to quickly purge cached values that become invalid. Hosts also use neighbor discovery to find neighboring routers that are willing to forward packets on their behalf. In addition, nodes use the protocol to actively keep track of which neighbors are reachable and which are not, and to detect changed link-layer addresses. When a router or the path to a router fails, a host actively searches for functioning alternates.
Procedure
Step 1 | Select and click Edit ( |
Step 2 | Click Edit ( |
Step 3 | Click IPv6 , and then Prefixes. To configure the IPv6 router advertisements with IPv6 prefixes, perform these steps:
|
Step 4 | Click Settings. 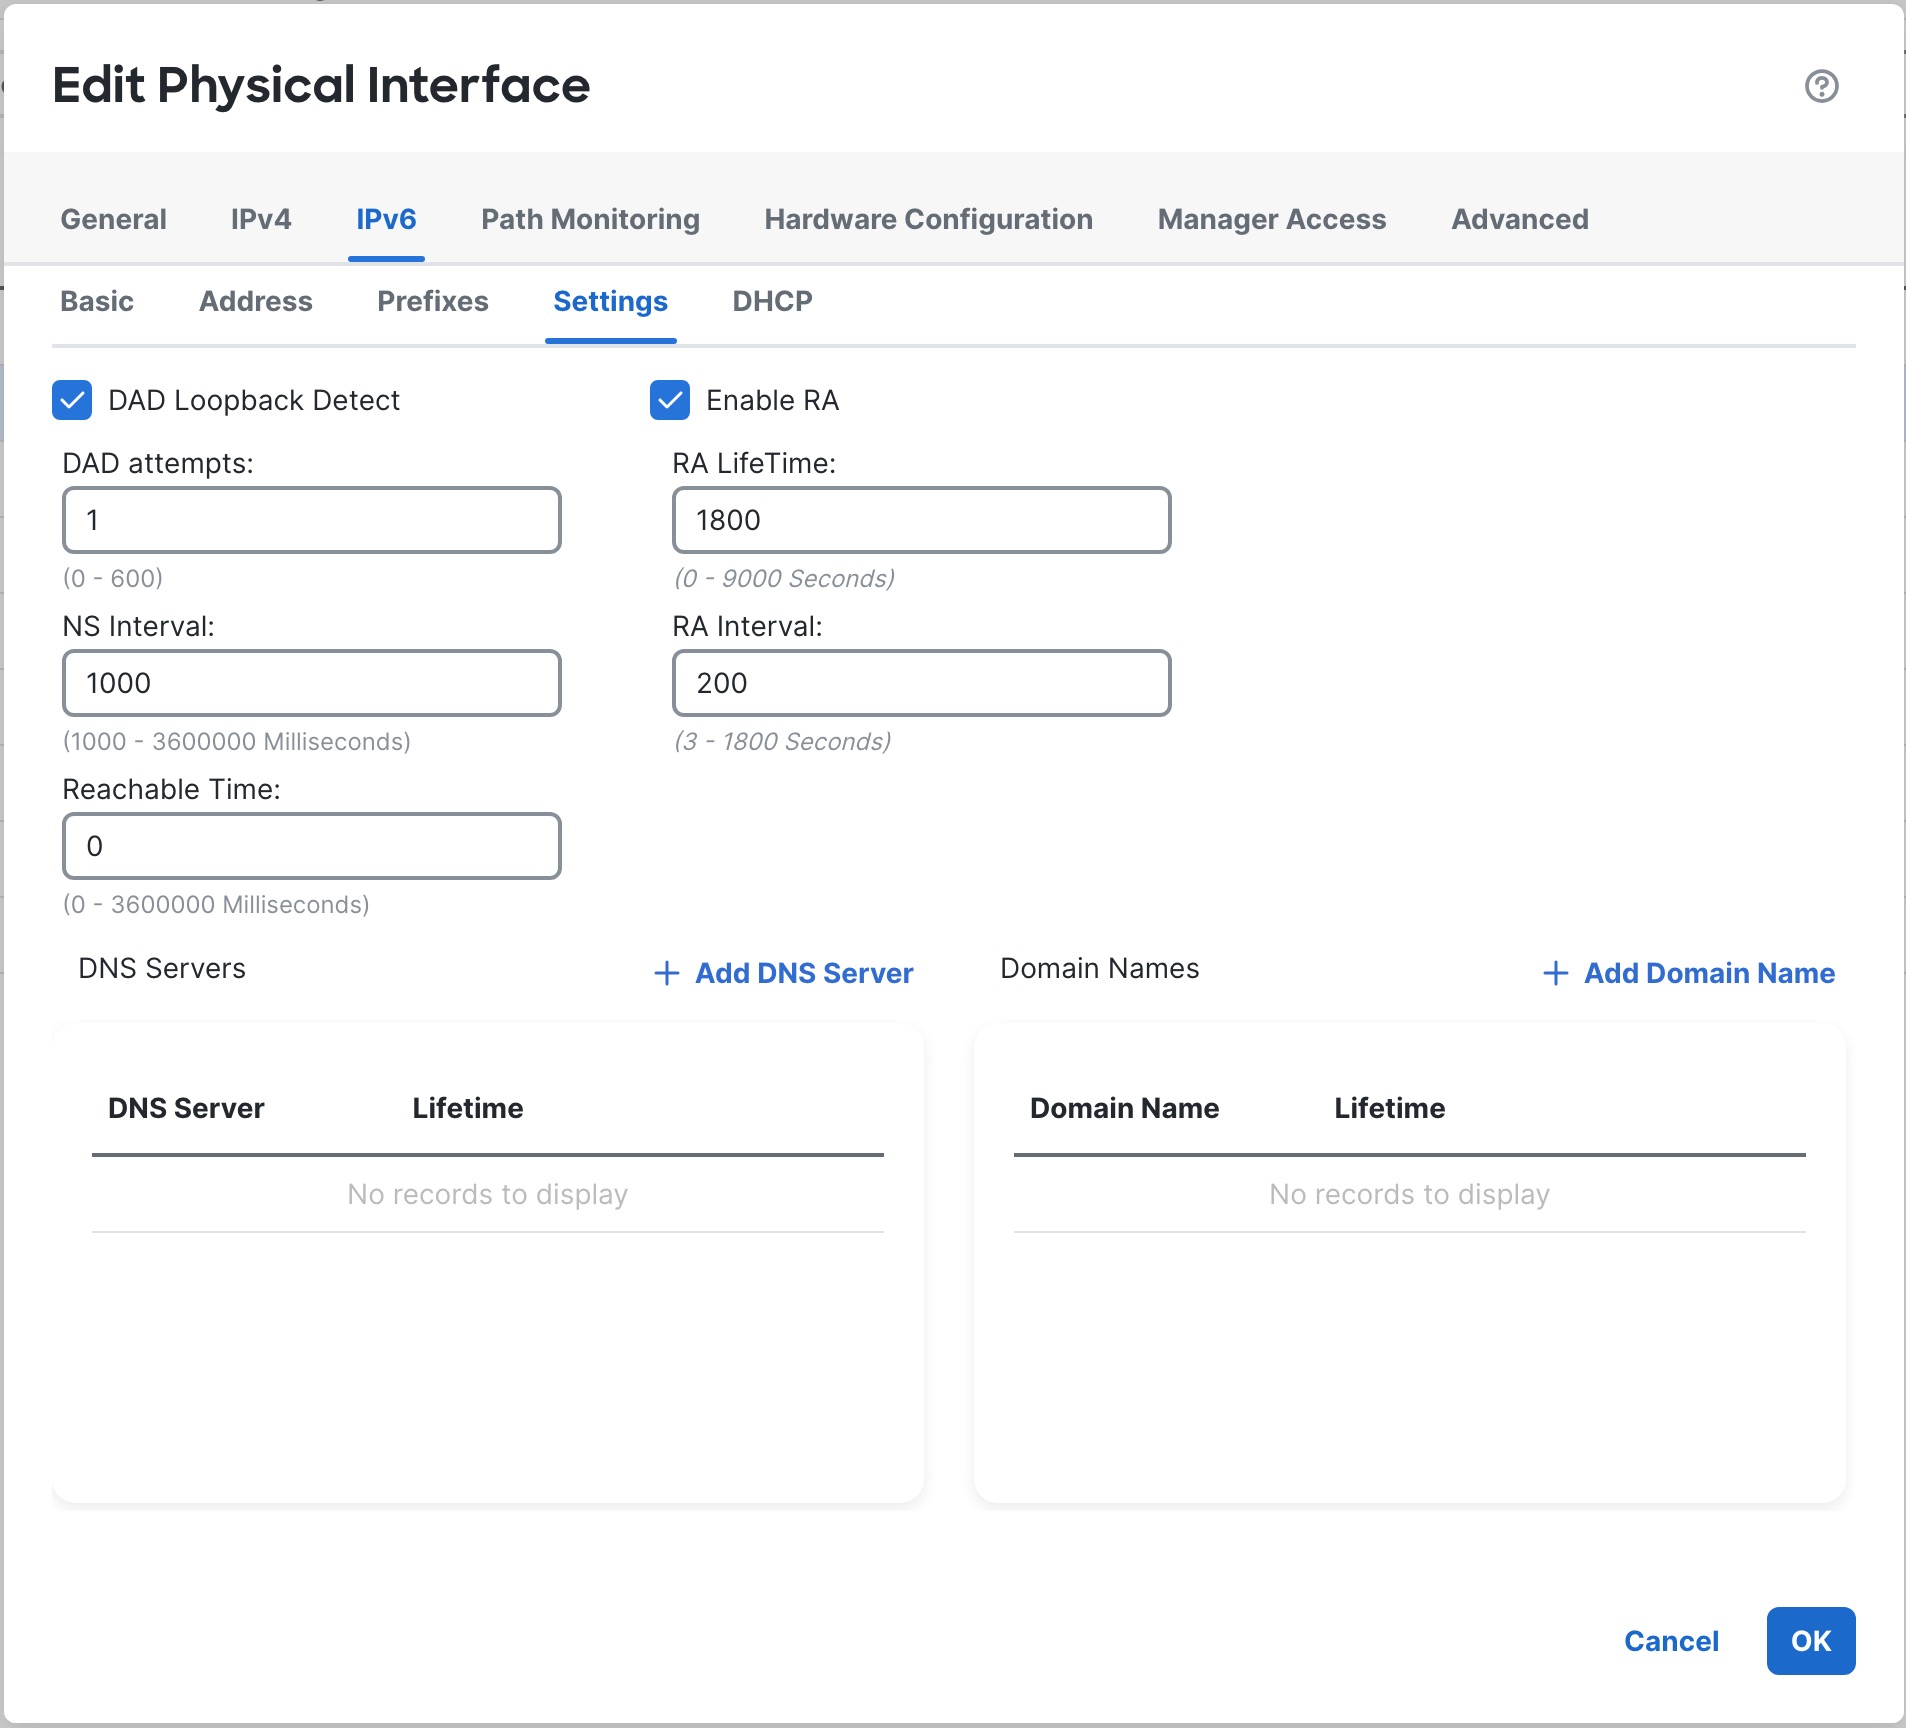
|
Step 5 | (Optional) Configure the amount of time that a remote IPv6 node is considered reachable after a reachability confirmation event has occurred in the Reachable Time field, between 0 and 3600000 ms. The default value is 0 ms. When 0 is used for the value, the reachable time is sent as undetermined. It is up to the receiving devices to set and track the reachable time value. The neighbor reachable time enables detecting unavailable neighbors. Shorter configured times enable detecting unavailable neighbors more quickly, however, shorter times consume more IPv6 network bandwidth and processing resources in all IPv6 network devices. Very short configured times are not recommended in normal IPv6 operation. |
Step 6 | (Optional) To suppress the router advertisement transmissions, uncheck the Enable RA check box. If you enable router advertisement transmissions, you can set the RA lifetime and interval. Router advertisement messages (ICMPv6 Type 134) are automatically sent in response to router solicitation messages (ICMPv6 Type 133). Router solicitation messages are sent by hosts at system startup so that the host can immediately autoconfigure without needing to wait for the next scheduled router advertisement message. You may want to disable these messages on any interface for which you do not want the Firewall Threat Defense to supply the IPv6 prefix (for example, the outside interface).
|
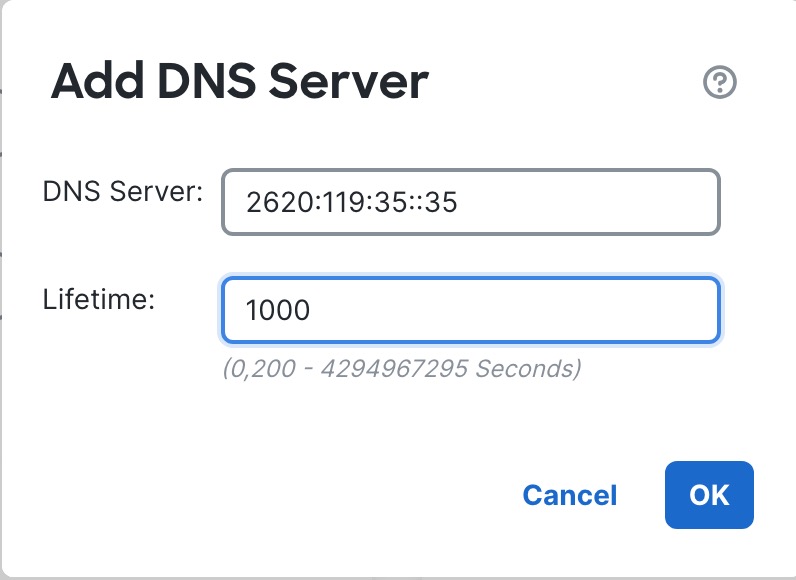
Step 7 | (Optional) Configure the Recursive DNS Server (RDNSS) option to advertise a list of DNS servers to IPv6 clients. This option is useful for clients that use SLAAC instead of DHCPv6 for their addressing. Note that if you enabled the prefix delegation client on the Firewall Threat Defense , you can alternatively pass along the DNS server information that the Firewall Threat Defense received using the Firewall Threat Defense 's DHCPv6 stateless server. If you configure both methods, the client will receive both sets of servers.
|
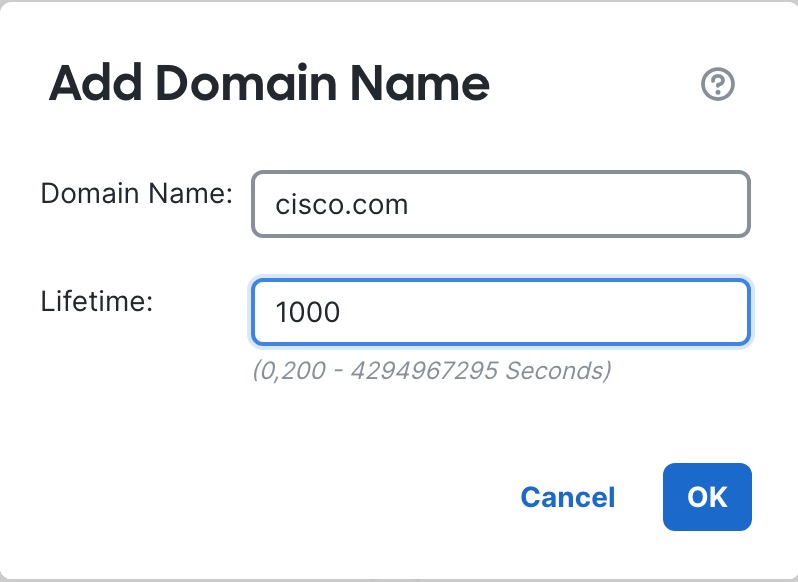
Step 8 | (Optional) Configure the DNS Search List (DNSSL) option to advertise a list of search domains to IPv6 clients. This option is useful for clients that use SLAAC instead of DHCPv6 for their addressing. Note that if you enabled the prefix delegation client on the Firewall Threat Defense , you can alternatively pass along the DNS domain that the Firewall Threat Defense received using the Firewall Threat Defense 's DHCPv6 stateless server. If you configure both methods, the client will receive both sets of domains.
|
Step 9 | Click OK. Click Save. |

What to do next
Go to and deploy the policy to assigned devices. The changes are not active until you deploy them.