Step 1 | Go to . |
Step 2 | Go to the Snort 3 Version of the network analysis policy. |
Step 3 | Click the Actions dropdown menu.
The following options are displayed:
-
View Schema
-
Download Schema / Download Sample File / Template
-
Download Full Configuration
-
Download Overridden Configuration
-
Upload Overridden Configuration
|
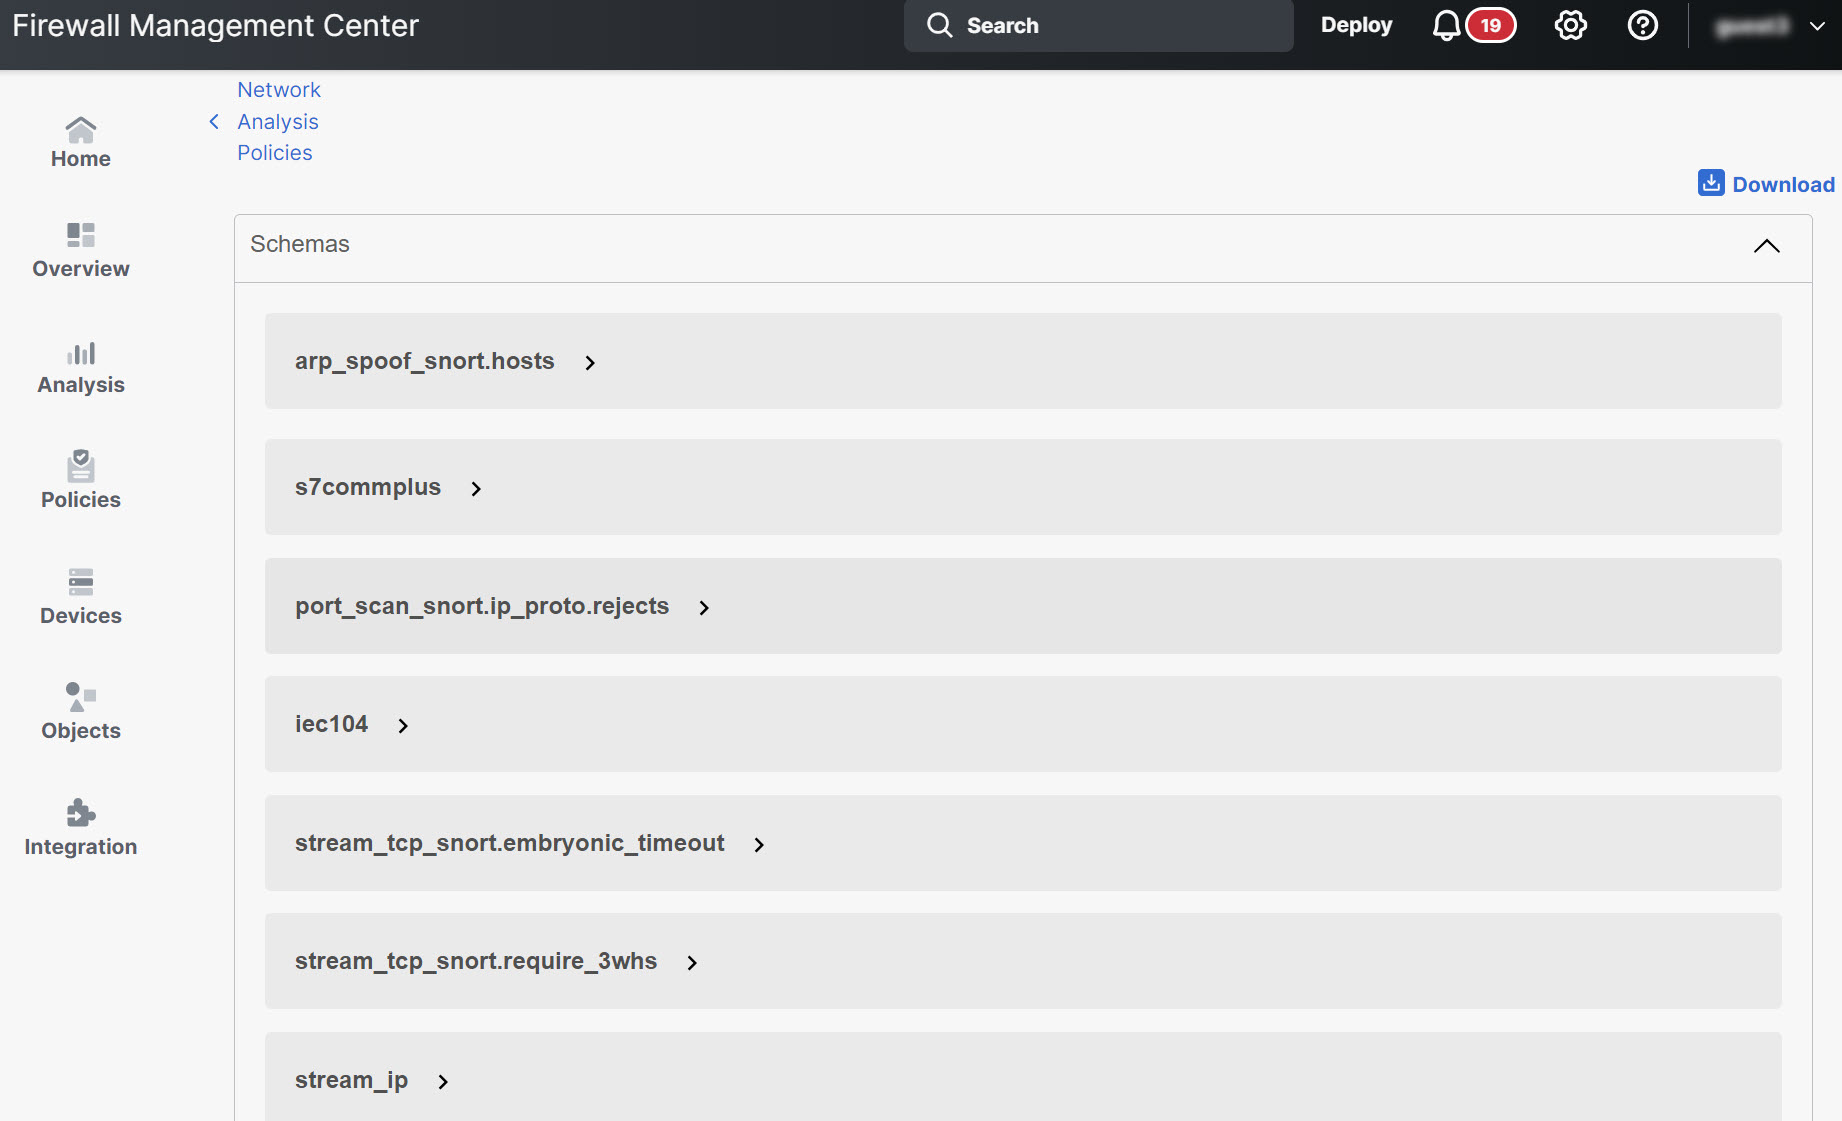
Step 4 | Click View Schema to open the schema file directly in a browser. |
Step 5 | You can download the schema file, sample file / template, full configuration, or overridden configuration as needed.
These options provide you an insight about the allowed values, range, and patterns, existing and default inspector configurations, and overridden inspector configurations.
-
Click Download Schema to download the schema file.
The schema file validates the content that you upload or download. You can download the schema file and open it using any third-party JSON editor. The schema file helps you identify which parameters can be configured for inspectors, along with their allowed values, ranges, and accepted patterns. For example, for the arp_spoof_snort inspector, you can configure the hosts. The hosts include the mac and ip address values. The schema file shows the following accepted pattern for these values.
-
mac – pattern: ^([0-9A-Fa-f]{2}[:-]){5}([0-9A-Fa-f]{2})$
-
ip – pattern: ^([0-9]{1,3}.[0-9]{1,3}.[0-9]{1,3}.[0-9]{1,3}(/[0-9]{1,2}){0,1})$
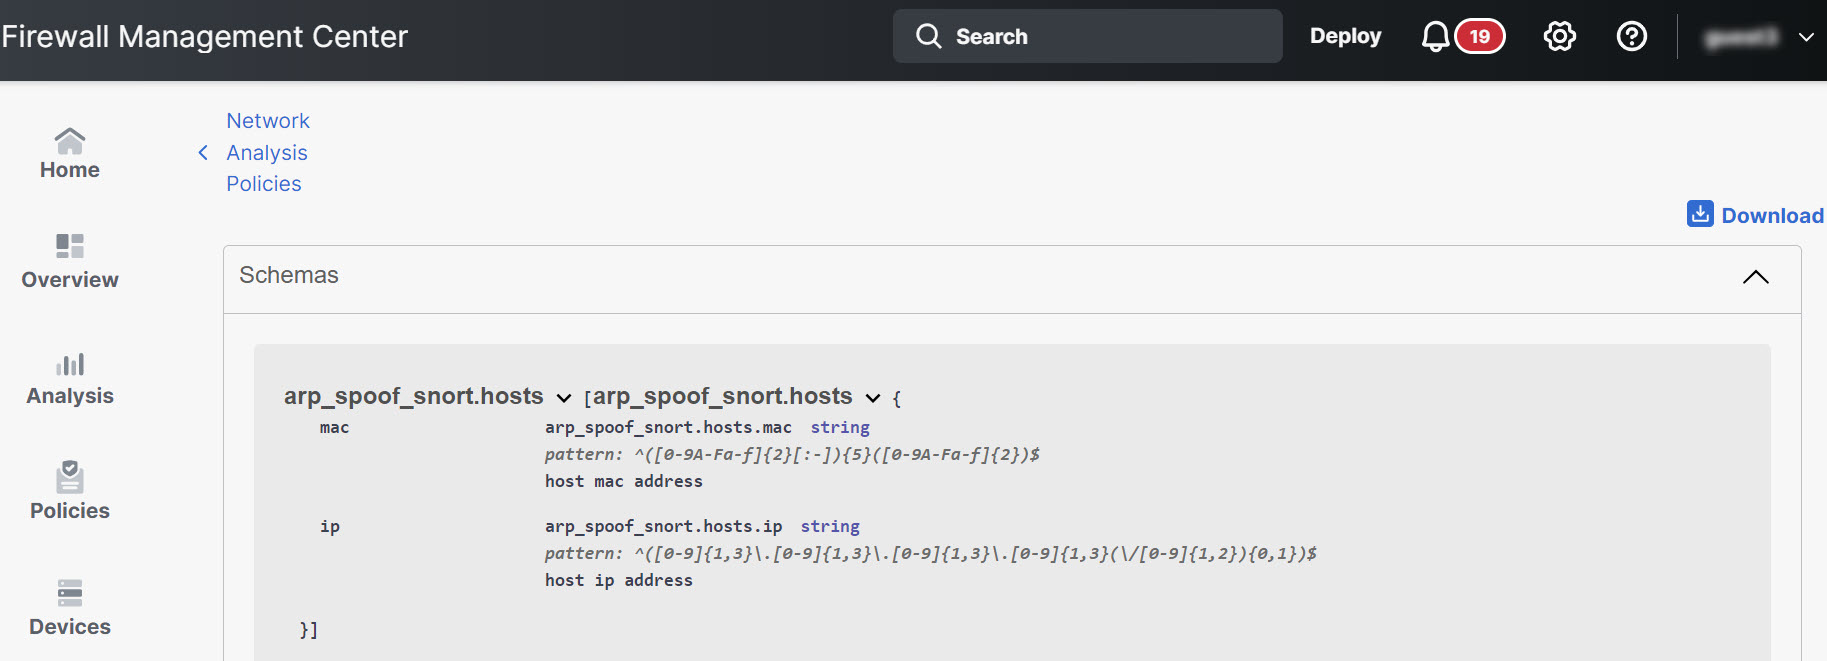 You must provide the values, range, patterns according to the accepted ones in the schema file to be able to successfully override the inspector configuration, otherwise, you get an error message.
-
Click Download Sample File / Template to use a pre-existing template that contains example configurations to help you with configuring the inspectors.
You can refer to the example configurations included in the sample file and make any changes that you may require.
-
Click Download Full Configuration to download the entire inspector configurations in a single JSON file.
You can download the full configuration to find the information you need, rather than expanding the inspectors separately. This file contains all information about the inspector configuration.
-
Click
Download Overridden Configuration to download the inspector configuration that has been overridden.
|
Step 6 | To override the existing configuration, follow these steps.
You can choose to override an inspector configuration using these ways.
- Make inline edits for an inspector directly on the Firewall Management Center. See the topic Make Inline Edit for an Inspector to Override Configuration in the Getting Started with Network Analysis Policies chapter of the Cisco Secure Firewall Management Center Snort 3 Configuration Guide.
- Continue to follow the current procedure of using the Actions dropdown menu to upload the overridden configuration file.
If you chose to make inline edits directly in the Firewall Management Center, then you do not need to complete this procedure any further. Otherwise, you must complete this procedure completely.
-
Under Inspectors, expand the required inspector for which you want to override the default configuration.
The default configuration is displayed on the left column and the overridden configuration is displayed on the right column under the inspector.
You may need to search for an inspector by entering any relevant text in in the search bar.
-
Click the Copy to clipboard icon to copy the default inspector configuration to the clipboard.
-
Create a JSON file and paste the default configuration in it.
-
Keep the inspector configuration that you want to override, and remove all other configuration and instances from the JSON file.
You can also use the Sample File / Template to understand how to override the default configuration. This is a sample file that includes JSON snippets explaining how you can customize the network analysis policy for Snort 3.
-
Make changes to the inspector configuration as needed.
Validate the changes and make sure they conform to the schema file. For multiton inspectors, make sure that the binder conditions for all instances are included in the JSON file. See Multiton Inspectors in the topic Custom Network Analysis Policy Creation for Snort 3 in the Cisco Secure Firewall Management Center Snort 3 Configuration Guide for more information.
-
If you are copying any further default inspector configurations, add the inspector configuration to the existing file that contains the overridden configuration.
Note |
The copied inspector configuration must comply with the JSON standards.
|
-
Save the overridden configuration file to your system.
|
Step 7 | From the Actions dropdown menu, choose Upload Overridden Configuration to upload the JSON file that contains the overridden configuration.
Caution |
Upload only the changes that you require. You should not upload the entire configuration as it makes the overrides sticky in nature and therefore, any subsequent changes to the default configuration as part of the LSP updates would not be applied.
|
You can drag and drop a file or click to browse to the JSON file saved in your system that contains the overridden inspector configuration.
- Merge inspector overrides – Content in the uploaded file is merged with the existing configuration if there is no common inspector. If there are common inspectors, then the content in the uploaded file (for common inspectors) takes precedence over the previous content, and it replaces the previous configuration for those inspectors.
- Replace inspector overrides – Removes all previous overrides and replaces them with the new content in the uploaded file.
Attention |
Choosing this option deletes all the previous overrides. Review your choice carefully before using this option to override the configuration.
|
If any error occurs while uploading the overridden inspectors, you see the error in the Upload Overridden Configuration File pop-up window. You can also download the file with the error, fix the error, and reupload the file.
|
Step 8 | In the Upload Overridden Configuration File pop-up window, click Import to upload the overridden inspector configuration.
After you upload the overridden inspector configuration, you will see an orange icon next to the inspector that signifies that it is an overridden inspector.
Also, the Overridden Configuration column under the inspector shows the overridden value.
You can also view all the overridden inspectors using the Show Overrides Only checkbox adjacent to the Search bar.
Note |
Make sure that you always download the overridden configuration, open the JSON file, and append any new changes/overrides to the inspector configurations to this file. This action is needed so that you do not lose the old overridden configurations.
|
|
Step 9 | (Optional) Take a backup of the overridden configuration file on your system before making any new inspector configuration changes.
Tip |
We recommend that you take a backup from time to time as you override the inspector configuration.
|
|