Add, edit, or delete connectors
The Dashboard enables you to view or edit connectors. You can click the name of a connector to view all instances of that connector or you can click ![]() for the following additional options:
for the following additional options:
-
Go to Connectors to view all connectors at the same time; you can add, edit, and delete connectors from there.
-
to add a connector of the indicated type.
Click any connector in the connectors column (![]() ) to display more information about it; an example follows:
) to display more information about it; an example follows:
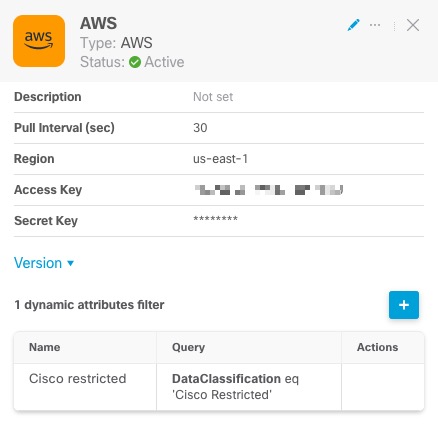
You have the following options:
-
Click the Edit icon (
 ) to edit this connector.
 -
Click the More icon (
 ) for additional options.
 -
Click
 to close the panel.
 -
Click Version to display the version of the . You can optionally copy the version to the clipboard if necessary for Cisco TAC.
The table at the bottom of the panel enables you to add dynamic attributes filters; or to edit or dynamic attributes connector delete connectors. A sample follows:
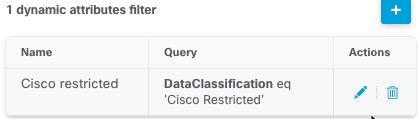
Click the Add icon (![]() ) to add a dynamic attributes filter for this connector. For more information, see Create dynamic attributes filters.
) to add a dynamic attributes filter for this connector. For more information, see Create dynamic attributes filters.
Hover the mouse pointer over the Actions column to either edit or delete the indicated connector.
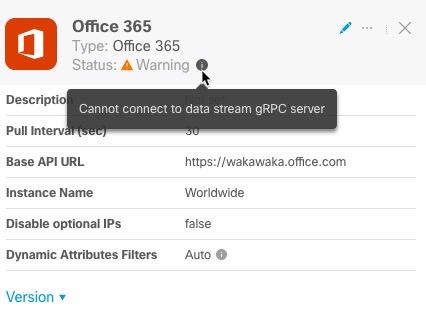
View error information
To view error information for a connector:
-
On the Dashboard, click the name of the connector that is displaying the error.
-
In the right pane, click Information (
 ).
).An example follows.
-
To resolve this issue, edit the connector settings as discussed in Create an Office 365 connector.
-
If you cannot resolve the issue, click Version and copy the version to a text file.
-
Get your Security Cloud Control tenant ID as discussed in Get Your Tenant ID
-
Provide all of this information to Cisco TAC.