Configure Breakout Ports

You can configure 10GB breakout ports for each 40GB or higher interface. This procedure tells you how to break out and rejoin the ports. breakout ports can be used just like any other physical Ethernet port, including being added to EtherChannels.

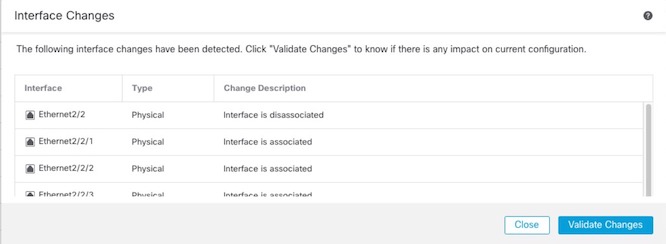
Changes are immediate; you do not need to deploy to the device. After you break or rejoin, you cannot roll back to the previous interface state.

Before you begin

  • You must use a supported breakout cable. See the hardware installation guide for more information.

  • The interface cannot be in use for the following before breaking or rejoining:

    • Failover link

    • Cluster control link

    • Have a subinterface

    • EtherChannel member

    • BVI member

    • Manager access interface

  • Breaking or rejoining and interface that is used directly in your security policy can impact the configuration; however, the action is not blocked.

Procedure


Step 1

From Devices > Device Management, click Manage in the Chassis column. For clustering or High Availability, this option is only available for the control node/active unit; network module changes are replicated to all nodes.

Manage Chassis
Manage Chassis

The Chassis Operations page opens for the device (in multi-instance mode, this page is called Chassis Manager). This page shows physical interface details for the device.

Step 2

Break out 10GB ports from a 40GB or higher interface.

  1. click Break (break icon) to the right of the interface.

    Click Yes on the confirmation dialog box. If the interface is in use, you will see an error message. You must resolve any use cases before you can retry the breakout.

    For example, to break out the Ethernet2/1 40GB interface, the resulting child interfaces will be identified as Ethernet2/1/1, Ethernet2/1/2, Ethernet2/1/3, and Ethernet2/1/4.

    On the interfaces graphic, a port that is broken out has this appearance:

    Breakout Ports
    Breakout Ports
  2. Click the link in the message at the top of the screen to go to the Interfaces page to save the interface changes.

    Go to Interface Page
    Go to Interface Page
  3. At the top of the Interfaces page, click Click to know more. The Interface Changes dialog box opens.

    View Interface Changes
    View Interface Changes
    Interface Changes
    Interface Changes
  4. Click Validate Changes to make sure your policy will still work with the interface changes.

    If there are any errors, you need to change your policy and rerun the validation.

    Replacing the parent interface that is used in your security policy can impact the configuration. Interfaces can be referenced directly in many places in the configuration, including access rules, NAT, SSL, identity rules, VPN, DHCP server, and so on. Deleting an interface will delete any configuration associated with that interface. Policies that refer to security zones are not affected.

  5. Click Close to return to the Interfaces page.

  6. Click Save to save the interface changes to the firewall.

  7. If you had to change any configuration, go to Deploy > Deployment and deploy the policy.

    You do not need to deploy just to save the breakout port changes.

Step 3

Rejoin breakout ports.

You must rejoin all child ports for the interface.

  1. Click Join (join icon) to the right of the interface.

    Click Yes on the confirmation dialog box. If any child ports are in use, you will see an error message. You must resolve any use cases before you can retry the rejoin.

  2. Click the link in the message at the top of the screen to go to the Interfaces page to save the interface changes.

    Go to Interface Page
    Go to Interface Page
  3. At the top of the Interfaces page, click Click to know more. The Interface Changes dialog box opens.

    View Interface Changes
    View Interface Changes
    Interface Changes
    Interface Changes
  4. Click Validate Changes to make sure your policy will still work with the interface changes.

    If there are any errors, you need to change your policy and rerun the validation.

    Replacing the child interfaces that are used in your security policy can impact the configuration. Interfaces can be referenced directly in many places in the configuration, including access rules, NAT, SSL, identity rules, VPN, DHCP server, and so on. Deleting an interface will delete any configuration associated with that interface. Policies that refer to security zones are not affected.

  5. Click Close to return to the Interfaces page.

  6. Click Save to save the interface changes to the firewall.

  7. If you had to change any configuration, go to Deploy > Deployment and deploy the policy.

    You do not need to deploy just to save the breakout port changes.