Procedure
Procedure
Step 1 | Log in to the firewall device manager for your FDM-managed device. | ||
Step 2 | Configure the extended access control list (ACL) for redirecting initial connections to ISE. The purpose of the redirect ACL is to send initial traffic to ISE so that ISE can assess the client posture. The ACL should send HTTPS traffic to ISE, but not traffic that is already destined for ISE, or traffic that is directed to a DNS server for name resolution. A sample redirect ACL might look like the following:
access-list redirect extended deny ip any host <ISE server IP>
access-list redirect extended deny ip any host <DNS server IP>
access-list redirect extended deny icmp any any
access-list redirect extended permit tcp any any eq www
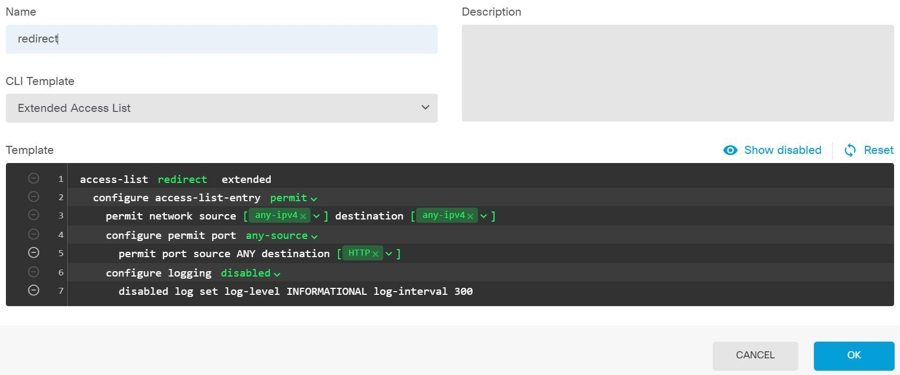
However, note that ACLs have an implicit "deny any any" as the last access control entry (ACE). In this example, the last ACE, which matches TCP port www (that is, port 80), will not match any traffic that matches the first 3 ACEs, so those are redundant. You could simply create an ACL with the last ACE and get the same results. Note that in a redirect ACL, the permit and deny actions simply determine which traffic matches the ACL, with permit matching and deny not matching. No traffic is actually dropped, denied traffic is simply not redirected to ISE. To create the redirect ACL, you need to configure a Smart CLI object.
| ||
Step 3 | Configure a RADIUS server group for dynamic authorization. Perform the below steps by following the instructions provided in the Create or Edit a Firepower Threat Defense RADIUS Server Object or Group section.
| ||
Step 4 | Create a connection profile that uses this RADIUS server group. See Configure an RA VPN Connection Profile. Use AAA Authentication (either only or with certificates), and select the server group in the Primary Identity Source for User Authentication, Authorization, and Accounting options. |