Upload AnyConnect Software Packages to an FDM-Managed Device Running Version 6.4.0
You can upload the AnyConnect software packages to the FDM-managed devices version 6.4.0 using firewall device manager API explorer. A minimum of one AnyConnect software package must be present on the device to create an RA VPN connection.
Important | The procedure applies only to firewall device manager Version 6.4. If you are using firewall device manager Version 6.5 or later, use the Security Cloud Control interface to upload the AnyConnect package. |
Use the following procedure to upload the AnyConnect package to firewall device manager Version 6.4.0:
Procedure
Step 1 | Download the AnyConnect packages from https://software.cisco.com/download/home/283000185.
|
Step 2 | Using a browser, open the home page of the system. For example, https://ftd.example.com. |
Step 3 | Log into Firewall Device Manager. |
Step 4 | Edit the URL to point to /#/api-explorer, for example, https://ftd.example.com/#/api-explorer. |
Step 5 | Scroll down and click |
Step 6 | In fileToUpload field, click Choose File and select the required AnyConnect package. You can upload the packages one at a time. 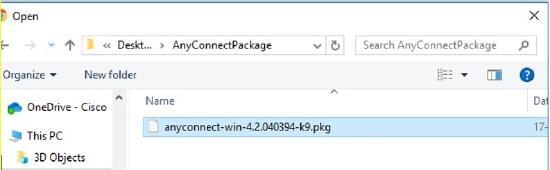
|
Step 7 | Click Open. |
Step 8 | Scroll down and click TRY IT OUT!. Wait until the package uploads completely. In the Response Body, the API response appears in the following format.
{ "version": null, "name": "691f47e1-90c7-11e9-a361-79e2452f0c57.pkg", "fileName": "691f47e1-90c7-11e9-a361-79e2452f0c57.pkg", "id": "691f47e1-90c7-11e9-a361-79e2452f0c57.pkg", "type": "fileuploadstatus", "links": { "self": https://ftd.example.com:972/api/fdm/...90d111e9-a361- cf32937ce0df.pkg } }
Record the fileName of the package from the response as you must enter the same string when performing the POST operation. In this example, the fileName is 691f47e1-90c7-11e9-a361-79e2452f0c57.pkg. |
Step 9 | Scroll up near the top of Threat Defense REST API page and click . Perform a POST operation to the API providing the temp staged diskFilename and the OS type of the package file in the payload. This action creates the AnyConnect package file. |
Step 10 | In the body field, enter the package details in the following format only: { "platformType": "WINDOWS", "diskFileName": "691f47e1-90c7-11e9-a361-79e2452f0c57.pkg", "type": "anyconnectpackagefile", "name": "AnyConnectWindowsBGL" }
"name": "AnyConnectWindowsBGL", "description": null, "diskFileName": "41d592e3-90ca-11e9-a361-6d05320a165d.pkg", "md5Checksum": "9bbe53dcf92e515d3ce5423048212488", "platformType": "WINDOWS", "id": "c9c9dfe3-9cd8-11e9-a361-23534f081c43", "type": "anyconnectpackagefile", "links": { "self": } } The AnyConnect package is created on firewall device manager. |
Step 11 | Click The Response Body shows all AnyConnect package files. A sample response is shown below. {"items": [ { "version": "la4nwceqk2sg4", "name": "AnyConnectWindowsBGL", "description": null, "diskFileName": "82f1e362-9cd8-11e9-a361-9758ba07962d.pkg", "md5Checksum": "9bbe53dcf92e515d3ce5423048212488", "platformType": "WINDOWS", "id": "c9c9dfe3-9cd8-11e9-a361-23534f081c43", "type": "anyconnectpackagefile", "links": { "self": } } ],
|
Step 12 | Upload other AnyConnect packages for each OS type. Repeat steps from 4 to 10. |
Step 13 | Edit the URL to point to the web page, for example, https://ftd.example.com |
Step 14 | Click the Deploy Changes icon in the upper right of the web page. The icon is highlighted with a dot when there are undeployed changes. |
Step 15 | If you are satisfied with the changes, you can click Deploy Now to start the job immediately. The window will show that the deployment is in progress. You can close the window or wait for the deployment to complete. |
Note | To delete a package from the FDM-managed device, click . In the objID field, type the package id and click TRY IT OUT!. |
To complete a VPN connection, your users must install the AnyConnect client software on their workstation. For more information, see How Users Can Install the AnyConnect Client Software on FDM-Managed Device.