Change Interfaces Assigned to an Instance
You can allocate or unallocate an interface on the instance. Adding a new interface, or deleting an unused interface, has minimal impact on the instance configuration. You can also edit the membership of an allocated EtherChannel without affecting the instance. However, deleting an interface that is used in your security policy will impact the configuration.
Interfaces can be referenced directly in many places in the instance configuration, including access rules, NAT, SSL, identity rules, VPN, DHCP server, and so on. Deleting an interface will delete any configuration associated with that interface.
Policies that refer to security zones are not affected.
Note | For high availability, you need to make the same interface changes for the other unit. Otherwise, high availability might not operate correctly. |
Before you begin
-
Configure your interfaces according to Configure Instances.
-
If you want to add an already-allocated interface to an EtherChannel, you need to unallocate the interface from the instance first, then add the interface to the EtherChannel. For a new EtherChannel, you can then allocate the EtherChannel to the instance.
Procedure
Step 1 | From , click Manage in the Chassis column or click Edit ( 
The Chassis Manager page opens for the chassis to the Summary page. |
Step 2 | Click Instances, and click Edit ( 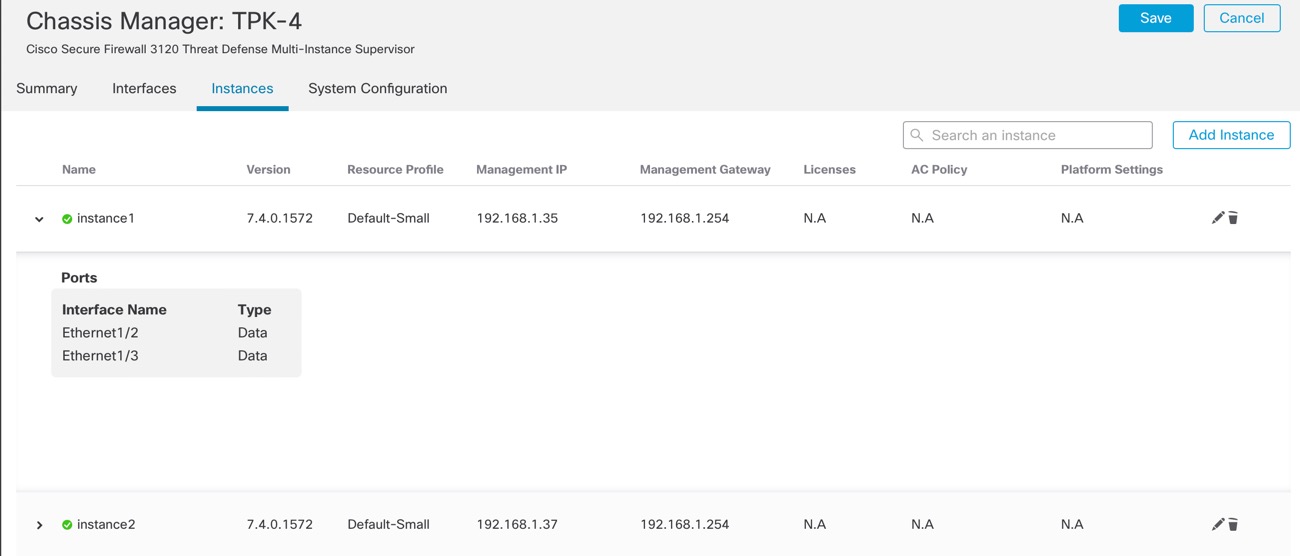
|
Step 3 | Click Next until you get to the Interface Assignment screen. 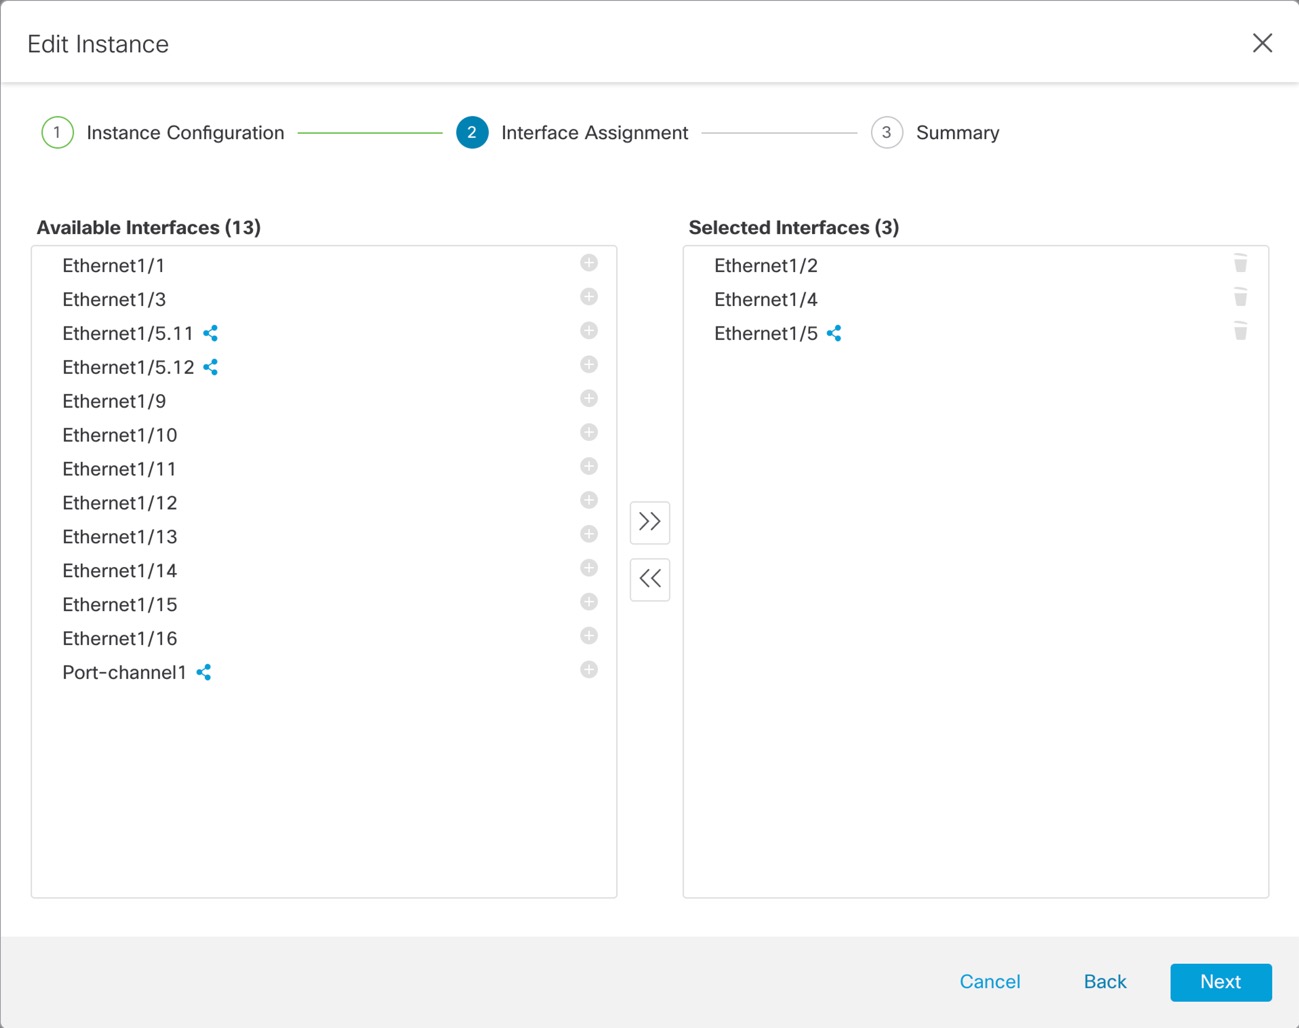
Shared interfaces show the sharing icon ( |
Step 4 | Make your interface changes, and then click Next. |
Step 5 | Click Save on the Summary screen. |
Step 6 | For high availability, you need to make the same interface changes for the other unit. Otherwise, high availability might not operate correctly. |
 ).
).