Change an Interface on a Firewall Threat Defense Logical Device
You can allocate or unallocate an interface, or replace a management interface on the Firewall Threat Defense logical device. You can then sync the interface configuration in the Cloud-Delivered Firewall Management Center.
Adding a new interface, or deleting an unused interface has minimal impact on the Firewall Threat Defense configuration. However, deleting an interface that is used in your security policy will impact the configuration. Interfaces can be referenced directly in many places in the Firewall Threat Defense configuration, including access rules, NAT, SSL, identity rules, VPN, DHCP server, and so on. Policies that refer to security zones are not affected. You can also edit the membership of an allocated EtherChannel without affecting the logical device or requiring a sync on the Cloud-Delivered Firewall Management Center.
Deleting an interface will delete any configuration associated with that interface.
Before you begin
-
Configure your interfaces, and add any EtherChannels according to Configure a Physical Interface and Add an EtherChannel (Port Channel).
-
If you want to add an already-allocated interface to an EtherChannel (for example, all interfaces are allocated by default to a cluster), you need to unallocate the interface from the logical device first, then add the interface to the EtherChannel. For a new EtherChannel, you can then allocate the EtherChannel to the device.
-
If you want to replace the management or eventing interface with a management EtherChannel, then you need to create the EtherChannel with at least 1 unallocated data member interface, and then replace the current management interface with the EtherChannel. After the Firewall Threat Defense device reboots (management interface changes cause a reboot), and you sync the configuration in the Cloud-Delivered Firewall Management Center, you can add the (now unallocated) management interface to the EtherChannel as well.
-
For clustering or High Availability, make sure you add or remove the interface on all units before you sync the configuration in the Cloud-Delivered Firewall Management Center. We recommend that you make the interface changes on the data/standby unit(s) first, and then on the control/active unit. Note that new interfaces are added in an administratively down state, so they do not affect interface monitoring.
-
In mult-instance mode, for changing a sub-interface with an another sub-interface with the same vlan tag, you must first remove all the configuration (including nameif config) of the interface and then unalloacte the interface from Firewall Chassis Manager. Once unallocated, add the new interface and then use sync interfaces from the Cloud-Delivered Firewall Management Center.
Procedure
Step 1 | In the Firewall Chassis Manager, choose Logical Devices. |
Step 2 | Click the Edit icon at the top right to edit the logical device. |
Step 3 | Allocate a new data interface by selecting the interface in the Data Ports area. Do not delete any interfaces yet. 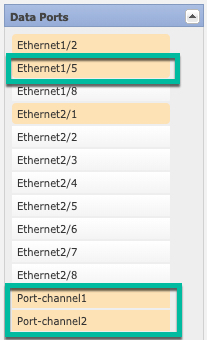 |
Step 4 | Replace the management or eventing interface: For these types of interfaces, the device reboots after you save your changes.
If you change the IP address of the Management interface, then you must also change the IP address for the device in the Cloud-Delivered Firewall Management Center: go to . In the Management area, set the IP address to match the bootstrap configuration address. |
Step 5 | Click Save. |
Step 6 | Sync the interfaces in the Cloud-Delivered Firewall Management Center.
|
Step 7 | In the Firewall Chassis Manager, unallocate a data interface by de-selecting the interface in the Data Ports area. 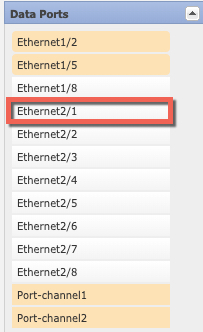 |
Step 8 | Click Save. |
Step 9 | Sync the interfaces again in the Cloud-Delivered Firewall Management Center. |
