Configure Power Supply Alarms

The ISA 3000 has two power supplies. By default, the system operates in single-power mode. However, you can configure the system to operate in dual mode, where the second power supply automatically provides power if the primary power supply fails. When you enable dual-mode, the power supply alarm is automatically enabled to send syslog alerts, but you can disable the alert altogether, or also enable SNMP traps or the alarm hardware relay.

The following procedure explains how to enable dual mode, and how to configure the power supply alarms.

Procedure


Step 1

Create the FlexConfig object to configure the power supply alarm.
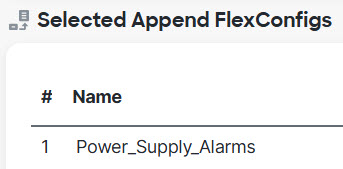
  1. Choose Objects > Object Management.

  2. Choose FlexConfig > FlexConfig Object from the table of contents.

  3. Click Add FlexConfig Object, configure the following properties, and click Save.

    • Name—The object name. For example, Power_Supply_Alarms.

    • Deployment—Select Everytime. You want this configuration to be sent in every deployment to ensure it remains configured.

    • Type—Keep the default, Append. The commands are sent to the device after the commands for directly-supported features.

    • Object body—In the object body, type the commands needed to configure the power supply alarms. The following steps explain the commands.

  4. Enable dual power supply mode.

    power-supply dual

    For example:

    
    power-supply dual 
    
  5. Configure the actions to take when the power supply alarm is triggered.

    alarm facility power-supply rps {relay | syslog | notifies | disable}

    You can configure more than one action. For example, you can configure the device to activate the external alarm, send syslog messages, and also send SNMP traps.

    • relay—Energize the alarm output relay, which activates the external alarm that you attached to it, such as a buzzer or a flashing light. The output LED also goes red.

    • syslog—Send a syslog message. This option is enabled by default.

    • notifies—Send an SNMP trap.

    • disable—Disable the power supply alarm. Any other actions configured for the power supply alarm are inoperable.

    For example, to enable all actions for the power supply alarm, enter the following:

    
    alarm facility power-supply rps relay 
    alarm facility power-supply rps syslog
    alarm facility power-supply rps notifies
    
  6. Verify that the object body contains the commands you want.

    For example, if your template includes all of the command examples shown in this procedure, the object body would have the following commands:

    
    power-supply dual
    alarm facility power-supply rps relay 
    alarm facility power-supply rps syslog
    alarm facility power-supply rps notifies
    

    The object body should look similar to the following:


    FlexConfig object for configuring power supply alarms on ISA 3000 devices.

  7. Click Save.

Step 2

Create the FlexConfig policy and assign it to the devices.

  1. Choose Devices > FlexConfig.

  2. Either click New Policy, or if an existing FlexConfig policy should be assigned to (or is already assigned to) the target devices, simply edit that policy.

    When creating a new policy, assign the target devices to the policy in the dialog box where you name the policy.

  3. Select the power supply alarm FlexConfig object in the User Defined folder in the table of contents and click > to add it to the policy.

    The object should be added to the Selected Appended FlexConfigs list.


    FlexConfig policy, power supply alarms object in the selected objects list.

  4. Click Save.

  5. If you have not yet assigned all the targeted devices to the policy, click the Policy Assignments link below Save and make the assignments now.

  6. Click Preview Config, and in the Preview dialog box, select one of the assigned devices.

    The system generates a preview of the configuration CLI that will be sent to the device. Verify that the commands generated from the FlexConfig object look correct. These will be shown at the end of the preview. Note that you will also see commands generated from other changes you have made to managed features. For the power supply alarm commands, you should see something similar to the following:

    
    ###Flex-config Appended CLI ###
    power-supply dual
    alarm facility power-supply rps relay 
    alarm facility power-supply rps syslog
    alarm facility power-supply rps notifies
    

Step 3

Deploy your changes.

Because you assigned a FlexConfig policy to the devices, you will always get a deployment warning, which is meant to caution you about the use of FlexConfig. Click Proceed to continue with the deployment.

After the deployment completes, you can check the deployment history and view the transcript for the deployment. This is especially valuable if the deployment fails. See Verify the Deployed Configuration.