Create a realm sequence
Creating a realm sequence provides an ordered list of realms the system searches when it applies identity policy, allowing you to specify the priority order for user authentication across multiple Active Directory servers.
The following procedure enables you to create a realm sequence, which is an ordered list of realms the system searches when it applies identity policy. You add a realm sequence to an identity rule exactly the same way as you add a realm; the difference is that the system searches all the realms in the order specified in the realm sequence when applying an identity policy.
Before you begin
You must create and enable at least two realms, each corresponding to a connection with an Active Directory server. You cannot create realm sequences for LDAP realms.
Create a realm as discussed in Create an LDAP realm or an Active Directory realm and realm directory.
Follow these steps to create a realm sequence:
Procedure
Step 1 | Log in to the Security Cloud Control and click . |
Step 2 | Under the Realm Sequences tab, click Add Sequence. |
Step 3 | In the Name field, enter a name to identify the realm sequence. |
Step 4 | (Optional.) In the Description field, enter a description for the realm sequence. |
Step 5 | Under Realms, click Add ( |
Step 6 | Click the name of each realm to add to the sequence. To narrow your search, enter all or part of a realm name in Filter field. Click OK. |
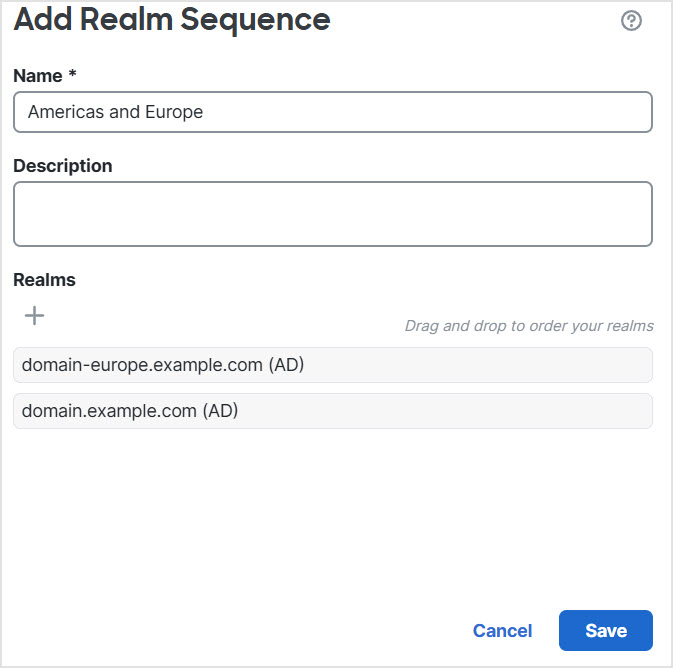
Step 7 | In the Add Realm Sequence dialog box, drag and drop the realms in the order in which you want the system to search for them. The following figure shows an example of a realm sequence consisting of two realms. The domain-europe.example.com realm will be searched for users before the domain.example.com realm.
|
Step 8 | Click Save. |