How to Block QUIC Traffic
As a best practice, we recommend you to block QUIC traffic. Chrome browsers have the QUIC protocol enabled by default. When you try to access Google applications using the Chrome browser, a session to a Google server is established using the QUIC protocol instead of TLS/SSL. QUIC is an experimental protocol at its early stages of development, and it uses proprietary encryption methods.
Secure Hypertext Transfer Protocol (HTTPS) uses Transmission Control Protocol (TCP), as does Hypertext Transfer Protocol (HTTP). Transmission Control Protocol is connection oriented or stateful. HTTPS uses TCP port 443 and HTTP uses TCP port 80. HTTP/3 runs on the QUIC protocol. For QUIC, HTTP/3 relies on the User Datagram Protocol (UDP), not the TCP.
QUIC could inadvertently have a negative impact on network security. Security appliances, such as firewalls and network sensors, typically are not able to access information that can be accessed with legacy TCP sessions. With the QUIC traffic getting blocked by the firewall, the Chrome browser falls back to using traditional TLS/SSL. Note that this does not cause loss of any functionality on the browser. Firewall gains better visibility and control of Google applications with or without the SSL decryption enabled. QUIC traffic is therefore not scrutinized as it should be and it is not forwarded to the firewall's web protection features.
In this use case, we show how to create an access control rule to block QUIC and HTTP/3 traffic.
Procedure
Step 1 | Choose and edit the access control policy. |
Step 2 | Click Add Rule. |
Step 3 | Enter a meaningful name for the rule, such as Block-QUIC. 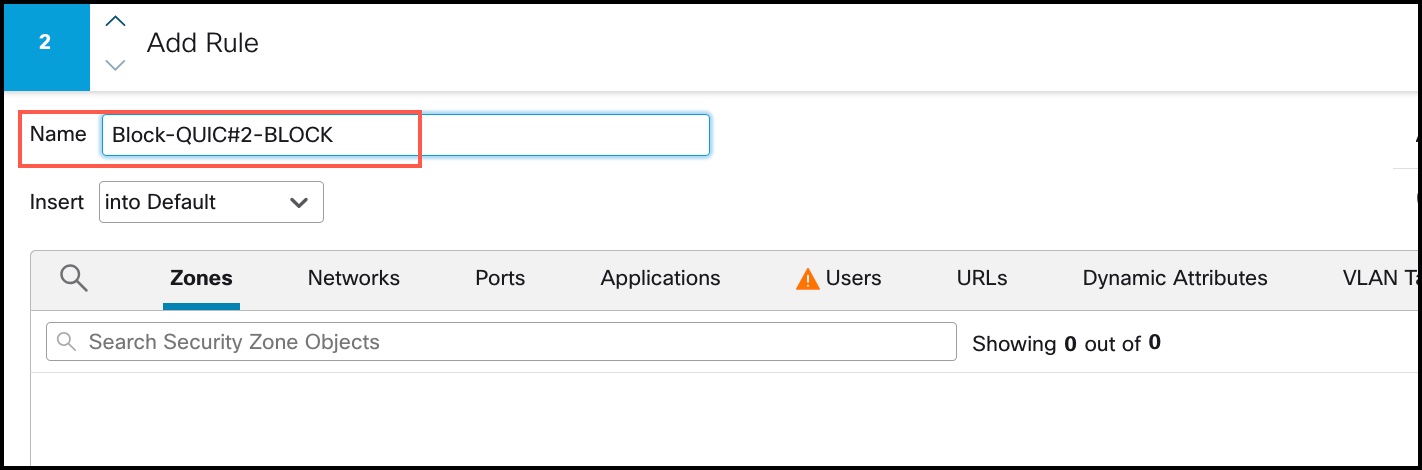
|
Step 4 | From the Actions drop-down list, choose Block. 
|
Step 5 | Click the Applications tab. |
Step 6 | Search for "quic" in the Search box and check the QUIC application check box. 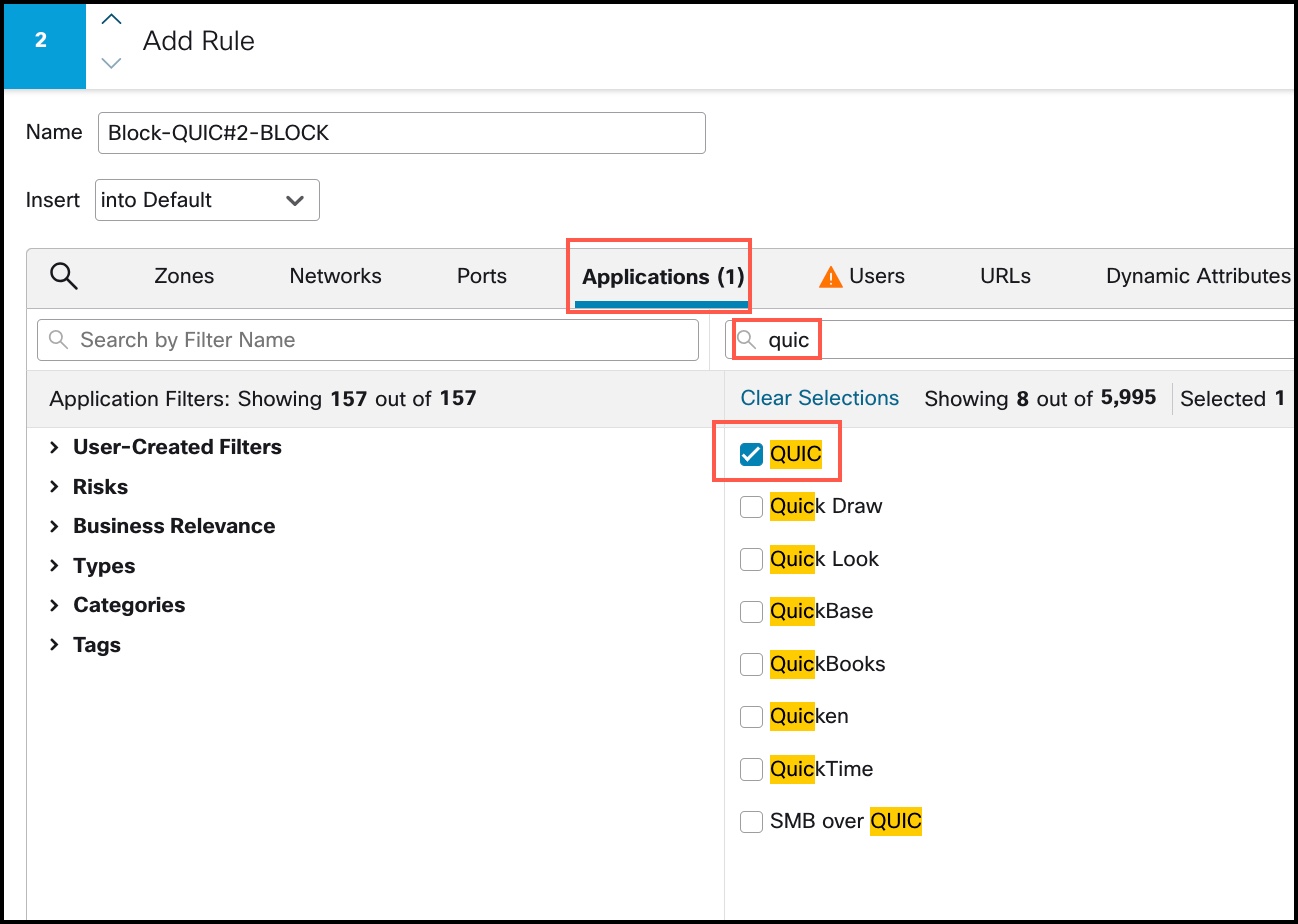
|
Step 7 | Search for "HTTP/3" in the search box and check the HTTP/3 check box. 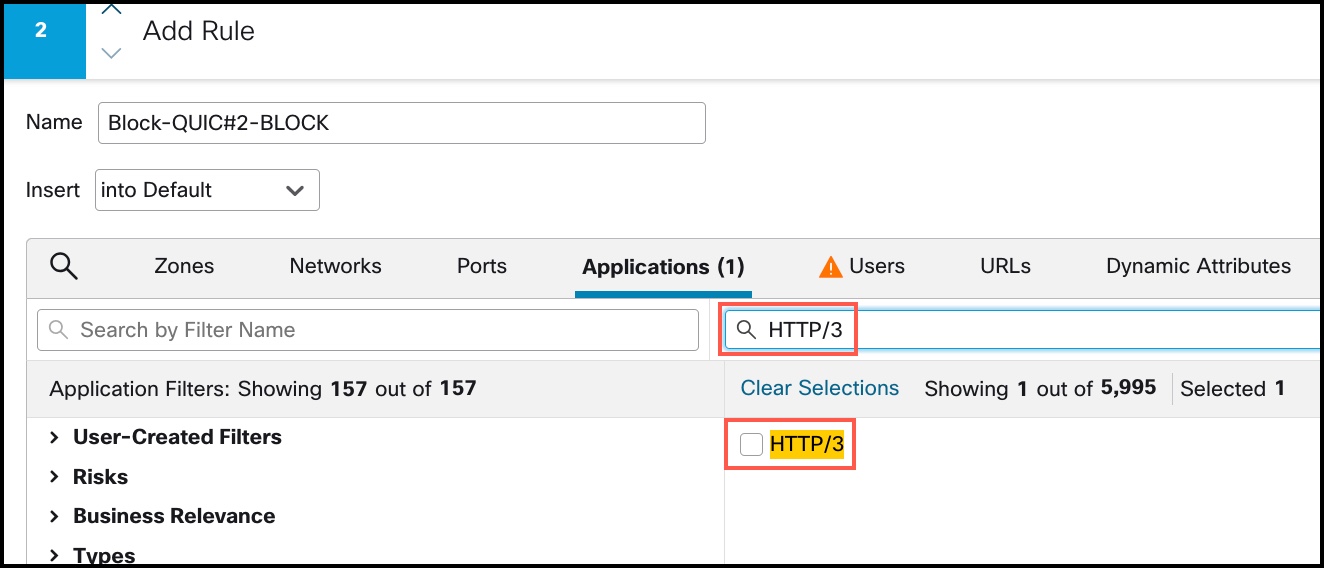
|
Step 8 | Click Add Application to add to Destinations and Applications. |
Step 9 | Click Logging next to the rule action, and enable logging at the start of the connection. You must enable logging to get information about any connections blocked by this rule. |
Step 10 | Click Apply to save the rule, and then Save to save the updated policy. |
Step 11 | Move the rule to the appropriate location in the access control policy. |
Step 12 | Deploy your changes. |