Add a Protected Web Application
This section describes steps for adding protected web applications to a DNG deployed within Secure Firewall Threat Defense.
Before you begin
-
Identify the web application you'd like to protect with Duo Network Gateway.
-
Obtain an SSL certificate for your application from a commercial certificate authority (CA) using the fully qualified external DNS name of your application as the common name (e.g. yourinternalapp.example.com). This secures the connection between your external users and the Duo Network Gateway server.
-
If the application you'll be protecting is communicating over HTTPS you will also need to obtain the Base64-encoded X.509 (pem, cer, or crt) formatted version of the application's certificate bundle including the issuing certificates and the root certificate. You may also use a wildcard SSL certificate.
-
Ensure that a minimum of one Duo Admin Panel is onboarded into your CDO tenant.
Procedure
| Step 1 | In the CDO navigation bar, choose .
| ||
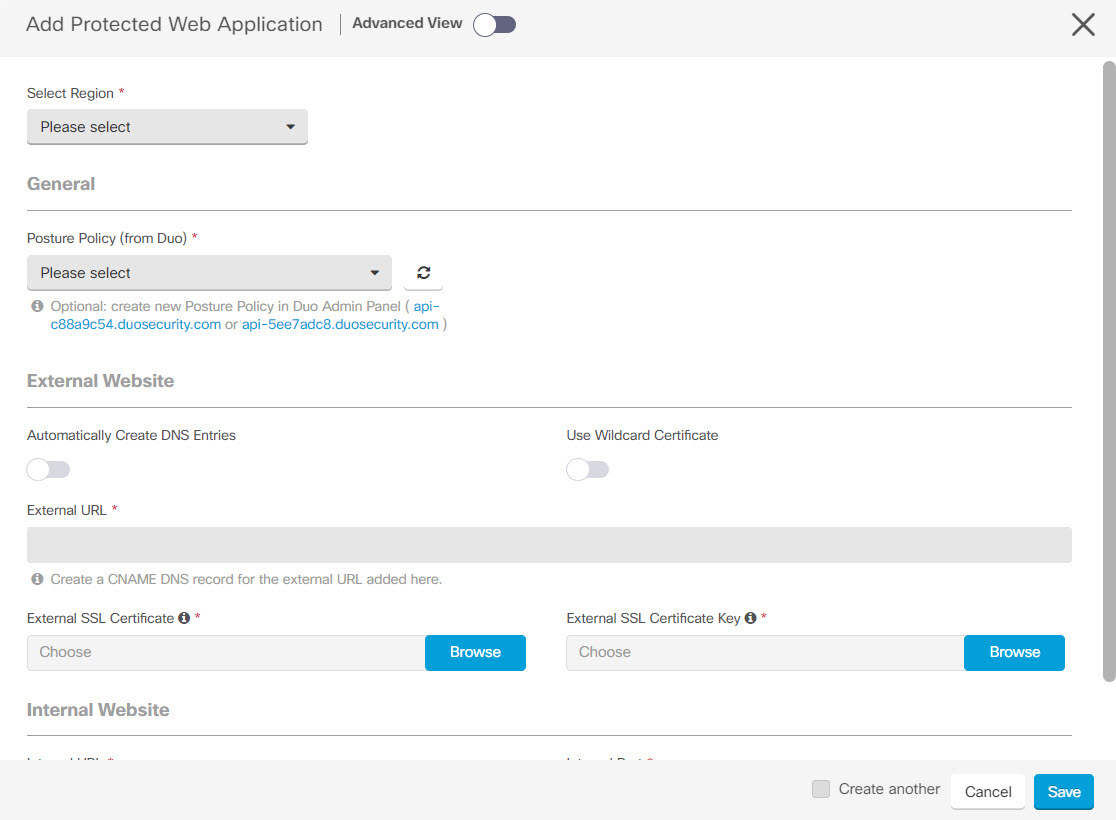
| Step 2 | In the Web Applications tab, click + to add a web application.
The Add Protected Web Application screen provides normal and advanced views. The simple view displays the minimum parameters required for creating a web application, whereas the advanced view displays advanced fields for application creation. You can move the Advanced View slider to the right to view the advanced fields required for application creation.
| ||
| Step 3 | In the normal view, you can configure the following fields:
| ||
| Step 4 | If you have enabled the advanced view, you can configure the following fields:
| ||
| Step 5 | If you want to create another web application with the same values, click Create another. | ||
| Step 6 | Click Save. A new web application is created. If you have opted to create another web application, most of the common fields from the previous application are copied automatically to the next application created. After you make a configuration change using the CDO GUI and save your change, that change is saved in CDO's stored version of the firewall's running configuration file. | ||
| Step 7 | Deploy the changes you made to the region. See Deploy the Configuration Changes. |