Configure an EtherChannel
An EtherChannel (also known as a port channel) can include up to 8 member interfaces of the same media type and capacity, and must be set to the same speed and duplex. The media type can be either RJ-45 or SFP; SFPs of different types (copper and fiber) can be mixed. You cannot mix interface capacities (for example 1GB and 10GB interfaces) by setting the speed to be lower on the larger-capacity interface, unless you set the speed to Detect SFP; in this case, you can use different interface capacities, and the lowest common speed is used.
The Link Aggregation Control Protocol (LACP) aggregates interfaces by exchanging the Link Aggregation Control Protocol Data Units (LACPDUs) between two network devices. LACP coordinates the automatic addition and deletion of links to the EtherChannel without user intervention. It also handles misconfigurations and checks that both ends of member interfaces are connected to the correct channel group. “On” mode cannot use standby interfaces in the channel group when an interface goes down, and the connectivity and configurations are not checked.
When the chassis creates an EtherChannel, the EtherChannel stays in a Suspended state for Active LACP mode or a Down state for On LACP mode until you assign it to a logical device, even if the physical link is up. The EtherChannel will be brought out of this Suspended state when it is added to an instance.
Before you begin
Enable physical interfaces and set hardware parameters. See Configure a Physical Interface.
Procedure
Step 1 | From , click Manage in the Chassis column or click Edit ( 
The Chassis Manager page opens for the chassis to the Summary page. | ||
Step 2 | Click Interfaces. 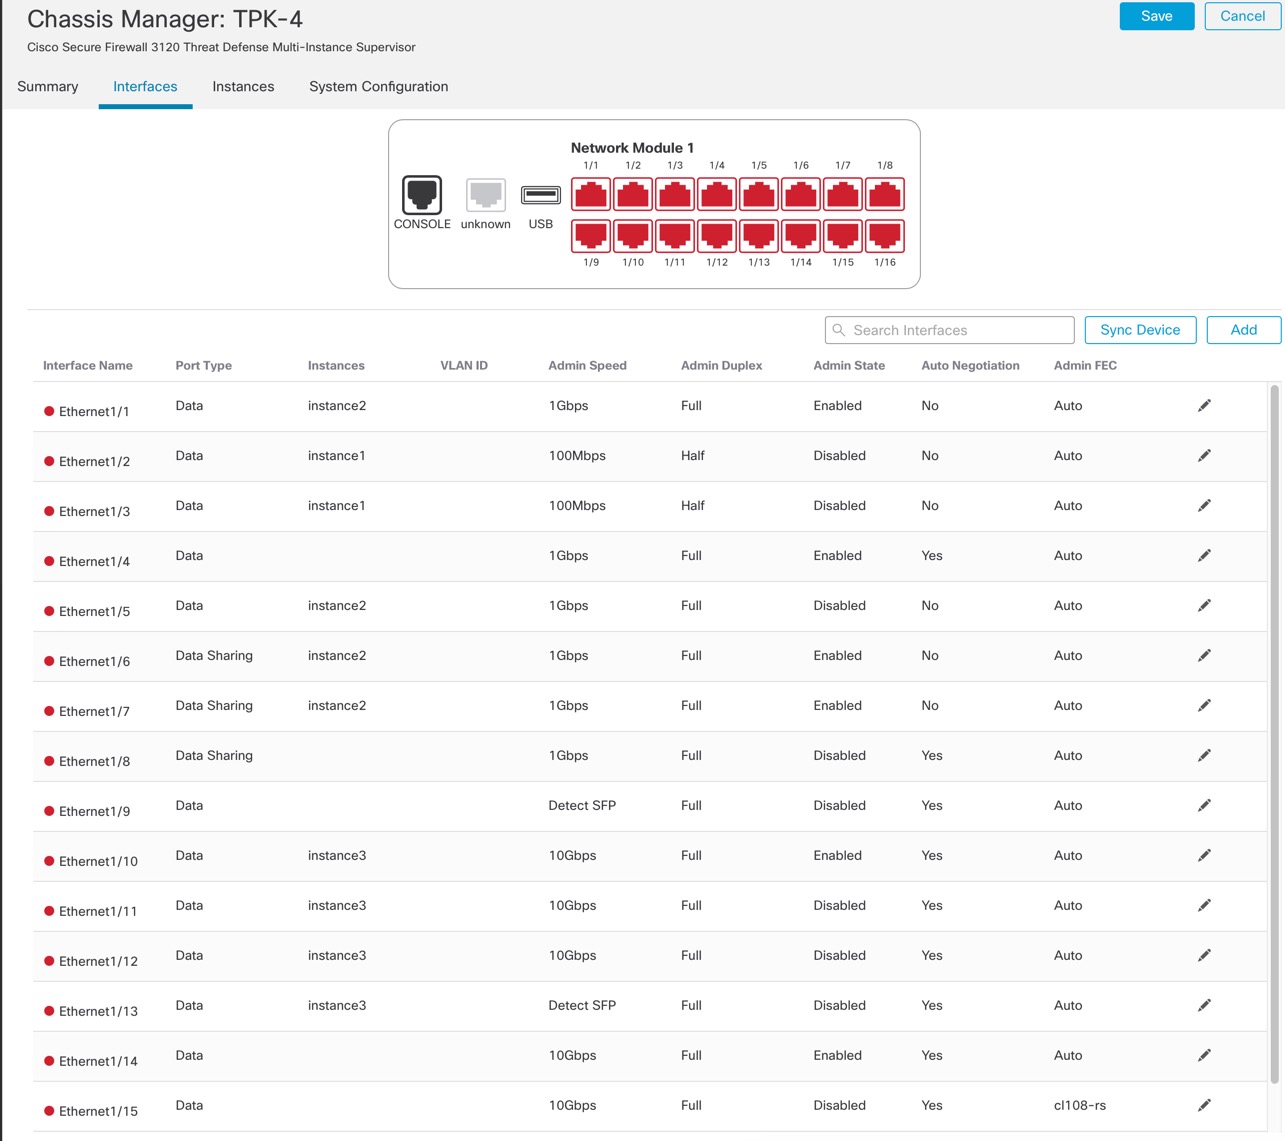
| ||
Step 3 | Click . 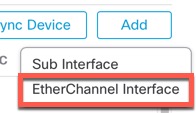
| ||
Step 4 | Set the following Interfaces parameters. 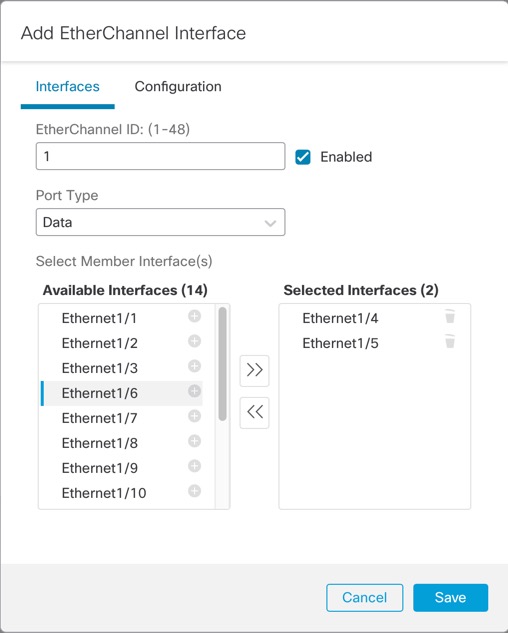
| ||
Step 5 | (Optional) Set the following Configuration parameters. Many of these settings (excluding the LACP settings) set the requirements for interfaces to be included in the EtherChannel; they do not override the settings of member interfaces. So if you check LLDP Transmit, for example, you should only add interfaces that have that setting. If you set the Admin Speed to 1Gbps, then only 1Gbps interfaces can be included. 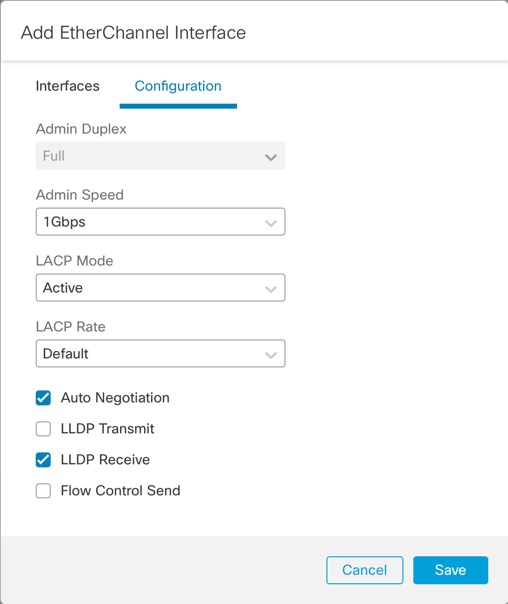
| ||
Step 6 | Click Save and then Save in the top right of the Interfaces page. You can now Deploy the policy to the chassis. The changes are not active until you deploy them. |
