Edit cluster health monitor settings
This task allows you to modify cluster health monitor settings to control how cluster nodes monitor system health and automatically rejoin the cluster after failures.
The Cluster Health Monitor Settings section of the Cluster page displays the settings for monitoring cluster node health. You can monitor any port-channel ID, any single physical interface ID, and the Snort and disk-full processes. Health monitoring is not performed on VLAN subinterfaces or virtual interfaces such as VNIs or BVIs. You cannot configure monitoring for the cluster control link. It is always monitored.
When a topology change occurs (such as adding or removing a data interface, enabling or disabling an interface on the node or the switch, or adding an additional switch to form a VSS or vPC or VNet) you should disable the system health check feature. Also, disable interface monitoring for any interfaces that are disabled. When the topology change is complete, and the configuration change is synced to all nodes, you can re-enable the system health check feature and monitored interfaces.
Procedure
Step 1 | Choose . |
Step 2 | Next to the cluster you want to modify, click Edit ( |
Step 3 | Click Cluster. |
Step 4 | In the Cluster Health Monitor Settings section, click Edit ( |
Step 5 | Disable the system health check by clicking the Health Check slider. 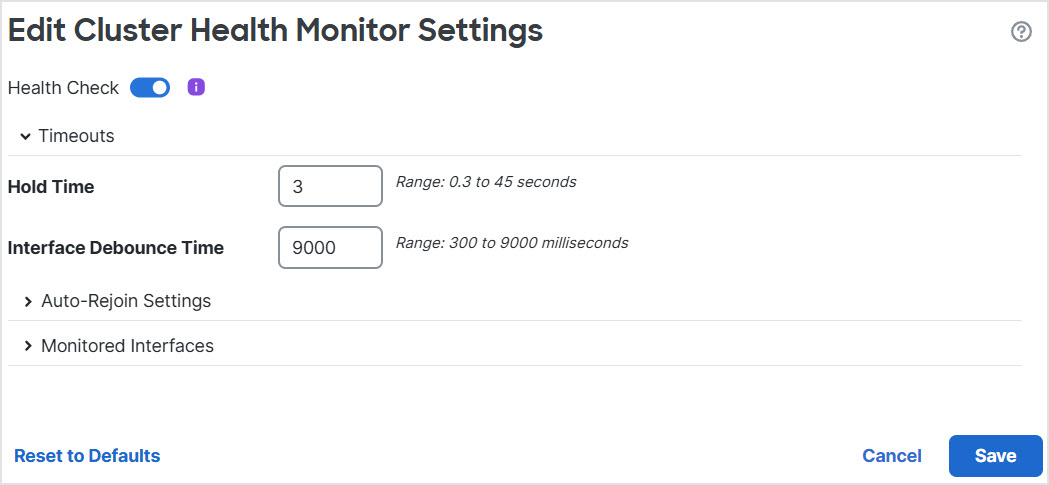
When any topology changes occur (such as adding or removing a data interface, enabling or disabling an interface on the node or the switch, or adding an additional switch to form a VSS or vPC or VNet) you should disable the system health check feature and also disable interface monitoring for the disabled interfaces. When the topology change is complete, and the configuration change is synced to all nodes, you can re-enable the system health check feature and monitored interfaces. |
Step 6 | Configure the hold time and interface debounce time.
|
Step 7 | Customize the auto-rejoin cluster settings after a health check failure. 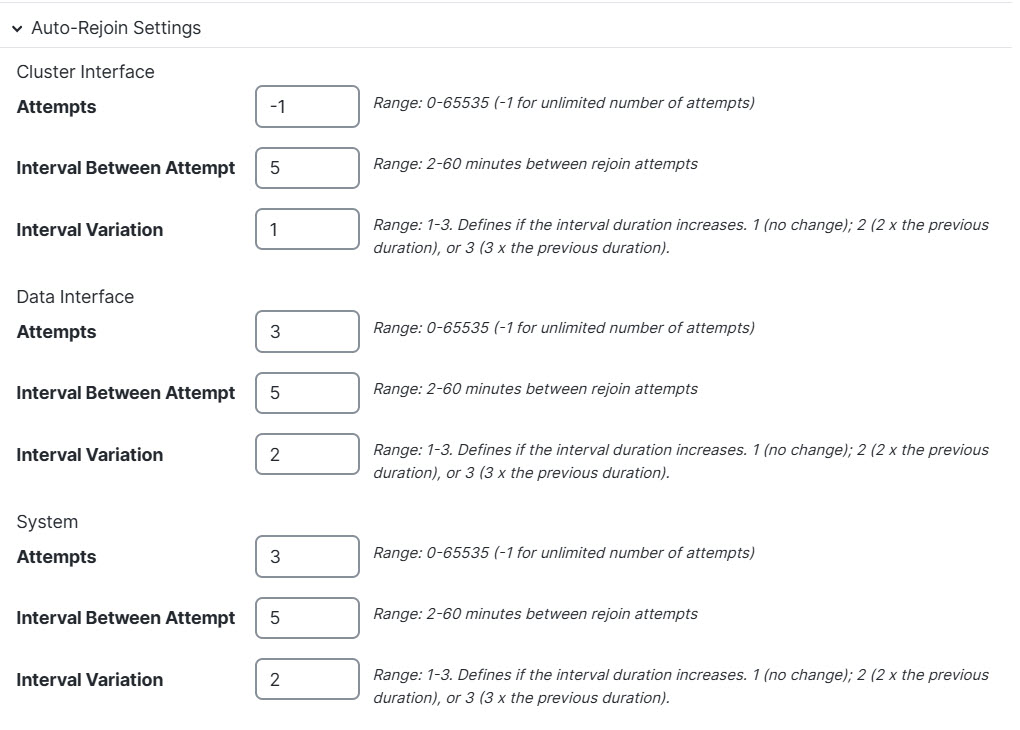
Set values for the Cluster Interface, Data Interface, and System (internal failures include: application sync timeout; inconsistent application statuses; and so on):
|
Step 8 | Configure monitored interfaces by moving interfaces in the Monitored Interfaces or Unmonitored Interfaces window. You can also check or uncheck Enable Service Application Monitoring to enable or disable monitoring of the Snort and disk-full processes. 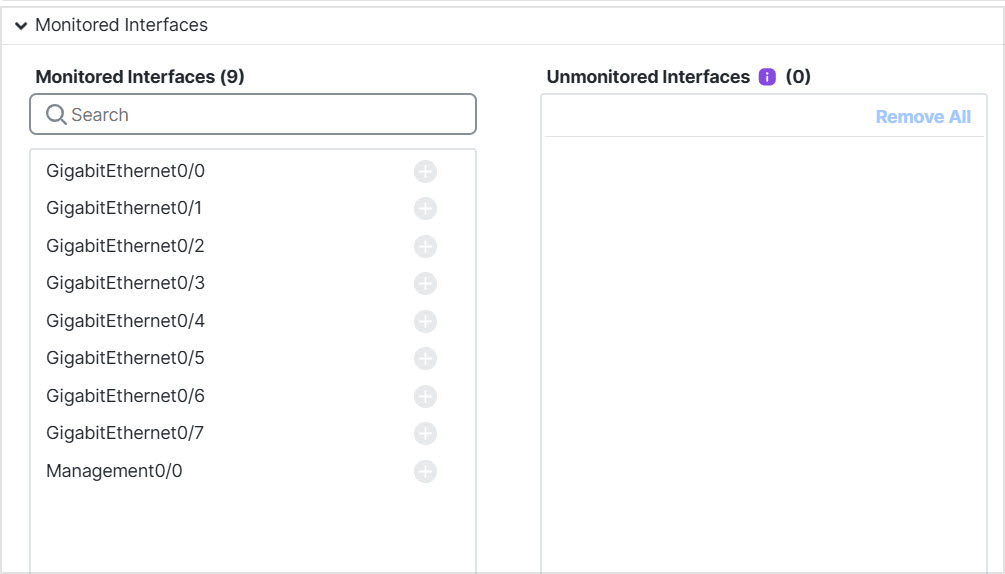
The interface health check monitors for link failures. If all physical ports for a given logical interface fail on a particular node, but there are active ports under the same logical interface on other nodes, then the node is removed from the cluster. The time required to remove a member from the cluster depends on the type of interface and whether the node is established or is joining the cluster. By default, health check is enabled for all interfaces and the Snort and disk-full processes. You might want to disable health monitoring of non-essential interfaces. When any topology changes occur (such as adding or removing a data interface, enabling or disabling an interface on the node or the switch, or adding an additional switch to form a VSS or vPC or VNet) you should disable the system health check feature and also disable interface monitoring for the disabled interfaces. When the topology change is complete, and the configuration change is synced to all nodes, you can re-enable the system health check feature and monitored interfaces. |
Step 9 | Click Save. Deploy configuration changes. |
