Configure Security Cloud Control for cross-domain-trust step 1: Configure realms and directories
This task configures the Cloud-Delivered Firewall Management Center to recognize Active Directory servers in a cross-domain trust relationship, enabling the discovery and use of users and groups from multiple domains in access control policies.
This is the first task in a step-by-step procedure that explains how to configure the Cloud-Delivered Firewall Management Center to recognize Active Directory servers configured in a cross-domain trust relationship, which is an increasingly common configuration for enterprise organizations. For an overview of this sample configuration, see Cross-domain trust setups with Cloud-Delivered Firewall Management Center.
If you set up the system with one realm for each domain and one directory for each domain controller, the system can discover up to 100,000 foreign security principals (users and groups). If these foreign security principals match a user downloaded in another realm, then they can be used in access control policy.
Before you begin
You must configure Microsoft Active Directory servers in a cross-domain trust relationship; see Realms and trusted domains for more information.
If you authenticate users with LDAP, you cannot use this procedure.
Procedure
Step 1 | Log in to the Security Cloud Control. | ||
Step 2 | Click . | ||
Step 3 | Click Add Realm > Active Directory/LDAP. | ||
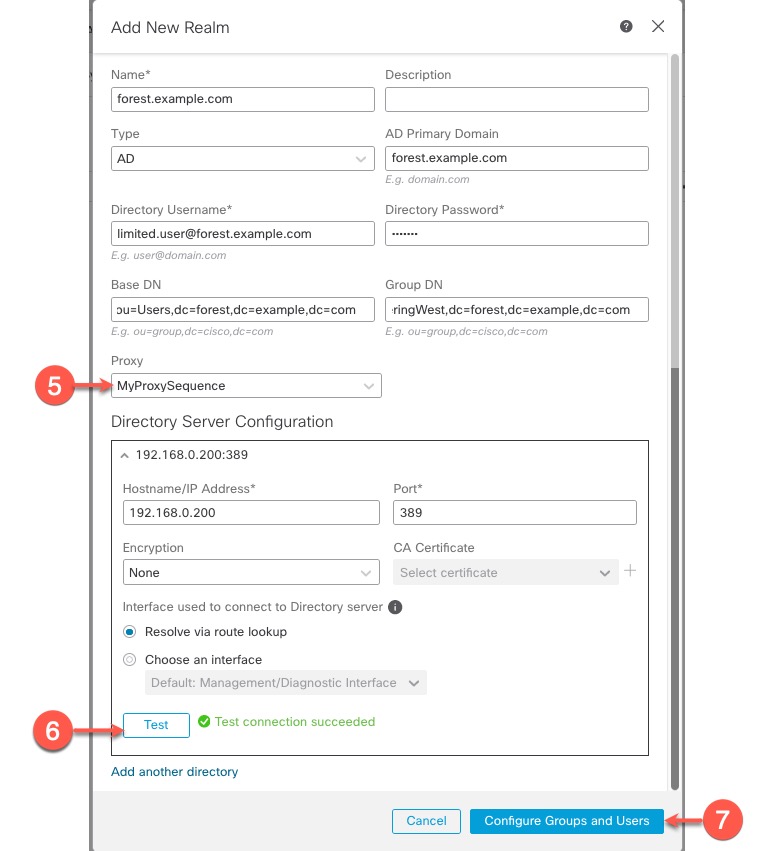
Step 4 | Enter the following information to configure forest.example.com .
| ||
Step 5 | Proxy is an optional managed device or proxy sequence to communicate with ISE/ISE-PIC if Security Cloud Control is unable to do so. For example, your Security Cloud Control might be in a public cloud but the ISE/ISE-PIC server might be on an internal intranet. | ||
Step 6 | Click Test and make sure the test succeeds before you continue. | ||
Step 7 | Click Configure Groups and Users. | ||
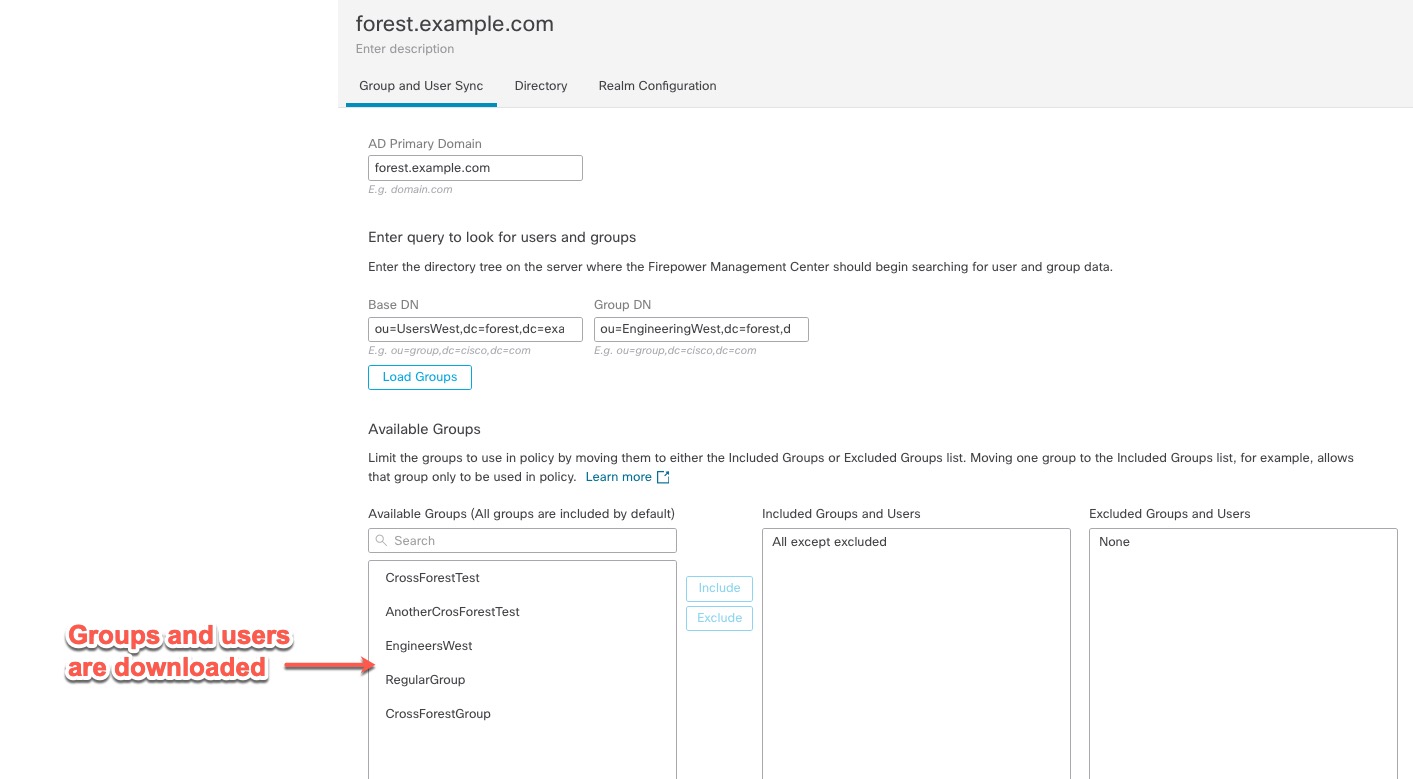
Step 8 | Verify your configuration was successful by checking that the next page is displayed similar to the following.
| ||
Step 9 | If you made changes on this page or tab pages, click Save. |
Create another realm
Before you begin
Complete the configuration of your first realm as in the prior task.
Follow these steps to create another realm.
Procedure
| Command or Action | Purpose | |
|---|---|---|
Step 1 | Click . | |
Step 2 | Click Add Realm. | |
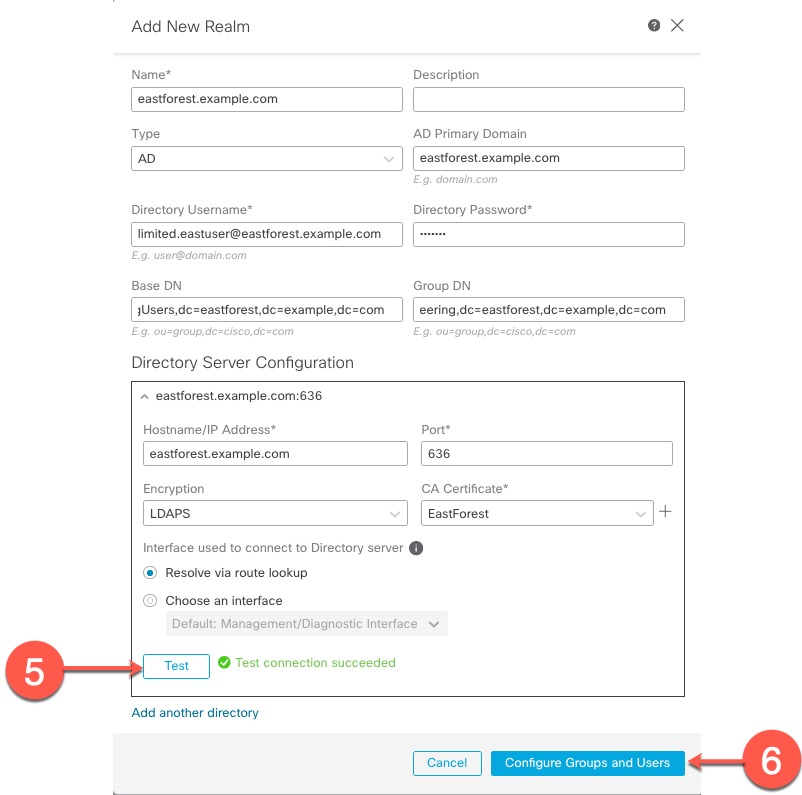
Step 3 | Enter the following information to configure eastforest.example.com . |
|
Step 4 | Click Test and make sure the test succeeds before you continue. | |
Step 5 | Click Configure Groups and Users. | |
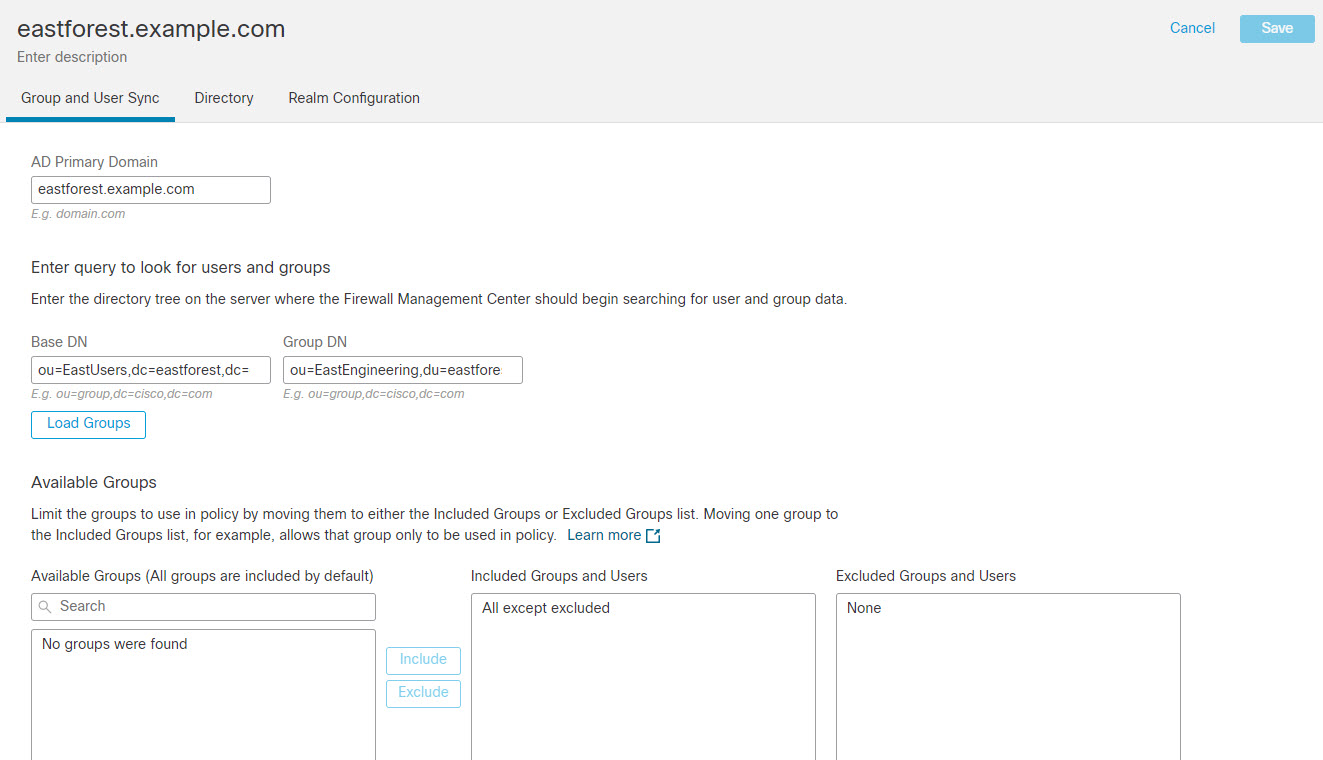
Step 6 | Verify your configuration was successful by checking that the next page is displayed similar to the following. |
|
You have successfully configured two realms (forest.example.com and eastforest.example.com ) with their respective directories.