Activate the app instance
Activate an app instance to create a pxGrid Cloud identity source that sends user session data to the Cloud-Delivered Firewall Management Center.
There is a one-hour time limit on the one-time password (OTP) required to complete this procedure successfully. You do not need to log in to Cisco ISE.
Before you begin
Complete the task discussed in Create the identity source.
Follow these steps to activate the app instance:
Procedure
Step 1 | Log in to the Cisco Catalyst Cloud Portal. |
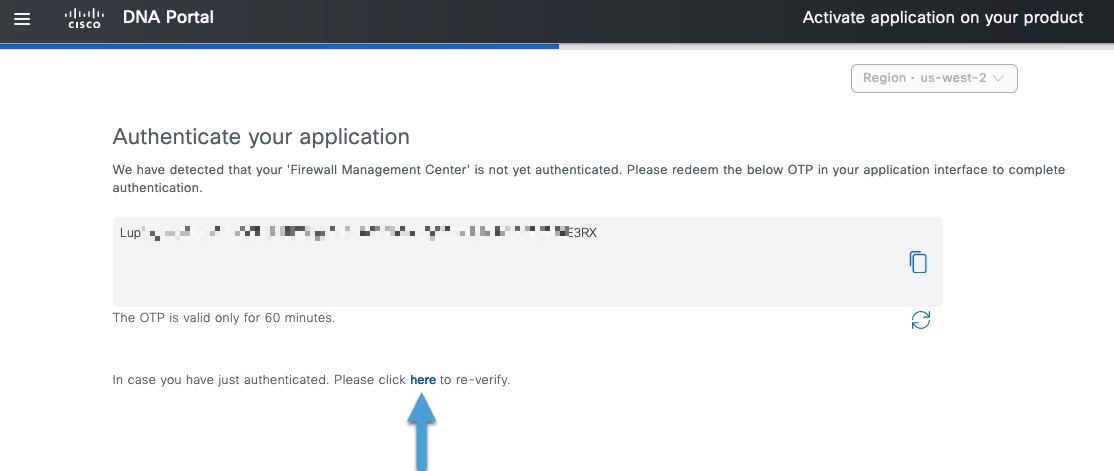
Step 2 | Reverify the app by clicking the word here as the following figure shows.
|
Step 3 | Click the name of the application instance you just created in Cloud-Delivered Firewall Management Center. |
Step 4 | Click Next. Example:
|
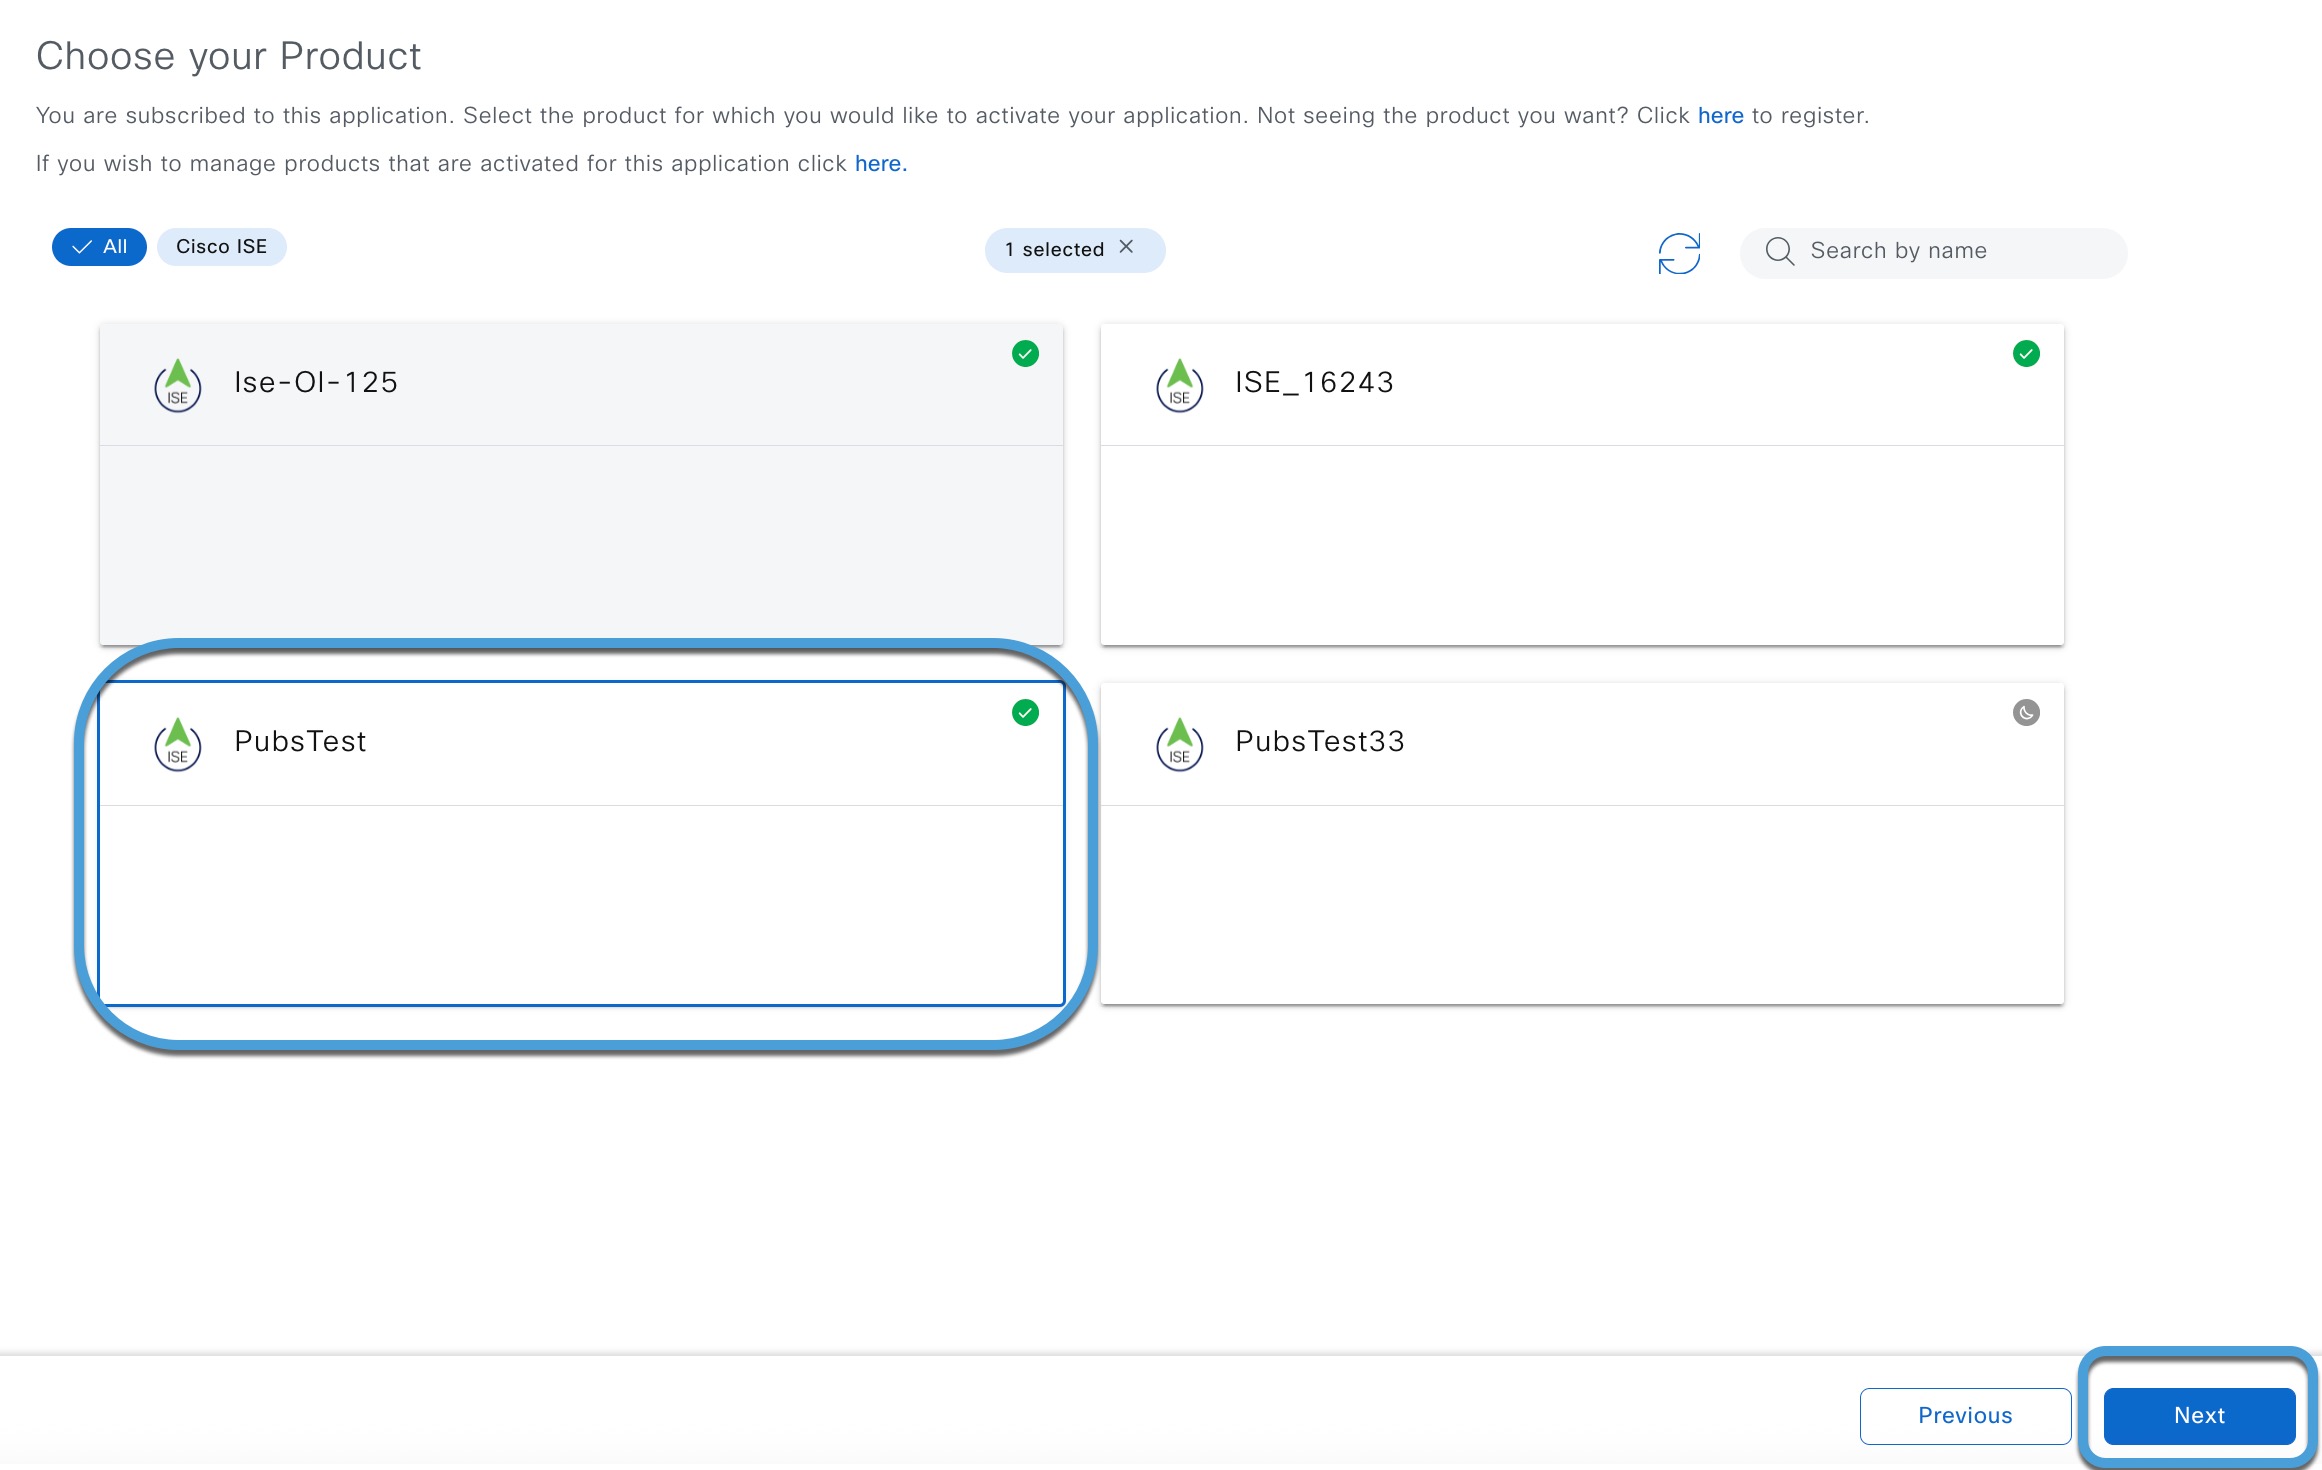
Step 5 | On the Choose Product page, click the name of the Cisco ISE product and click Next. Example:
|
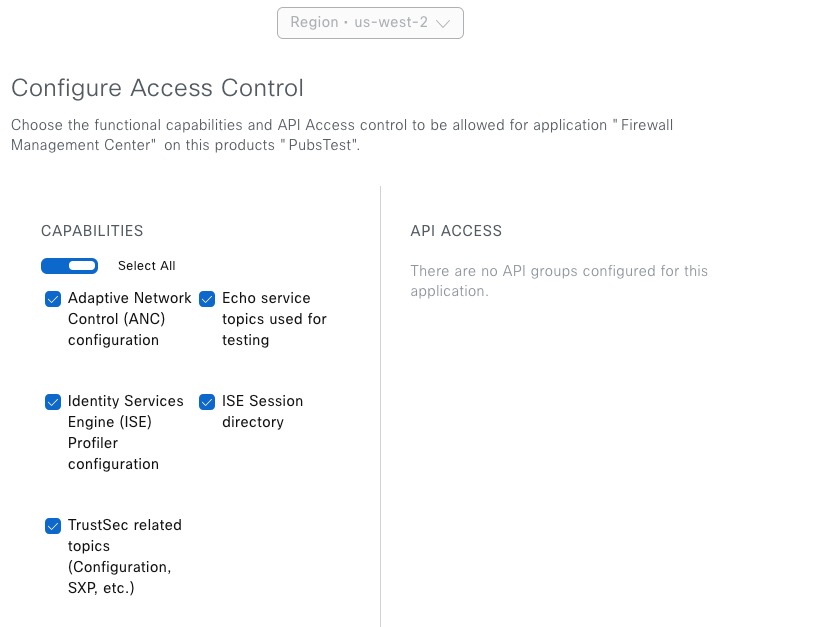
Step 6 | Select the check box next to each scope. The following figure shows an example.
|
Step 7 | Click Next. |
Step 8 | Review the displayed information for accuracy. Make sure all scopes are selected. |
Step 9 | Click Activate. It can take several minutes for the app instance to be activated. Continue with Activate the pxGrid Cloud identity source. |