Install a Secure Event Connector on an SDC Virtual Machine
The Secure Event Connector (SEC) receives events from ASA and FDM-managed devices and forwards them to the Cisco cloud. Security Cloud Control displays the events on the Event Logging page enabling you to analyze the security events from all devices in one place.
You can install one SEC on the same virtual machine as a Secure Device Connector, if you have one; or you can install the SEC on it's own Security Cloud Control Connector virtual machine that you maintain in your network.
This article describes installing an SEC on the same virtual machine as an SDC. If you want to install more SECs see Installing an SEC Using a Security Cloud Control Image or Install an SEC Using Your VM Image.
Before you begin
-
Purchase the Cisco Security and Analytics Logging license. If you want to try Cisco Security and Analytics Logging out first, log in to Security Cloud Control, and on the main navigation bar, choose and click Request Trial.
-
Make sure your SDC has been installed. For more information, see Deploy a VM for Running the Secure Device Connector and Secure Event Connector.
-
Make sure the SDC is communicating with Security Cloud Control:
-
In the left pane, click .
-
Make sure that the SDC's last heartbeat was less than 10 minutes prior to the installation of the SEC and that the SDC's status is active.
-
-
System Requirements - Assign additional CPUs and memory to the virtual machine running the SDC:
-
CPU: Assign an additional 4 CPUs to accommodate the SEC to make a total of 6 CPU.
-
Memory: Assign an additional 8 GB of memory for the SEC to make a total of 10 GB of memory.
After you have updated the CPU and memory on the VM to accommodate the SEC, power on the VM and ensure that the Secure Connectors page indicates that the SDC is in the "Active" state.
-
Procedure
Step 1 | Log in to Security Cloud Control. |
Step 2 | In the left pane, click . |
Step 3 | Click the |
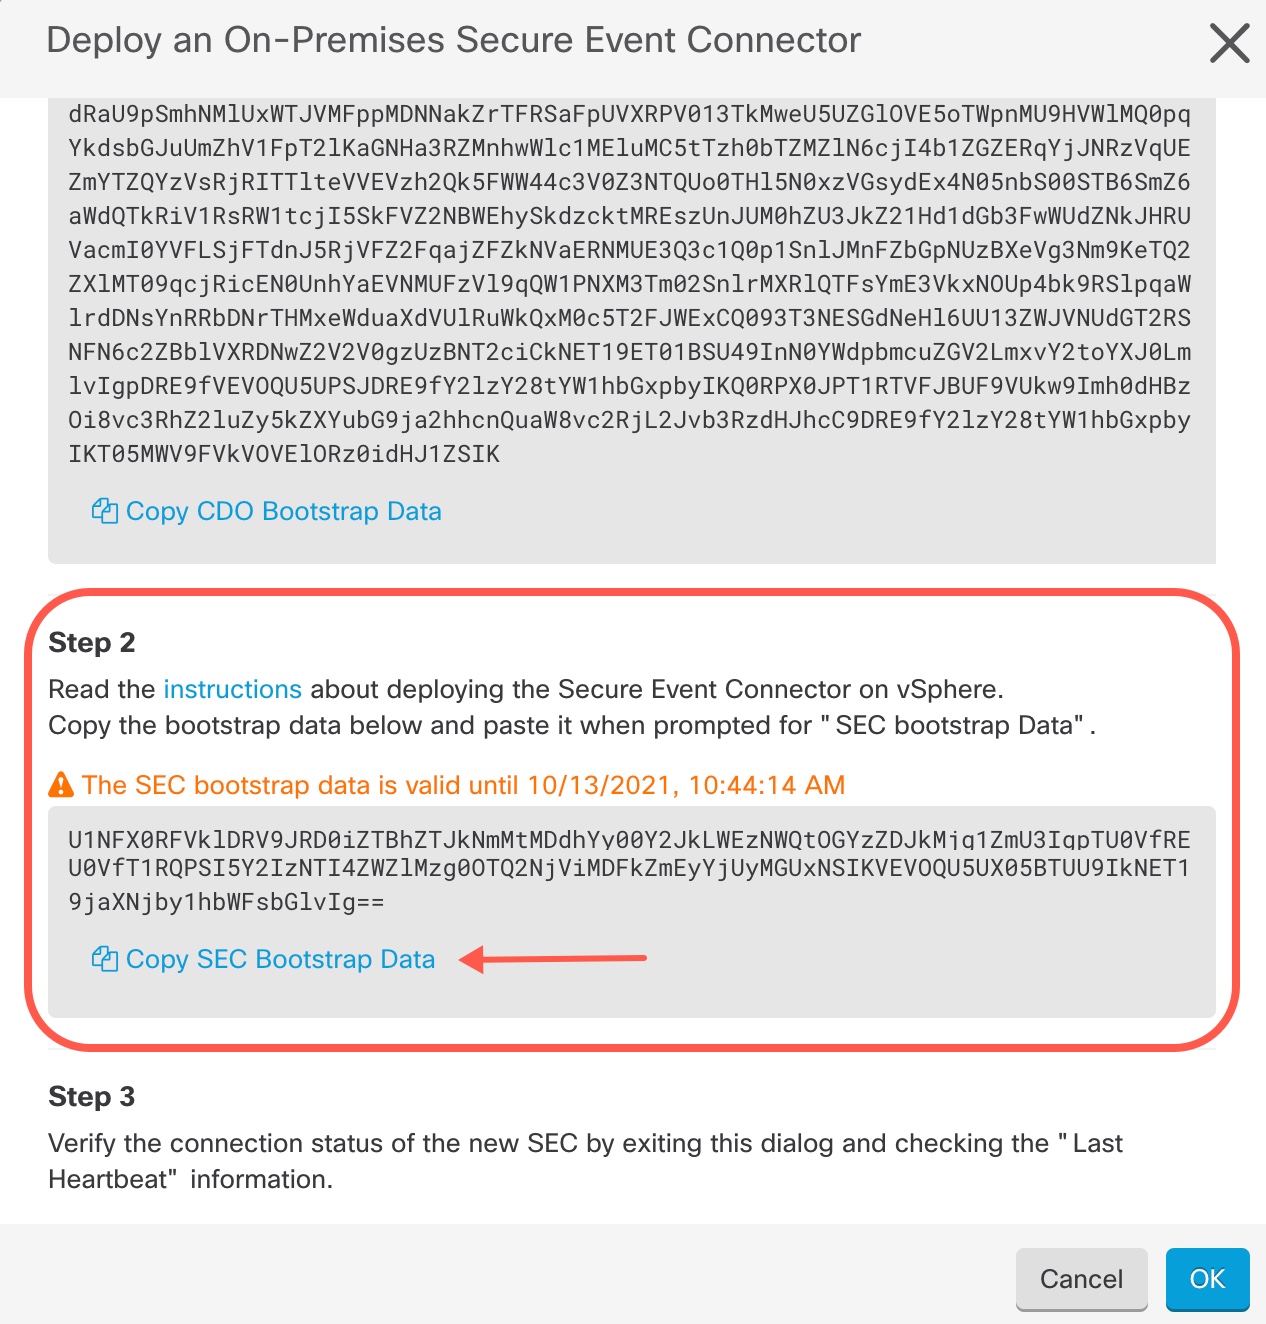
Step 4 | Skip Step 1 of the wizard and go to Step 2. In step 2 of the wizard, click the link to Copy SEC Bootstrap Data. |
Step 5 | Open a terminal window and log into the SDC as the "cdo" user. |
Step 6 | Once logged in, switch to the "sdc" user. When prompted for a password, enter the password for the "cdo" user. Here is an example of those commands: |
Step 7 | At the prompt, run the sec.sh setup script: |
Step 8 | At the end of the prompt, paste the bootstrap data you copied in step 4 and press Enter. After the SEC is onboarded, the sec.sh runs a script to check on the health of the SEC. If all the health checks are "green," the health check sends a sample event to the Event Log. The sample event shows up in the Event Log as a policy named "sec-health-check." 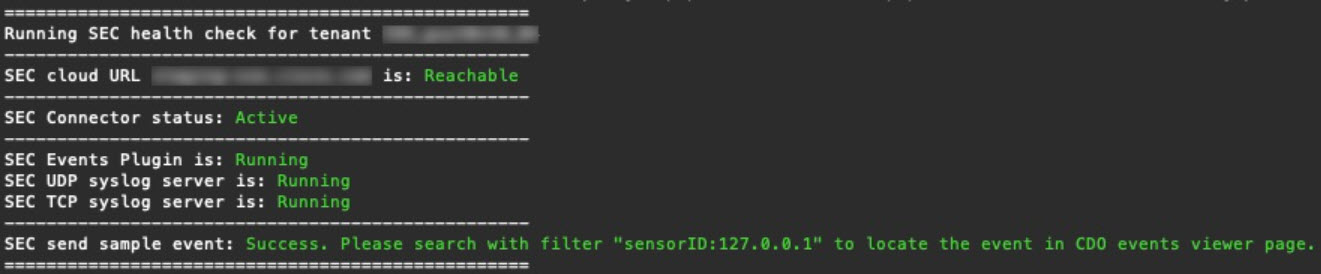 If you receive a message that the registration failed or that the SEC onboarding failed, go to Troubleshooting Secure Event connector Onboarding Failures. |
Step 9 | Determine if the VM on which the SDC and SEC are running needs additional configuration:
|