Add the Cluster to the Management Center (Manual Deployment)
Use this procedure to add the cluster to the Cloud-Delivered
Firewall Management Center if you manually deployed the cluster. If you used a template, the cluster will auto-register on the Cloud-Delivered
Firewall Management Center.
Add one of the cluster units as a new device to the Cloud-Delivered
Firewall Management Center; the Cloud-Delivered
Firewall Management Center auto-detects all other cluster members.
Before you begin
All cluster units must be in a successfully-formed cluster prior to adding
the cluster to the Cloud-Delivered
Firewall Management Center. You should also check which unit is the control unit. Use the Firewall Threat Defenseshow cluster info command.
Procedure
Step 1
In the Cloud-Delivered
Firewall Management Center, choose Devices > Device Management, and then choose Add > Add Device to add the control unit using the unit's management IP address.
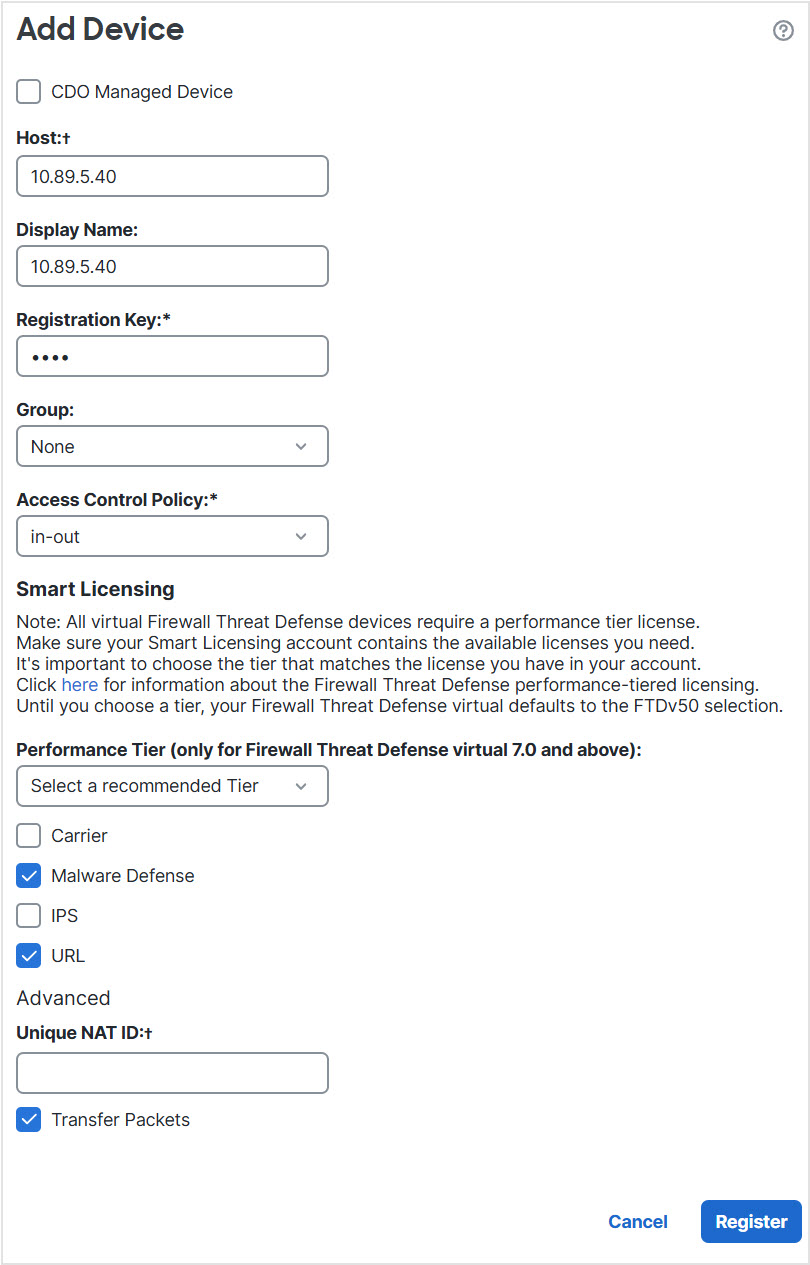
Add Device
In the Host field, enter the IP address or hostname of the control unit.
We recommend adding the control unit for the best performance, but you can add any unit of the cluster.
If you used a NAT ID during device setup, you may not need to enter this field.
In the Display Name field, enter a name for the control unit as you want it to display in the Cloud-Delivered
Firewall Management Center.
This display name is not for the cluster; it is only for the control unit you are adding. You can later change the name of other cluster members and the cluster display name.
In the Registration Key field, enter the same registration key that you used during device setup. The registration key is a one-time-use shared secret.
(Optional) Add the device to a device Group.
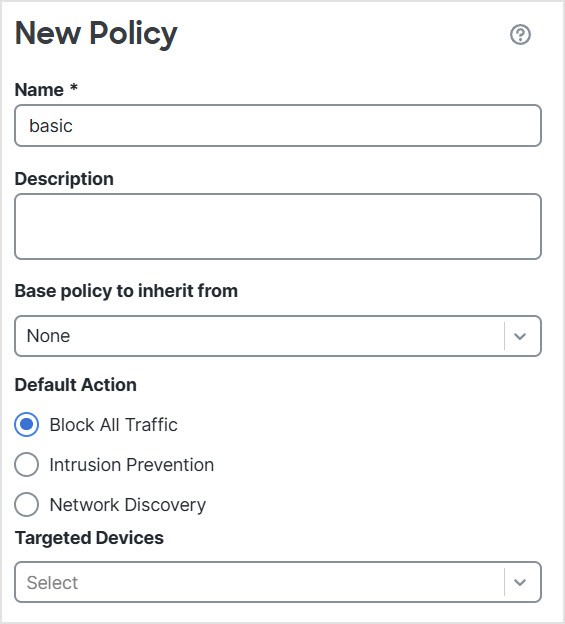
Choose an initial Access Control Policy to deploy to the device upon registration, or create a new policy.
If you create a new policy, you create a basic policy only. You can later customize the policy as needed.
Choose licenses to apply to the device.
If you used a NAT ID during device setup, expand the Advanced section and enter the same NAT ID in the Unique NAT ID field.
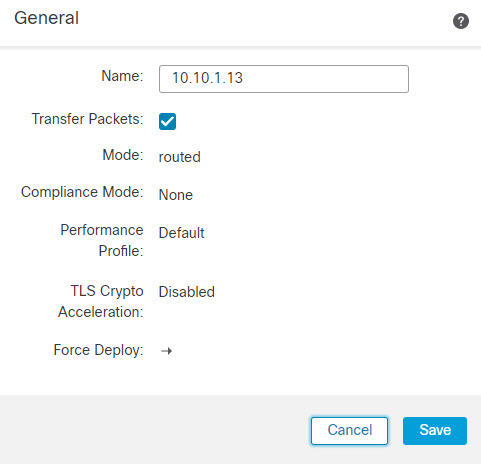
Check the Transfer Packets check box to allow the device to transfer packets to the Cloud-Delivered
Firewall Management Center.
This option is enabled by default. When events like IPS or Snort are triggered with this option enabled, the device sends event metadata information and packet data to the Cloud-Delivered
Firewall Management Center for inspection. If you disable it, only event information will be sent to the Cloud-Delivered
Firewall Management Center but packet data is not sent.
Click Register.
The Cloud-Delivered
Firewall Management Center identifies and registers the control unit, and then registers all data units. If the control unit does not successfully register, then the cluster is not added. A registration failure can occur if the cluster was not up, or because of other connectivity issues. In this case, we recommend that you try re-adding the cluster unit.
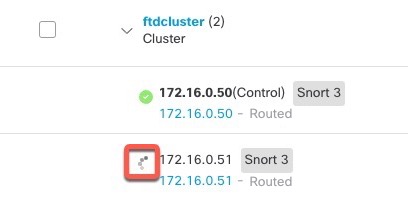
The cluster name shows on the Devices > Device Management page; expand the cluster to see the cluster units.
Cluster Management
A unit that is currently registering shows the loading icon.
Node Registration
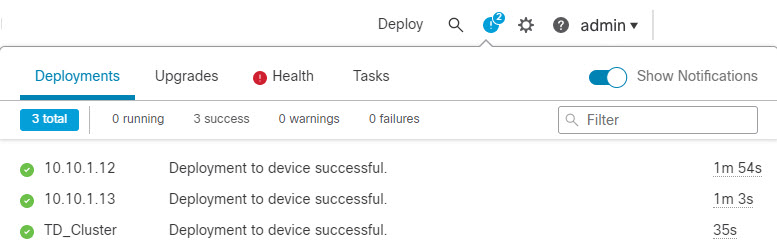
You can monitor cluster unit registration by clicking the Notifications icon and choosing Tasks. The Cloud-Delivered
Firewall Management Center updates the Cluster Registration task as each unit registers. If any units fail to register, see Reconcile Cluster Nodes.
Step 2
Configure device-specific settings by clicking the Edit () for the cluster.
Most configuration can be applied to the cluster as a whole, and not nodes in
the cluster. For example, you can change the display name per node, but you
can only configure interfaces for the whole cluster.
Step 3
On the Devices > Device Management and then choose Add, Cluster screen, you see General, License, System, and Health settings.
See the following cluster-specific items:
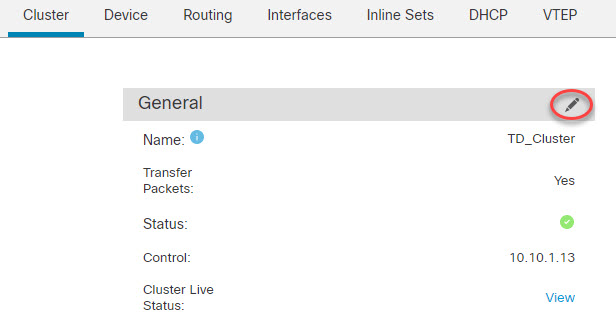
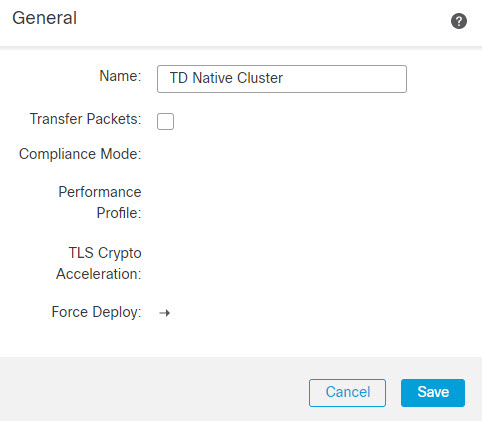
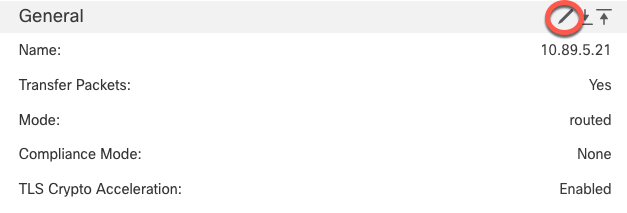
General > Name—Change the cluster display name by clicking the Edit ().
Then set the Name field.
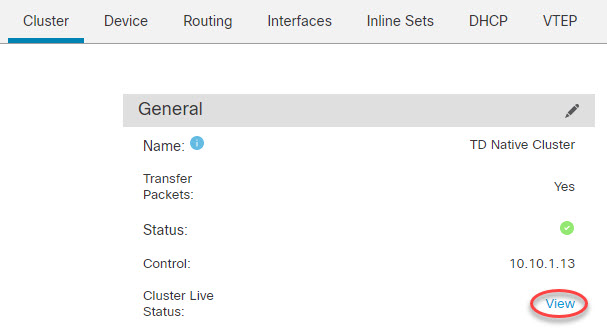
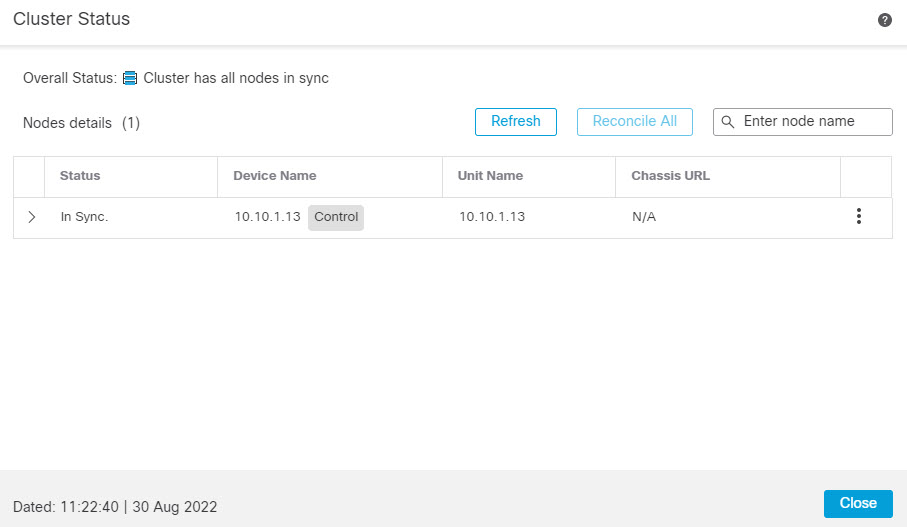
General > Cluster Live Status—Click the View link to open the Cluster Status dialog box.
The Cluster Status dialog box also lets you retry data unit registration by clicking Reconcile.
License—Click Edit () to set license entitlements.
Step 4
On the Devices > Device Management and then click Add > Device, you can choose each member in the cluster from the top right drop-down menu and configure the following settings.
General > Name—Change the cluster member display name by clicking the Edit ().
Then set the Name field.
Management > Host—If you change the management IP address in the device configuration, you must match the new address in the Cloud-Delivered
Firewall Management Center so that it can reach the device on the network; edit the Host address in the Management area.