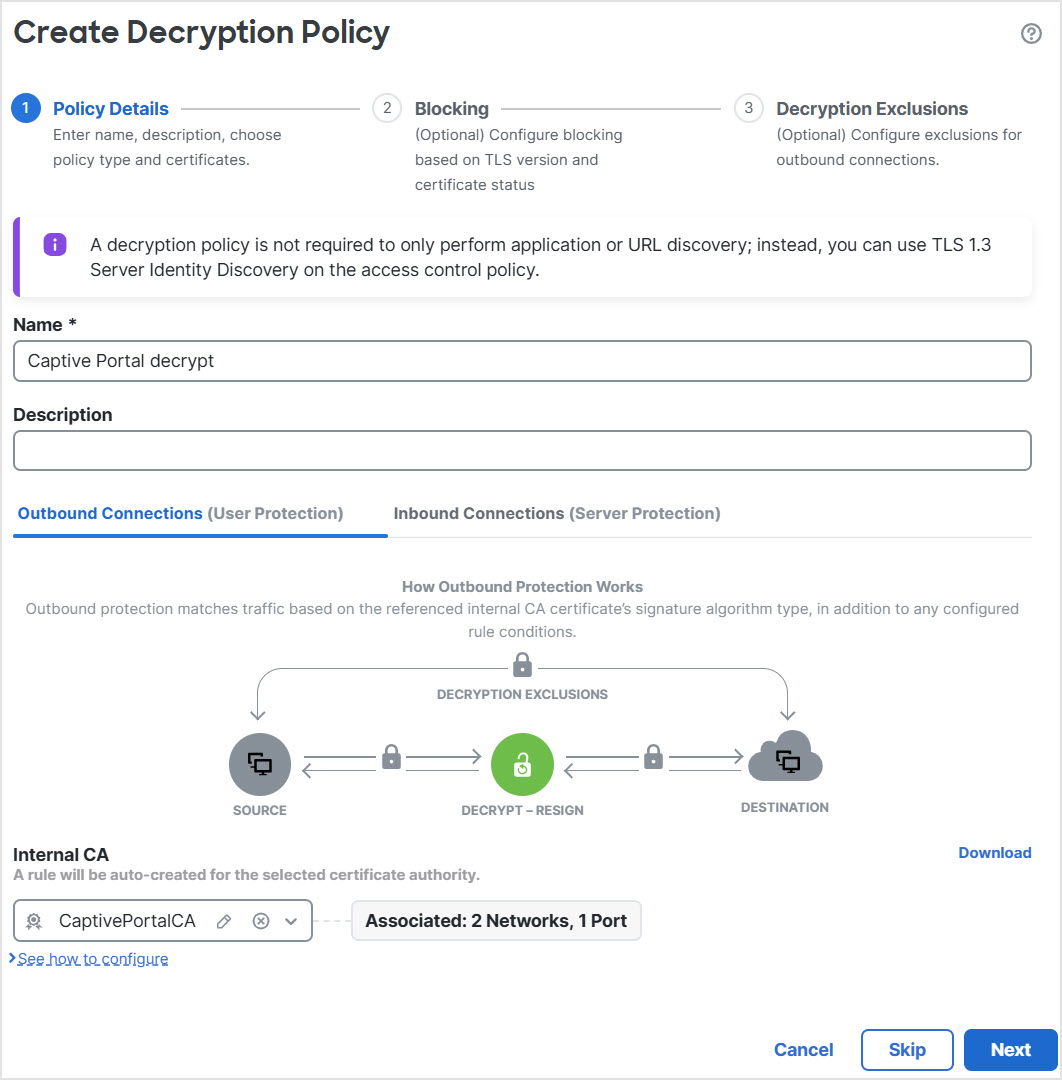
Create a decryption policy with an outbound rule
Create a decryption policy to decrypt and resign outbound traffic before captive portal authentication in the Secure Firewall Management Center.
This part of the procedure discusses how to create a decryption policy to decrypt and resign traffic before the traffic reaches the captive portal. The captive portal can authenticate traffic only after it has been decrypted.
Before you begin
You must have an internal certificate authority (CA) for your outbound server; in other words, the managed device that decrypts the traffic for captive portal users to authenticate. This certificate must be different from the internal certificate you use to authenticate the captive portal with the managed device.
Procedure
Step 1 | Click . |
Step 2 | Click New Policy. |
Step 3 | Give the policy a unique Name and, optionally, a Description. |
Step 4 | Click the Outbound Connections tab.
|
Step 5 | Upload or choose certificates for the rules. The system creates one rule per combination of CA and networks/ports. |
Step 6 | (Optional.) Choose networks and ports. |
Step 7 | Click Save. |
What to do next
Configure the decryption rule.
Configure a decryption rule
Procedure
| Command or Action | Purpose | |
|---|---|---|
Step 1 | Click Edit ( | |
Step 2 | Click Edit ( | |
Step 3 | Click Users. | |
Step 4 | Above the Available Realms list, click Refresh ( | |
Step 5 | In the Available Realms list, click Special Identities. | |
Step 6 | In the Available Users list, click Unknown. | |
Step 7 | Click Add to Rule. | The following figure shows an example. 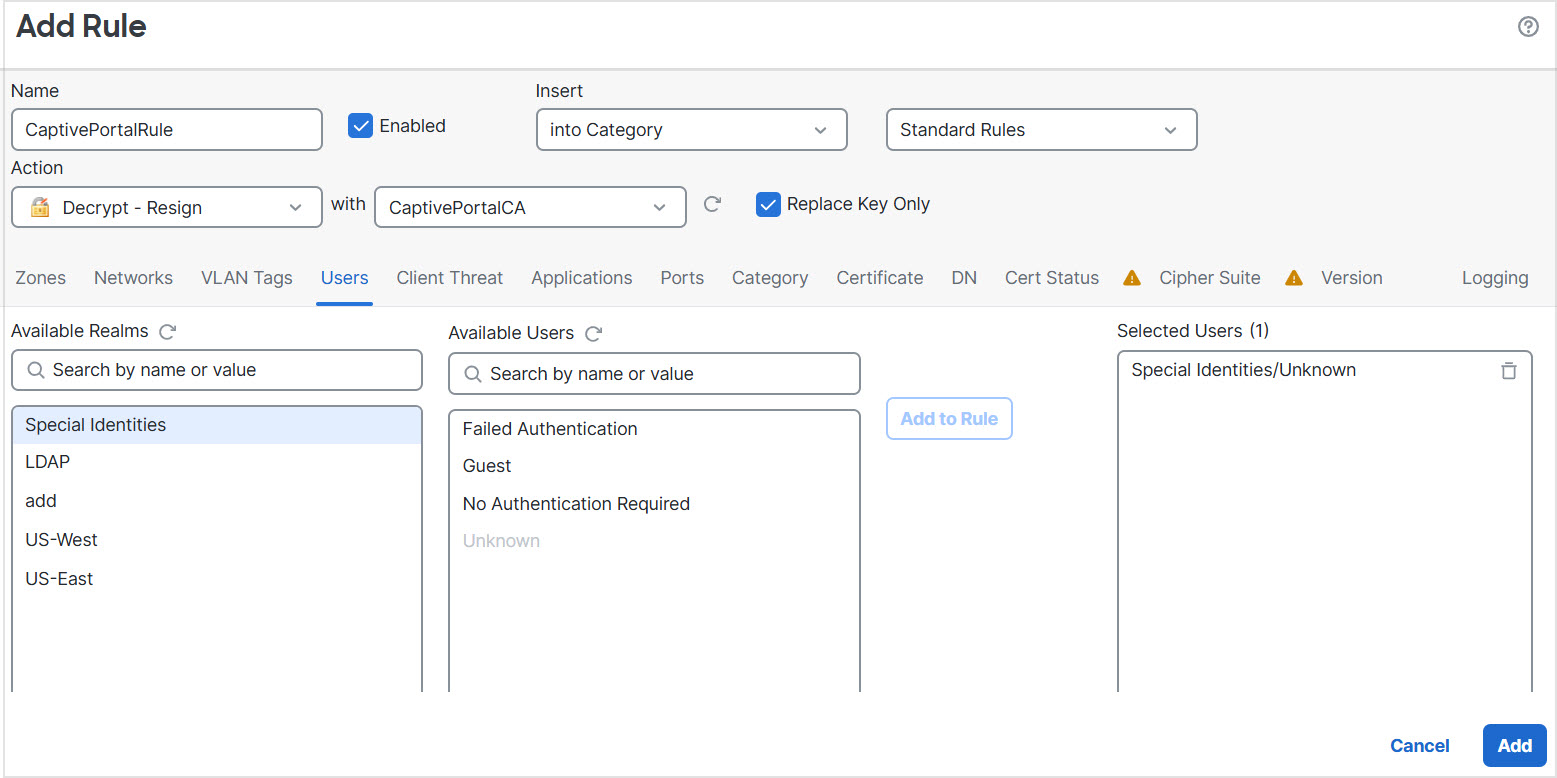 |
Step 8 | (Optional.) Set other options as discussed in Rule-based decryption rule conditions. | |
Step 9 | Click Add. |
