Create a TCP port access control rule
Create an access control rule that allows the captive portal to communicate with clients using TCP port 885, enabling secure user authentication.
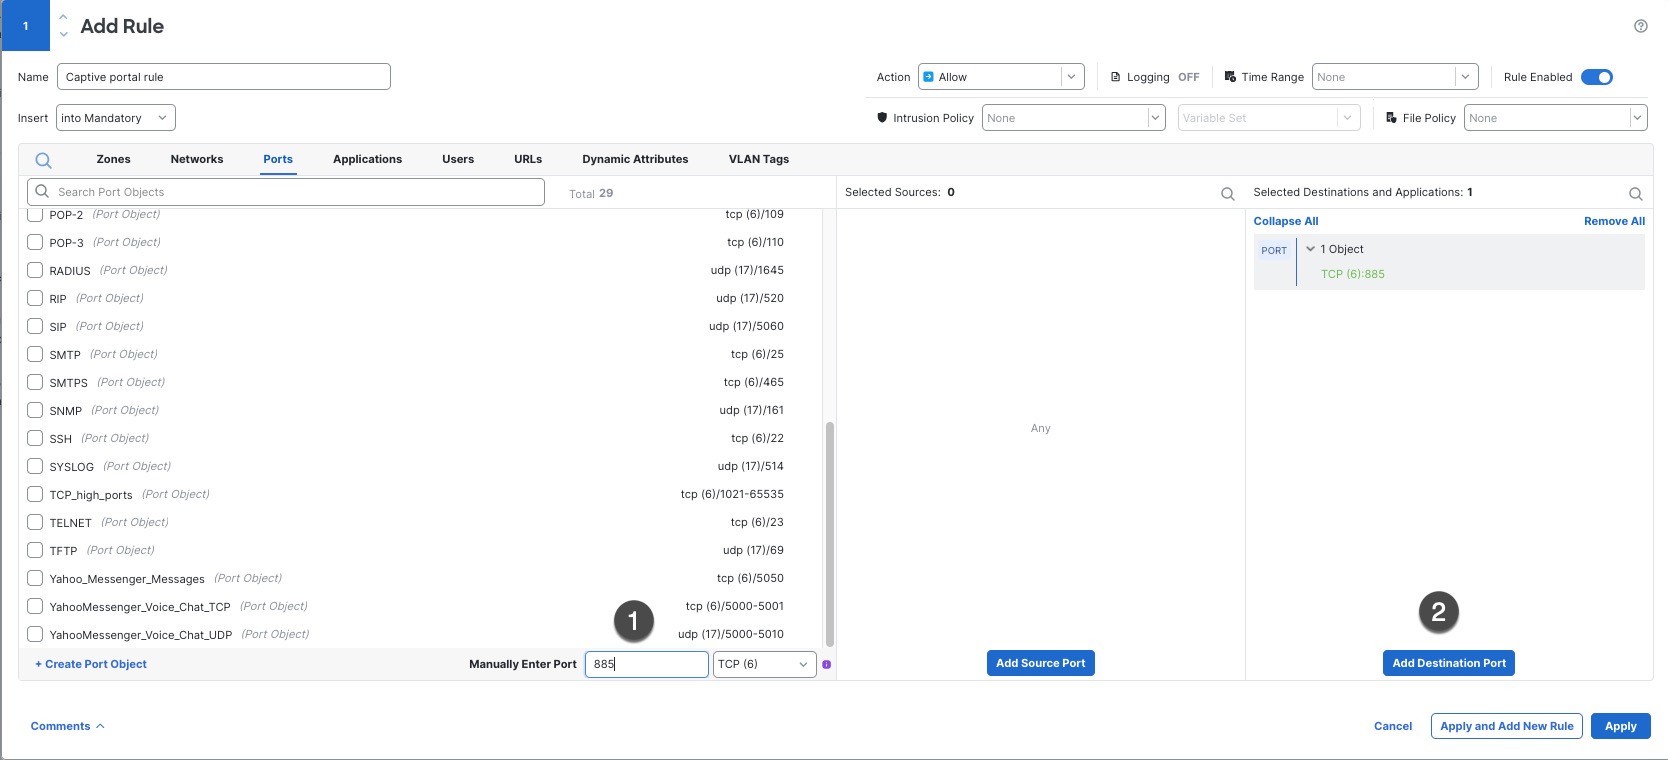
This part of the procedure shows how to create an access control rule that allows the captive portal to communicate with clients using TCP port 885, which is the captive portal's default port. You can choose another port if you wish, but the port must match the one you chose in Create an identity policy and active authentication rule.
Before you begin
For an overview of the entire captive portal configuration, see Configure the captive portal for user control.
Follow these steps to create a TCP port access control rule:
Procedure
Step 1 | Log in to the Firewall Management Center if you have not already done so. If you haven't done so already, create a certificate for the captive portal as discussed in PKI objects. |
Step 2 | Click and create or edit an access control policy. |
Step 3 | Click Add Rule. |
Step 4 | Enter a Name for the rule. |
Step 5 | Choose Allow from the Action list. |
Step 6 | Click Ports. |
Step 7 | From the Protocol list under the Selected Destination Ports field, choose TCP. |
Step 8 | In the Port field, enter 885 and click Add next to the Port field. The following figure shows an example.
|
Step 9 | Click Add at the bottom of the page. |
What to do next
Continue with Create a user access control rule.