Deploy Cluster on Azure with GWLB Using an Azure Resource Manager Template

Deploy the Virtual Machine Scale Set for Azure GWLB using the customized Azure Resource Manager (ARM) template.

Procedure


Step 1

Prepare the template.

  1. Clone the github repository to your local folder. See https://github.com/CiscoDevNet/cisco-ftdv/tree/master/cluster/azure.

  2. Modify azure_ftdv_gwlb_cluster.json and azure_ftdv_gwlb_cluster_parameters.json with the required parameters.

    OR

    Modify withoutDiagnostic templates, azure_withoutDiagnostic_ftdv_gwlb_cluster_parameters.json and azure_withoutDiagnostic_ftdv_gwlb_cluster.json, with the required parameter for deploying cluster without the diagnostic interface.

Step 2

Log into the Azure Portal: https://portal.azure.com.

Step 3

Create a Resource Group.

  1. In the Basics tab, choose the Subscription and Resource Group from the drop-down lists.

  2. Choose the required Region.

Step 4

Create a virtual network with 4 subnets: Management, Diagnostic, Outside, and Cluster Control Link (CCL).

From Secure Firewall version 7.4.1, you can deploy the cluster without the diagnostic interface. To deploy the cluster with only the Outside, Inside, Management, and CCL interfaces, use the withoutDiagnostic templates - azure_withoutDiagnostic_ftdv_gwlb_cluster_parameters.json and azure_withoutDiagnostic_ftdv_gwlb_cluster.json files.

  1. Create the virtual network.

    1. In the Basics tab, choose the Subscription and Resource Group from the drop-down lists.

    2. Choose the required Region. Click Next: IP addresses.

    In the IP Addresses tab, click Add subnet and add the following subnets – Management, Diagnostic, Data, and Cluster Control Link.

    If you are deploying the Threat Defense Virtual 7.4.1 cluster without a Diagnostic interface, then you must skip the Diagnostic subnet creation.

  2. Add the subnets.

Step 5

Deploy the custom template.

  1. Click Create > Template deployment (deploy using custom templates).

  2. Click Build your own template in the editor.

  3. Click Load File, and upload azure_ftdv_gwlb_cluster.json or azure_withoutDiagnostic_ftdv_gwlb_cluster.json, if you have opted for without diagnostic interface deployment.

  4. Click Save.

Step 6

Configure the Instance details.

  1. Enter the required values and then click Review + create.

  2. Click Create after the validation is passed.

Step 7

After the instance is running, verify the cluster deployment by logging into any one of the nodes and entering the show cluster info command.
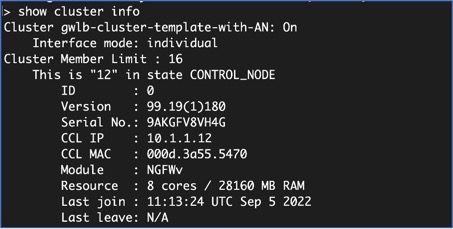
show cluster info
show cluster info

Step 8

In the Azure Portal, click the Function app to register the cluster with the Management Center.

Note

If you do not want to use the Function app, you can alternatively register the control node to the management center directly by using Add > Device (not Add > Cluster). The rest of the cluster nodes will register automatically.

Step 9

Create FTPS Credentials by clicking Deployment Center > FTPS credentials > User scope > Configure Username and Password, and then click Save.

Step 10

Upload the Cluster_Function.zip file to the Function app by executing the following curl command in the local terminal.

curl -X POST -u username --data-binary @"Cluster_Function.zip" https:// Function_App_Name.scm.azurewebsites.net/api/zipdeploy

Note

The curl command might take few minutes (~2 to 3 minutes) to complete command execution.

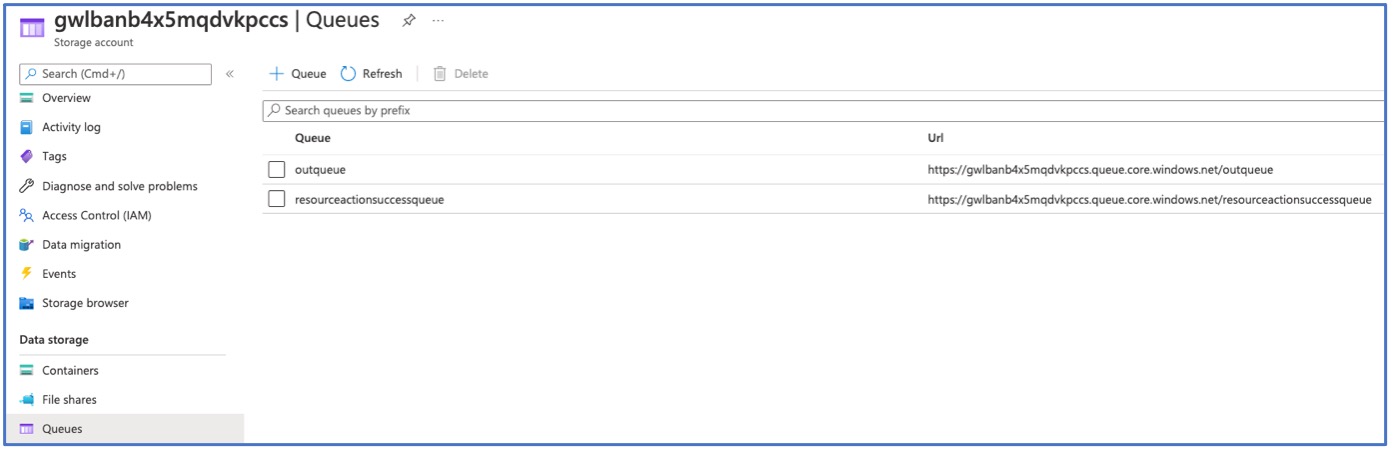
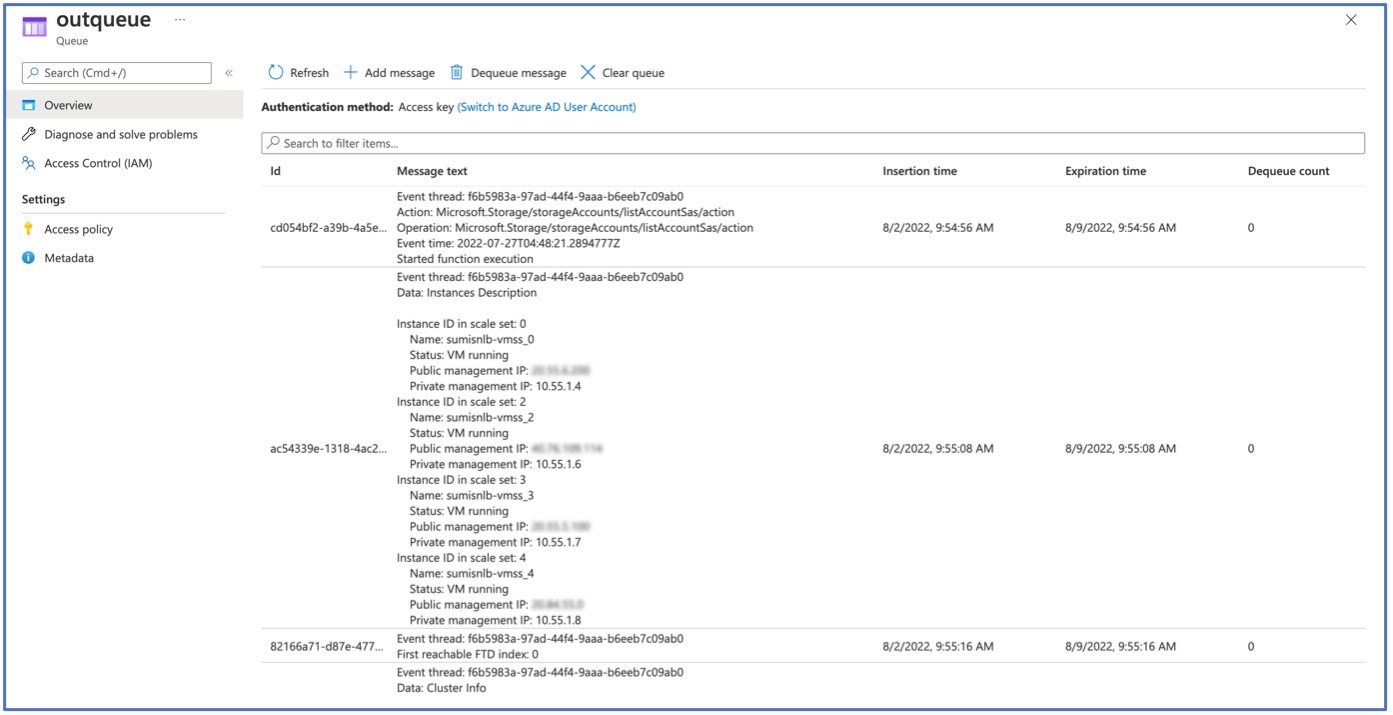
The function will be uploaded to the Function app. The function will start, and you can see the logs in the storage account’s outqueue. The device registration with the Management Center will be initiated.
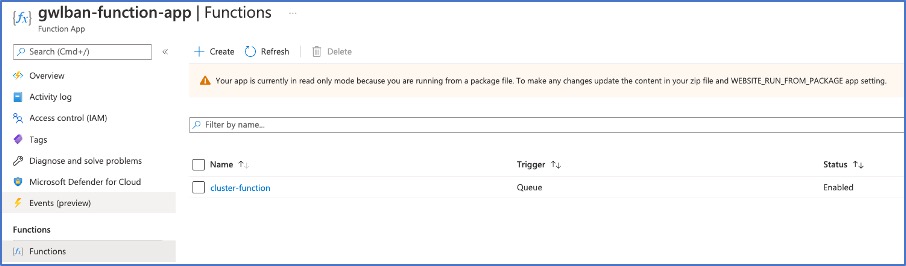
Functions
Cluster Function Upload
Queues
Output Queue
Outqueue
Outqueue