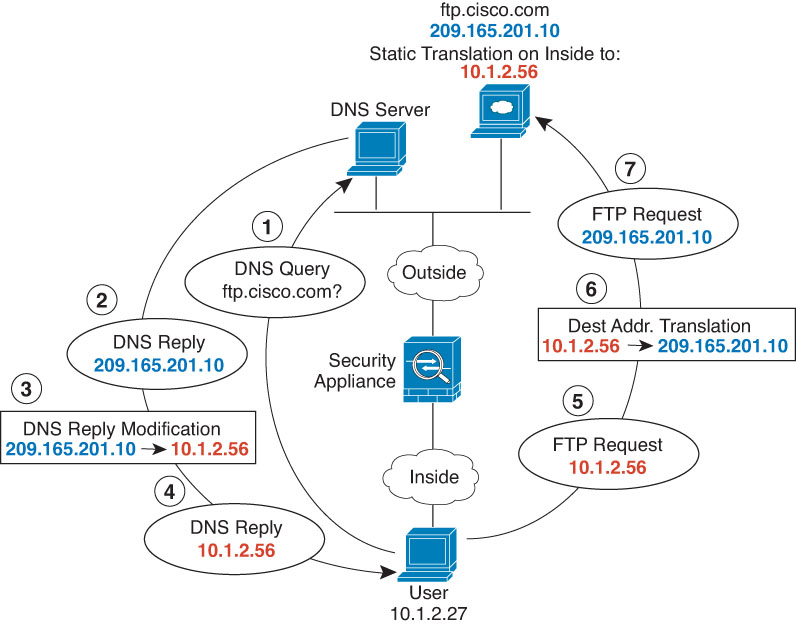
DNS reply modification, DNS server on host network
The following figure shows an FTP server and DNS server on the outside. The system has a static translation for the outside server. In this case, when an inside user requests the address for ftp.cisco.com from the DNS server, the DNS server responds with the real address, 209.165.20.10. Because you want inside users to use the mapped address for ftp.cisco.com (10.1.2.56) you need to configure DNS reply modification for the static translation.
Before you begin
Ensure that you have interface objects (security zones or interface groups) that contain the interfaces for the device. In this example, we will assume the interface objects are security zones named inside and outside. To configure interface objects, select .
Procedure
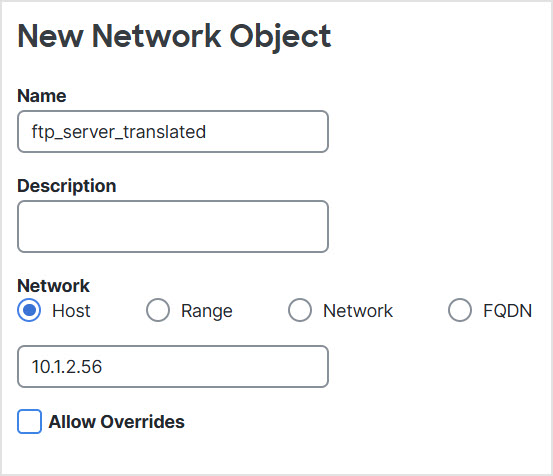
Step 1 | Create the network objects for the FTP server.
|
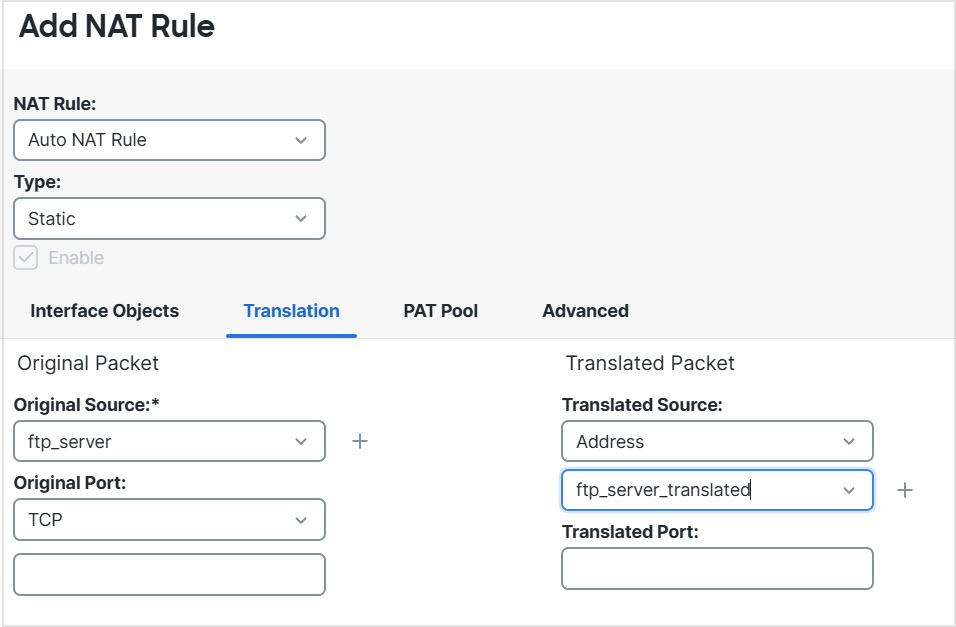
Step 2 | Configure the static NAT rule with DNS modification for the FTP server.
|