Configure a redundant manager access data interface
This task configures a redundant manager access data interface to ensure continuous management connectivity. The secondary interface provides automatic failover capabilities when the primary management interface becomes unavailable, maintaining device management functionality.
When you use a data interface for manager access, you can configure a secondary data interface to take over management functions if the primary interface goes down. You can configure only one secondary interface. The device uses SLA monitoring to track the viability of the static routes and an ECMP zone that contains both interfaces so management traffic can use both interfaces.
Before you begin
-
The secondary interface needs to be in a separate security zone from the primary interface.
-
All of requirements apply to the primary interface also apply to the secondary interface.
Follow these steps to configure a redundant manager access data interface:
Procedure
Step 1 | On the page, click Edit ( |
Step 2 | Enable manager access for the secondary interface. This setting is in addition to standard interface settings such as enabling the interface, setting the name, setting the security zone, and setting a static IPv4 address.
Both interfaces show (Manager Access) in the interface listing. 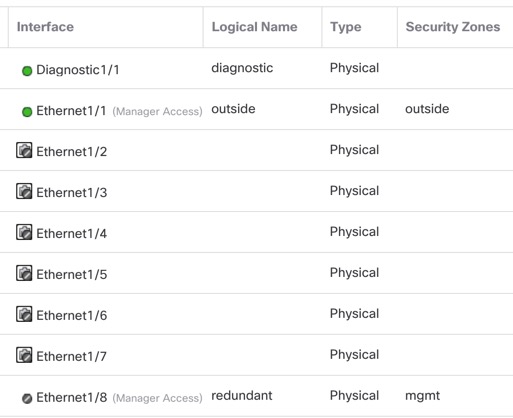
|
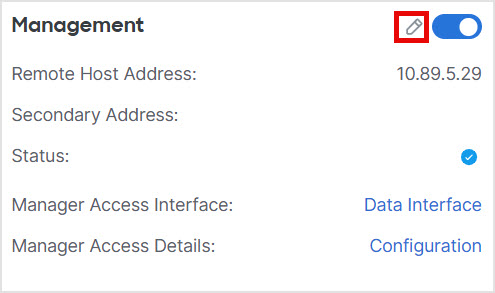
Step 3 | Add the secondary address to the Management settings.
|
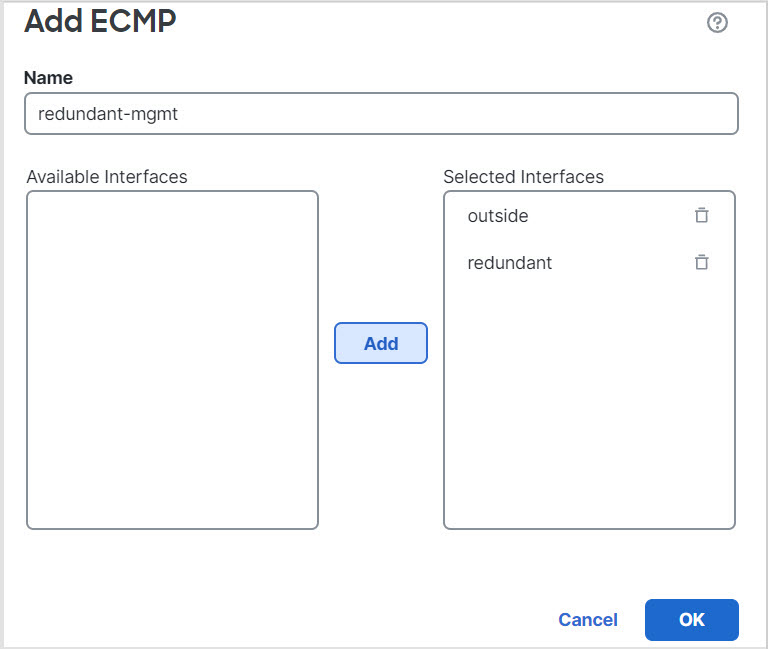
Step 4 | Create an ECMP zone with both interfaces.
|
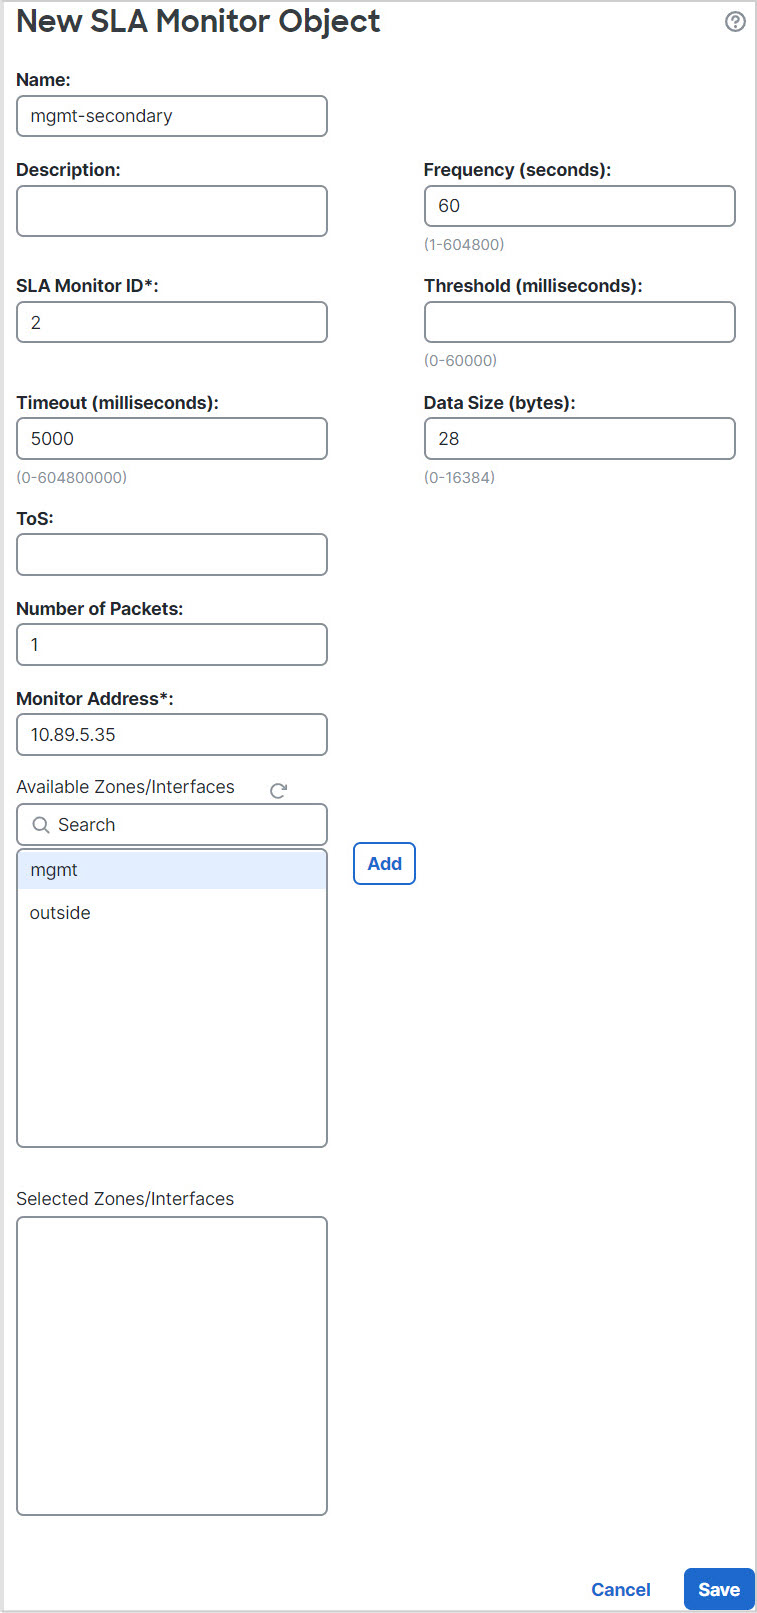
Step 5 | Add equal-cost default static routes for both interfaces and enable SLA tracking on both. The routes should be identical except for the gateway and should both have metric 1. The primary interface should already have a default route that you can edit. 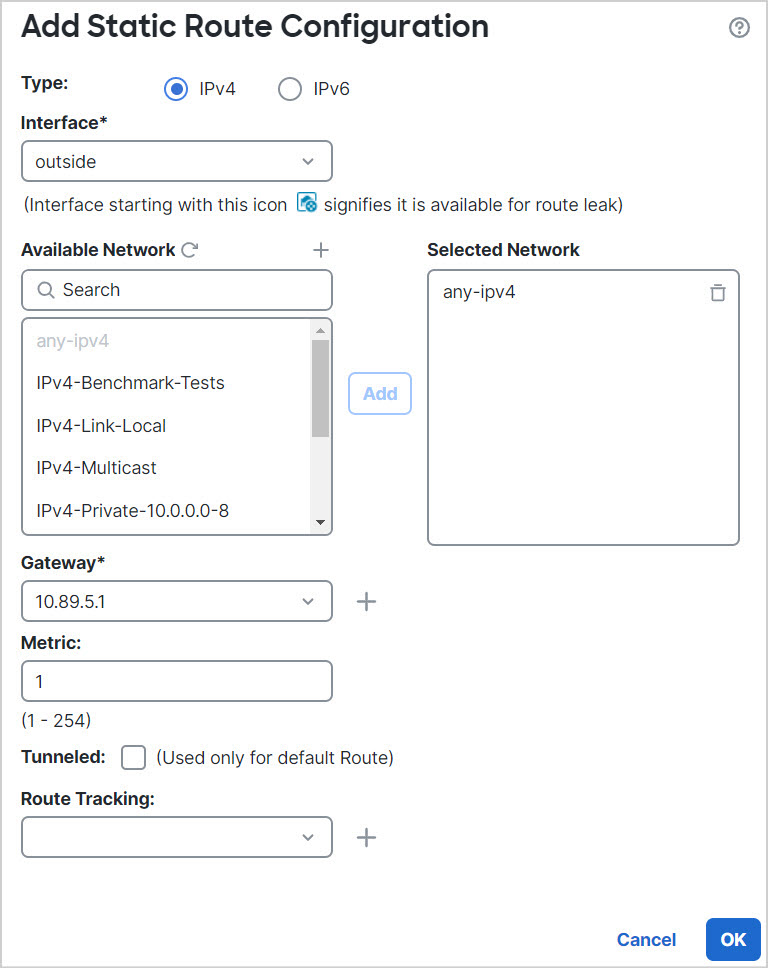
|
Step 6 | Deploy configuration changes. To deploy this feature, the Cloud-Delivered Firewall Management Center enables the secondary interface for management traffic, including auto-generated policy-based routing configuration for management traffic to get to the right data interface. The Cloud-Delivered Firewall Management Center also deploys a second instance of the configure network management-data-interface command. Note that if you edit the secondary interface at the CLI, you cannot configure the gateway or otherwise alter the default route, because the static route for this interface can only be edited in the Cloud-Delivered Firewall Management Center. |