Interconnect virtual routers using BGP
This task enables you to configure BGP settings to leak routes among virtual routers (Global and user-defined virtual routers) by using route targets and route maps to share routes between different virtual routing instances.
You can now configure BGP settings on a device to leak the routes among virtual routers (Global and user-defined virtual routers). The route target of the source virtual router is exported to the BGP table, which, in turn is imported to the destination virtual router. The route map is used to share the Global virtual routes with the user-defined virtual routers and vice versa. Note that all import or export of the routes to the BGP table is configured at the user-defined virtual router, including the Global virtual routes.
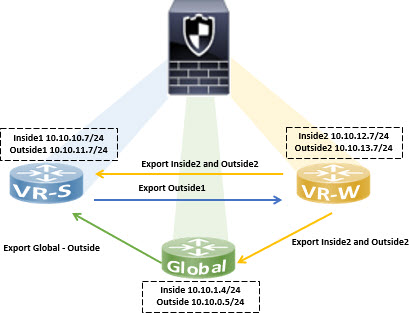
Consider the firewall device of a factory is configured with virtual routers and interfaces:
-
Global virtual router is configured with Inside (10.10.1.4/24) and Outside (10.10.0.5/24)
-
VR-S (Sales) virtual router is configured with Inside1 (10.10.10.7/24) and Outside1 (10.10.11.7/24)
-
VR-W (Warehouse) virtual router is configured with Inside2 (10.10.12.7/24) and Outside2 (10.10.13.7/24)
Assume that you want the routes of warehouse (VR-W) to be leaked with sales (VR-S) and Global, and the outside interface routes of VR-S to VR-W. Similarly, you want the outside interface routes of the Global router to be leaked to sales (VR-S). This example demonstrates the BGP configuration procedure to achieve interconnecting the routers:
Before you begin
-
Create the virtual routers—VR-S and VR-W.
-
Enable BGP and for each virtual router Configure BGP for redistribution of connected routes.
Follow these steps to interconnect virtual routers using BGP:
Procedure
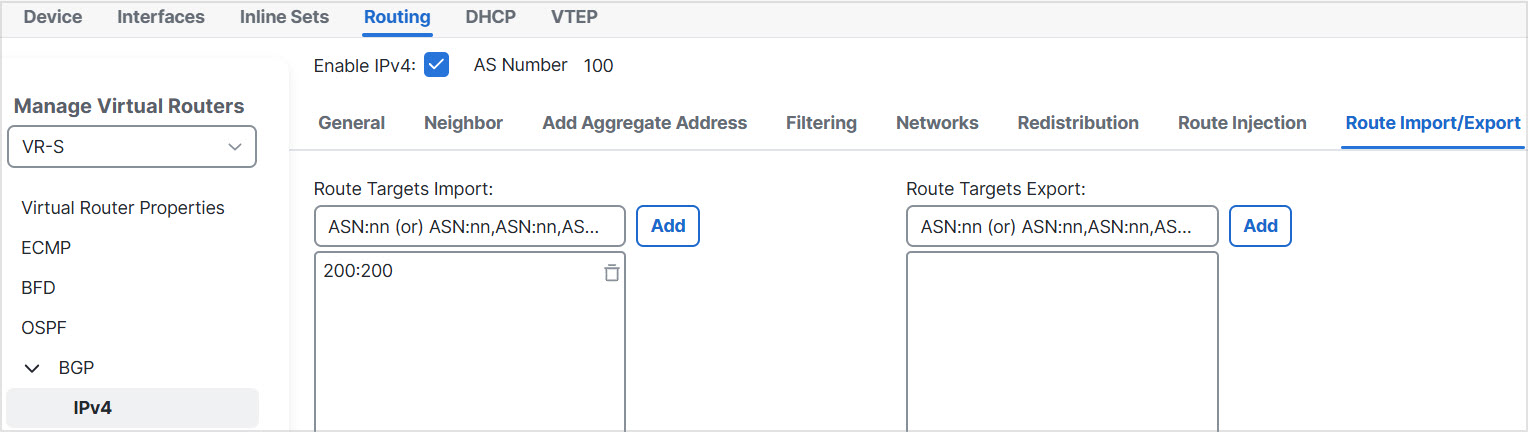
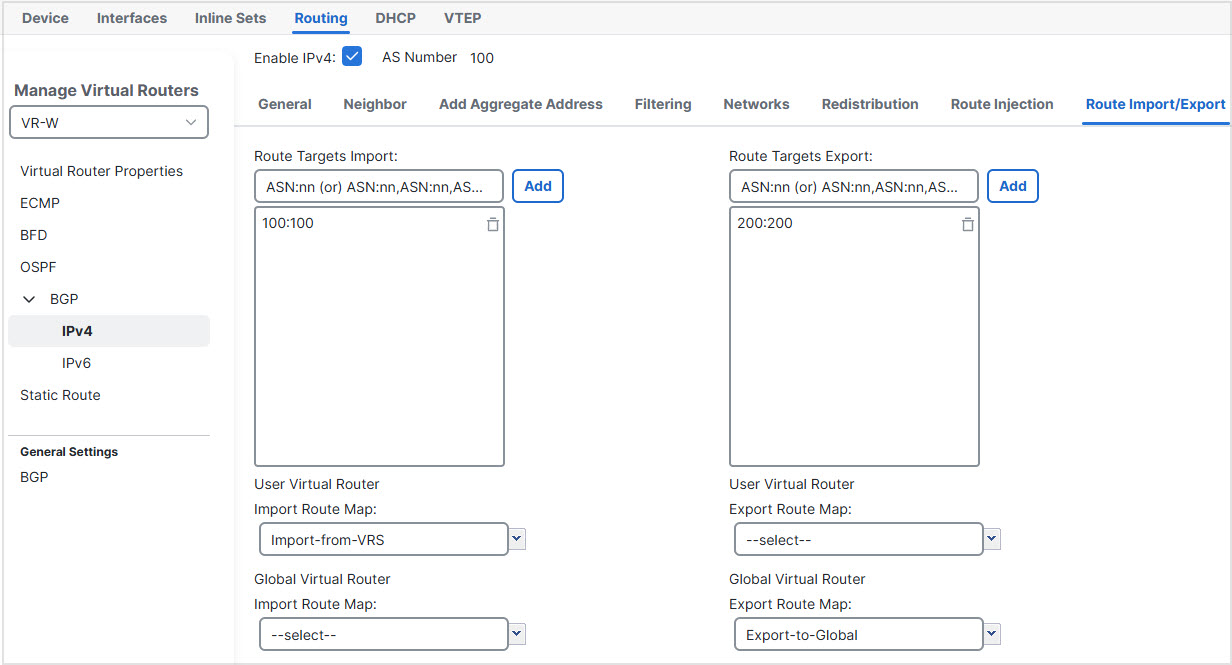
Step 1 | Configure VR-W to export its routes tagging them with a route target to VR-S:
| ||
Step 2 | Configure VR-W to export its routes to the Global virtual router:
| ||
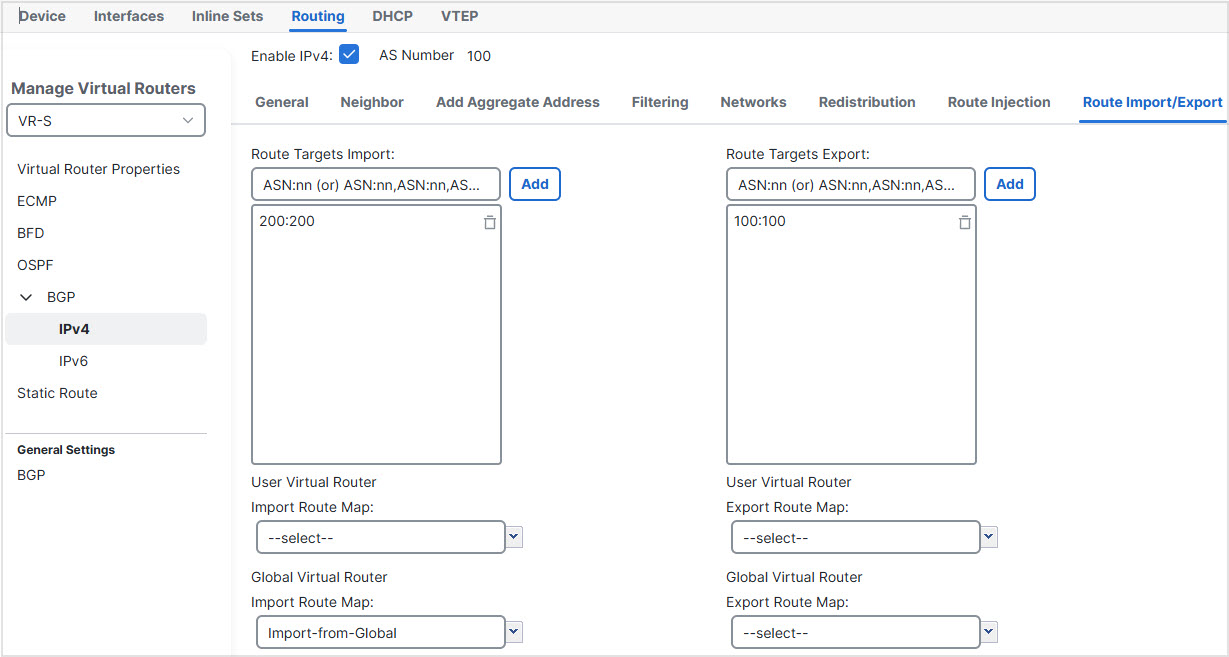
Step 3 | To leak only the Outside1 routes of VR-S to VR-W:
| ||
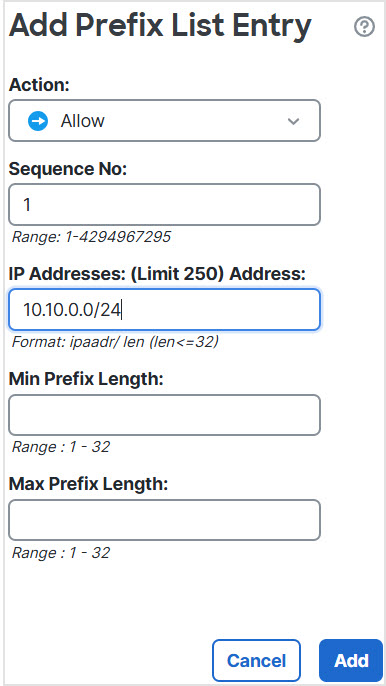
Step 4 | Configure VR-S to import the Outside routes of Global virtual router:
| ||
Step 5 | Save and Deploy. |


The BGP configuration is complete and routes are now leaked among the virtual routers according to the configured route targets and route maps. VR-W routes are exported to VR-S and Global, VR-S Outside1 routes are exported to VR-W, and Global Outside routes are imported to VR-S.